9
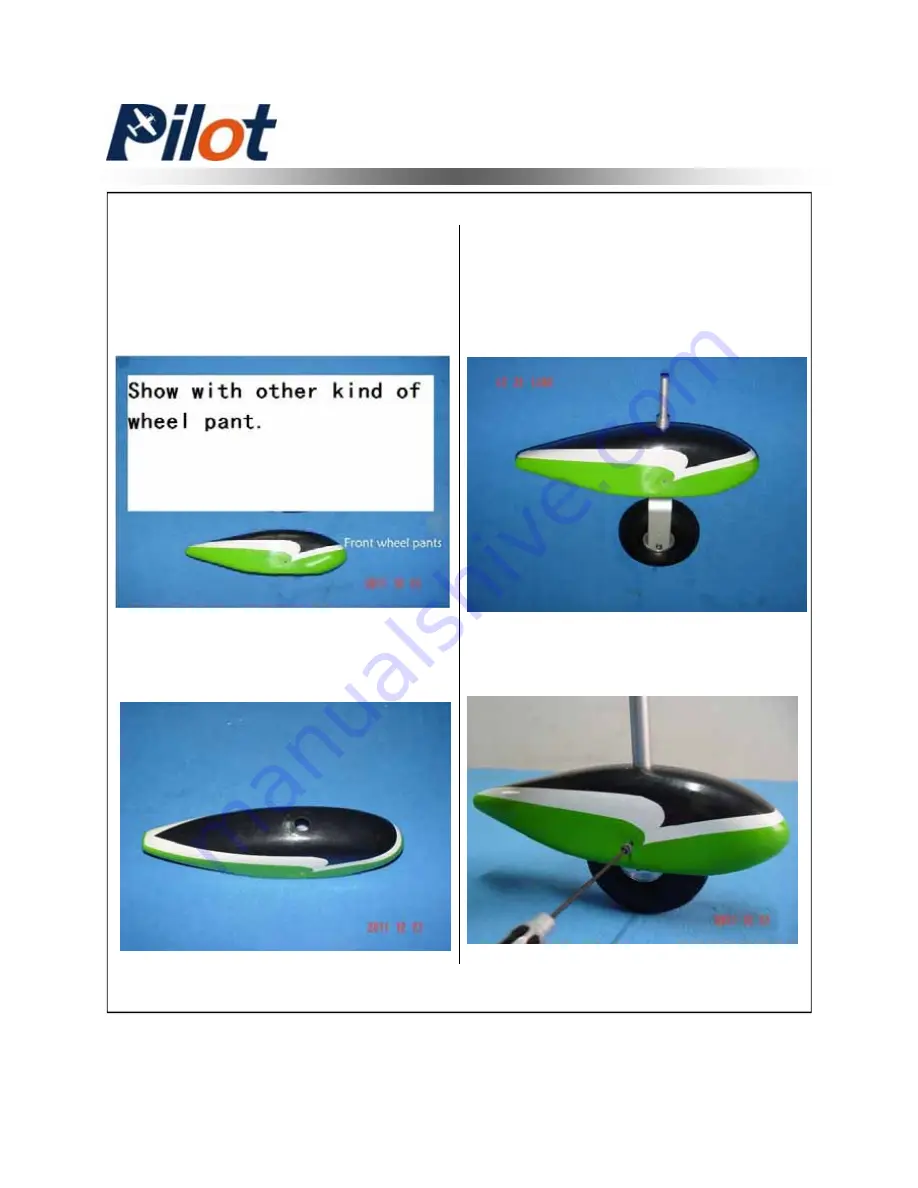
Front Landing Gear Assembly
2. Put the pants into the front
landing gear .
1. There is a hole on the top of the
front wheel pants.
3. Screw two side bolt to fit the wheel
pants.
Note: the front wheel pants are
different shape from the rear
wheel pants.
Install the front wheel pants:


