background image

GW PN/DP 1E/1DB9

18/34

PHOENIX CONTACT

4063_en_B

4.8

Device maintenance

Click the “Device Maintenance” tab to access the available maintenance functions of the 

GW PN/DP 1E/1DB9.

4.8.1

Passwords

The GW PN/DP 1E/1DB9 uses an administrator-level password. The administrator level 

user may make changes to the configuration.

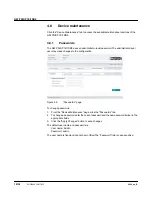
Figure


4-6

“Passwords” page

To change passwords: 

1.

From the “Device Maintenance” page, click the “Passwords” tab. 

2.

To change a password, enter the current password and the new password (twice) in the 

appropriate fields.

3.

Click the “Apply Changes” button to save changes.

The default user name and password are:

User name: Admin

Password: admin

The user name is fixed and cannot be modified.The “Password” field is case sensitive. 

Содержание 1108712

Страница 1: ...User manual UM EN GW PN DP1E 1DB9 Protocol converter for PROFINET to PROFIBUSDP ...

Страница 2: ...hsmarktstraße 8 32825 Blomberg Germany phoenixcontact com 4063_en_B Protocol converter for PROFINET to PROFIBUS DP Designation Version Order No GW PN DP 1E 1DB9 1108712 User manual This user manual is valid for UM EN GW PN DP 1E 1DB9 Revision B ...

Страница 3: ...Connecting the RS 485 cable 10 3 2 2 Connecting the Ethernet cable 10 3 3 Connecting the power supply 10 4 Configuration and startup 13 4 1 Default settings 13 4 2 Web based management 13 4 3 Login 13 4 4 Home page 14 4 5 General settings 15 4 6 LAN settings 16 4 7 Diagnostics 16 4 8 Device maintenance 18 4 8 1 Passwords 18 4 8 2 Restore defaults 19 4 8 3 Log files 19 4 8 4 Update firmware 20 4 9 ...

Страница 4: ...GW PN DP 1E 1DB9 4 34 PHOENIX CONTACT 4063_en_B B Appendixes 29 B 1 List of figures 29 B 2 List of tables 31 ...

Страница 5: ...h may cause damage or malfunction to the device hardware software or surrounding property Here you will find additional information or detailed sources of information 1 2 Qualification of users The use of products described in this user manual is oriented exclusively to Qualified electricians or persons instructed by them The users must be familiar with the relevant safety concepts of automation t...

Страница 6: ...d be taken from the packaging instructions and the certificates conformity assessment other possible approvals Opening the device or making changes to it is not permitted Do not repair the device yourself but replace it with an equivalent device Repairs may be carried out only by the manufacturer The manufacturer is not liable for any damage caused by violation of the prescribed regulations The IP...

Страница 7: ...r importing into the PROFINET engineering environment Once the GSDML files are imported to the PROFINET engineering environment the GW PN DP 1E 1DB9 may be added to the project and the PROFIBUS slaves may be connected to the corresponding slots The PROFINET slots 0 and 1 are reserved and the subsequent slots are labeled PROFIBUS address 0 address 1 etc The GW PN DP 1E 1DB9 initiates PROFIBUS commu...

Страница 8: ...GW PN DP 1E 1DB9 8 34 PHOENIX CONTACT 4063_en_B ...

Страница 9: ...using cover and carefully push the device toward the mounting surface B 3 After the foot is snapped onto the DIN rail verify that it is attached securely A B Figure 3 1 DIN rail mounting To remove 1 Use a suitable screwdriver to release the locking mechanism A on the snap on foot of the device 2 Hold on to the device by the housing cover and carefully tilt it upward B 3 Remove the device from the ...

Страница 10: ...00 can be connected The data transmission rate is either 10 or 100 Mbps The GW PN DP 1E 1DB9 supports the auto negotiation function for automatic selection of the transmission speed as well as an automatic crossover feature for the selection of line or crossover cabling Push the Ethernet cable with the crimped RJ45 connector into the GW PN DP 1E 1DB9 until it engages with a click 3 3 Connecting th...

Страница 11: ... 4063_en_B PHOENIX CONTACT 11 34 The device can be connected to a single power source The power supply is connected by way of a COMBICON plug in screw terminal blocks 24 V and 0 V Figure 3 3 Power supply connection ...

Страница 12: ...GW PN DP 1E 1DB9 12 34 PHOENIX CONTACT 4063_en_B ...

Страница 13: ...ser friendly web based management WBM _ interface may be used to manage the GW PN DP 1E 1DB9 from anywhere in the network using a standard browser Comprehensive configuration and diagnostic functions including a wide range of information about the device itself the current parameters and the operating state are clearly displayed 4 3 Login To log in 1 Set the IP address of the connected PC to the s...

Страница 14: ...to properly establish communication Discover and basic configuration protocol DCP settings will overwrite the IP address and the device name configured in the WBM interface Enter the credentials to access the web server configuration pages The default credentials are User name Admin Password admin 4 4 Home page After login the Home page appears From the Home page the basic settings of the GW PN DP...

Страница 15: ...t editable in the web based management Contact Enter the name of a contact person group or department responsible for this device System Time and Date Manual Enter the time and date in the appropriate fields Use PC Clock Transfers the current time and date from a connected PC to the GW PN DP 1E 1DB9 Use NTP Server The time and date are downloaded from the server s specified in the Time Server 1 an...

Страница 16: ... Diagnostics The Diagnostics page displays the PROFINET diagnostics and PROFIBUS live list Figure 4 5 Diagnostics page The Diagnostic page fields are PROFIBUS diagnostics Active application relation ships Displays the number of active application relationships Total application relation ships established This displays the total number of application relationships that have been established ...

Страница 17: ...US device If the Real Ident No shows 0xFFFF the PROFIBUS slave is not available on the segment or may be assigned to an incorrect slot in the PROFINET project The Real Ident No must match the Proj Ident No Proj Ident No Ident number of the PROFIBUS device in the GSD file The Real Ident No must match the Proj Ident No Input Bytes Message length of read Output Bytes Message length of write Status Ma...

Страница 18: ...ator level user may make changes to the configuration Figure 4 6 Passwords page To change passwords 1 From the Device Maintenance page click the Passwords tab 2 To change a password enter the current password and the new password twice in the appropriate fields 3 Click the Apply Changes button to save changes The default user name and password are User name Admin Password admin The user name is fi...

Страница 19: ...Restore Defaults page 1 From the Device Maintenance page click the Restore Defaults tab 2 Check the Check the box to confirm and then click the Apply button The IP address changes to the factory default and may require modification to prevent multiple devices on the network from trying to use the same address 4 8 3 Log files The log files can be used to aid in troubleshooting Figure 4 8 Log Files ...

Страница 20: ... install a new version of firmware 1 Download the firmware to a local drive on the connected computer 2 From the Device Maintenance page click the Update Firmware tab 3 Click the Choose File button and then navigate to the file in the Browse dialog box 4 Highlight the file to select it and then click the Close button 5 Click the Apply Changes button to install the firmware NOTE Ensure that a relia...

Страница 21: ...DML Creation Tool is available from the Download tab of the phoenixcontact net product 1108712 1 Using a file explorer navigate to the GSDML exe file and double click the file The initial view shows the GW PL ETH UNI BUS head station and the GW PN DP 1E 1DB9 Figure 4 10 Project Selection window 2 Click the radio button under the GW PN DP 1E 1DB9 and then click the OK button This opens the GSDML Cr...

Страница 22: ...e GSD files are added to the project click the File Export GSDML menu and save the GSDML file The GSDML file is now available to be imported into a PROFINET engineering tool NOTE Do not change the file name It may be useful to create a file for the GSDML files The GSDML generator creates three files a bmp file for that is an image of the GW PN DP 1E 1DB9 an html file that details the PROFIBUS addr...

Страница 23: ...ew Symbol bar Shows hides the Tool bar Status bar Shows hides the Status bar Module catalog Shows hides the window containing the available expansion modules Not applicable to the GW PN DP 1E 1DB9 Large icons Presents large icons for the imported PROFIBUS DP slave device GSDs Small icons Presents small icons for the imported PROFIBUS DP slave devices GSDs List Presents the imported PROFIBUS DP sla...

Страница 24: ...ied Reinitializing the module and firmware reset may take some time Do not disconnect from power during the process 3 After a successful reset the module will return to the factory loaded firmware version and default IP address of 192 168 254 254 Software reset A software reset returns the user interface settings to the default settings It requires a PC to be connected to the device 1 Start the we...

Страница 25: ...S controller initialization Flashing red 2 Hz PROFIBUS telegram error such as malformed tele gram frames Solid red Configuration issue such as a slave s configured incorrectly or missing Solid green PROFIBUS linked to network Flashing green 2 Hz No slaves configured for data exchange or PROF INET master in Stop mode Off PROFIBUS master is offline BF Flashing red 2 Hz No active connection to PROFIN...

Страница 26: ...GW PN DP 1E 1DB9 26 34 PHOENIX CONTACT 4063_en_B ...

Страница 27: ...ndix 4063_en_B PHOENIX CONTACT 27 34 A Technical appendix A 1 PROFIBUS slot assignment Table A 1 PROFIBUS slot assignments PROFINET slot PROFIBUS address 0 Reserved 1 Reserved 2 0 3 1 4 2 5 3 125 123 126 124 127 125 ...

Страница 28: ...GW PN DP 1E 1DB9 28 34 PHOENIX CONTACT 4063_en_B ...

Страница 29: ...age 13 Figure 4 2 Home page 14 Figure 4 3 General Settings page 15 Figure 4 4 LAN Settings page 16 Figure 4 5 Diagnostics page 16 Figure 4 6 Passwords page 18 Figure 4 7 Restore Defaults page 19 Figure 4 8 Log Files page 19 Figure 4 9 Update Firmware page 20 Figure 4 10 Project Selection window 21 Figure 4 11 GSDML gen GSDML Creation Tool window 21 Figure 4 12 Import GSD files dialog box 22 Figure...

Страница 30: ...GW PN DP 1E 1DB9 30 34 PHOENIX CONTACT 4063_en_B ...

Страница 31: ... List of tables Section 2 Table 2 1 UM EN GW PN DP 1E 1DB9 structure 7 Section 3 Table 3 1 RS 485 pinout 10 Section 4 Table 4 1 GSDML Creation Tool menu structure 23 Table 4 2 Status LED descriptions 25 Section A Table A 1 PROFIBUS slot assignments 27 ...

Страница 32: ...GW PN DP 1E 1DB9 32 34 PHOENIX CONTACT 4063_en_B ...

Страница 33: ... products in your specific application in particular with regard to observing the applicable standards and regulations All information made available in the technical data is supplied without any accompanying guarantee whether expressly mentioned implied or tacitly assumed In general the provisions of the current standard Terms and Conditions of Phoenix Contact apply exclusively in particular as c...

Страница 34: ... products Subsidiaries If there are any problems that cannot be solved using the documentation please contact your Phoenix Contact subsidiary Subsidiary contact information is available at phoenixcontact com Published by PHOENIX CONTACT GmbH Co KG Flachsmarktstraße 8 32825 Blomberg GERMANY PHOENIX CONTACT Development and Manufacturing Inc 586 Fulling Mill Road Middletown PA 17057 USA Should you ha...

Отзывы: