


Service Modes, Error Codes, and Fault Finding
5.
How to Navigate
•
In the SAM menu, select menu items with the UP/DOWN
keys on the remote control transmitter. The selected item
will be indicated. When not all menu items fit on the screen,
use the UP/DOWN keys to display the next/previous menu
items.
•
With the “LEFT/RIGHT” keys, it is possible to:
–
(De) activate the selected menu item.
–
(De) activate the selected sub menu.
–
Change the value of the selected menu item.
•
When you press the MENU button once while in top level
SAM, the set will switch to the normal user menu (with the
SAM mode still active in the background).
•
Press the following key sequence on the remote control
transmitter: “062596” directly followed by the “Home/Menu”
button to switch to SDM (do not allow the display to time out
between entries while keying the sequence).
How to Store SAM Settings
To store the settings changed in SAM mode (except the
RGB Align settings), leave the top level SAM menu by using
the POWER button on the remote control transmitter or the
television set. The mentioned exceptions must be stored
separately via the STORE button.
How to Exit SAM
Use one of the following methods:
•
Switch the set to STANDBY by pressing the mains button
on the remote control transmitter or the television set.
•
Via a standard RC-transmitter, key in “00” sequence.
Note: When the TV is switched “off” by a power interrupt while
in SAM, the TV will show up in “normal operation mode” as
soon as the power is supplied again. The error buffer will not be
cleared.
5.2.4
Contents of the Factory mode:
Purpose
•
To perform extended alignments.
Specifications
•
Displaying and or changing Panel ID information.
•
Displaying and or changing Tuner ID information.
•
Error buffer clearing.
•
Various software alignment settings.
•
Testpattern displaying.
•
Public Broadcasting Service password Reset.
•
etc.
How to Activate the Factory mode
To activate the Factory mode, use the following method:
•
Press the following key sequence on the remote control
transmitter: from the “menu/home” press “1999”, directly
followed by the “Back/Return” button. Do not allow the
display to time out between entries while keying the
sequence.
After entering the Factory mode, the following items are
displayed,
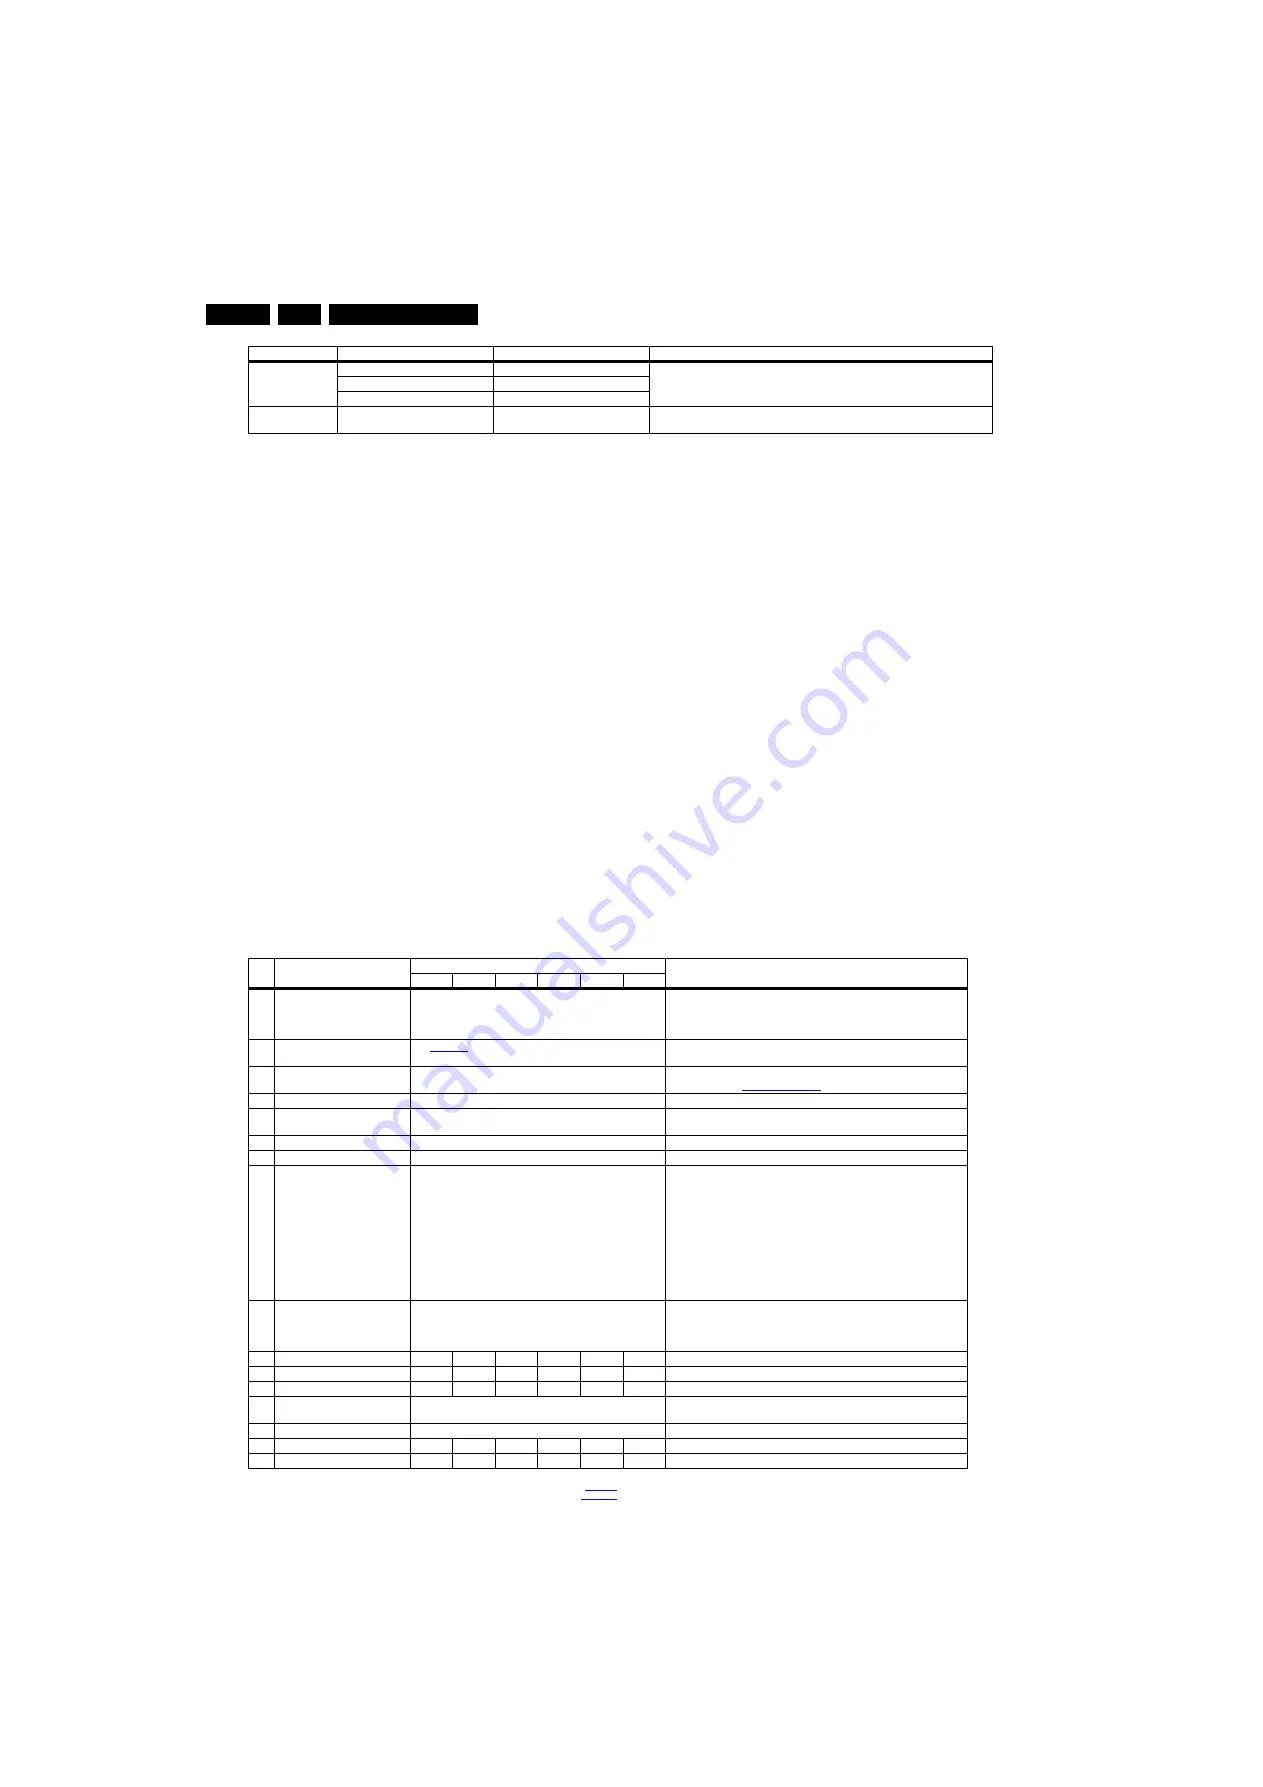
Table 5-2 Factory mode overview
Download from USB Channel List
To download several settings from the USB stick to the TV
NVM Copy
EDID Copy
Initialize NVM
Press [OK] to Initialize NVM
immediately
To initialize a (corrupted) NVM. Be careful, this will erase all settings.
Main Menu
Sub-menu 1
Sub-menu 2
Description
Item Item value
Default value
Description
24"
28"
32"
39"
47"
50"
0
F/W VERSION
Press OK
Displays the software versions of the supplier, Flash PQ, Smart Picture,
BL Dimming, Source Meter, the Picture Quality checksum, the Dimming
library, the Source meter library, the Flash AQ, the MTK, MCU and OAD
software versions.
1
PANEL_ID
Displays and changes the Panel ID with the left and right cursor; be careful
changing this, it can result in not correct displaying the screen!
2
ERR Code: xxx xxx xxx xxx xxx
000 000 000 000 000
Values showing the last 5 errors during the last 50 hours of operation,
according to table
3
CLEAR ERROR BUFFER
Press OK
Selecting this clear all current error codes.
4
NVM ADDRESS
0
NVM address 0 to 8191, Use Item 6 to change and 7 to store the data to the
correct NVM address
5
NVM VALUE
0
Displays the value at the NVM address of item 5
6
NVM STORE
Press OK
Use this option to save the data of item 6 to NVM address of item 5
7
NVM COPY TV to USB
Press OK
Use this to store the NVM data to the REPAIR folder of a FAT formatted
USB memory stick. The TV will write two files in the REPAIR folder of the
memory stick. It will create this folder if it does not exist. The items are
“Channel list”, “Personal settings”, “Option codes”, “Display-related
alignments” and “History list”. In case the download to the USB stick was
not successful “Failure” will appear. In this case, check if the USB stick is
connected properly. Now the settings are stored onto the USB stick and can
be used to download onto another TV or other SSB. Uploading is of course
only possible if the software is running and if a picture is available. This
method is created to be able to save the customer’s TV settings and to store
them into another SSB.
8
NVM READ USB to TV
Press OK
Use this to store the NVM data from the USB memory stick to the TV. The
TV will save the two files which were created in item 8 to the NVM of the set.
Use these options when replacing a SSB. When “USB to TV Success” is
displayed remove the power and restart the TV
9
CLR_TEMP_R
87
124
124
128
128
128
Red colour temperature setting
10
CLR_TEMP_G
97
128
102
118
97
122
Green colour temperature setting
11
CLR_TEMP_B
128
123
128
95
61
90
Blue colour temperature setting
12
AUTO_COLOR
Press OK
PC: any pattern that has black and white, YPbPr: SMPTE bar (colour bar),
any timing.
13
ADC_GAIN_R
0
Red ADC gain
14
ADC_GAIN_G
128
199
128
128
128
128
Green ADC gain
15
ADC_GAIN_B
128
197
128
128
128
128
Blue ADC gain


