background image

21

English

3139 115 21472

Set options

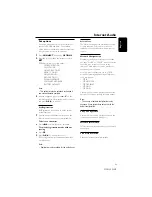
An option menu exists for each source/service
except for TUNER and AUX.  The available
option menus are detailed within the respective
source/service sections in this manual.

1

Press 

CONNECT

 followed by 

OPTIONS

.

2

Press the soft key (

!

) on the system to select

SET

SET

SET

SET

SET

”.

Below are some possible options :

SET REGISTRATION

SELECT USER

NETWORK CONFIG

PROXY CONFIG

NETWORK INFO

PRODUCT INFO

DISABLE INTERNET

SOFTWARE UPGRADE

RESTORE DEFAULTS

Note:
–  This option list may be extended or changed if
new services become available.

3

Use the navigation jog (or press 

3

 / 

4

 on the

remote control) to select the desired set options
and press 

OK

 (

2

) to confirm.

Set Registration

Set Registration is necessary to utilize various
system functions.

1

Use the numerical/alphabetical keypad on the
remote control to enter your e-mail address.

To delete a character

Press  

S

  to move the cursor backward.

To exit the registration mode without
storing

Press 

Ç

.

2

Press 

OK

 (

2

) to confirm your entry.

Your registration confirmation details will be

e-mailed to you.

Note:
–  Registration is only available for the default user.

Select User

The user menu displays the available account(s)
for easy selection.  Select a user account to
retrieve user specific favorites within a source/
service.

Network Configuration

Depending on the type of Internet connection
you have, “DHCP” or “STATIC” must be selected
to enable your system to connect to the
Internet.  Check with your service provider to
obtain the correct IP mode.

For users whose systems are set to “STATIC”
mode, the following additional input fields have
to be completed :
– SET IP
– SET NETMASK
– SET GATEWAY
– SET DNS 1
– SET DNS 2

Check with your service provider and enter the
necessary connection settings for these options.

Note:
–  The change of network configuration is only
necessary if your system does not work with the
default configuration.

Proxy Configuration

Check with your service provider to obtain the
correct proxy name and proxy port.

Network Information

This feature reports the details of your network
connection.

Product Information

Check the current system information.

Internet Audio

Содержание Streamium MC-I200/21M

Страница 1: ...ng the directions specified in your router s manual and make sure that the PC s Internet connection is installed properly and working If you have problems with the setup of the Internet connection contact your networking equipment manufacturer IMPORTANT Do not connect the streamium MC i200 to the gateway router before the internet connection of the connected PC through the router is working Connec...

Страница 2: ...s OK PLAY É Note Before you can use this music source 1 you have to switch on your PC and connect it to the network 2 you have to download and install the PC LINK PC application from http My Philips com Playing a CD MP3 CD in the CD drive 1 Press CD 2 Press OPEN CLOSE and insert a CD or MP3 CD into the tray Close the drawer by pressing OPEN CLOSE again 3 Select track with Navigation Jog 4 Press OK...

Страница 3: ...ed If you have any problems Philips Representatives can help you get the most from your new product by explaining Hookups FirstTime Setup and Feature Operation Do not attempt to return this product to the store For fast help call us first 1 800 531 0039 Thank you for making Philips a part of your home S EE WHY INSID E I M PORTAN T Return yourWarranty Registration Card within 10 days ...

Страница 4: ...aduire par une exposition dangereuse à l irradiation ATENCIÓN El uso de mando o ajustes o la ejecucción de métodos que no sean los aquí descritos puede ocasionar peligro de exposición a radiación UPGRADEABLE As new services and features are continuously added to this product through our online upgrades the documentation included may not be up to date Please refer to My Philips com for the most rec...

Страница 5: ...FFLE DIM 123 AM FM MW LW REC NEWS 1 2 3 NAVIGATE PLAY FAVORITES CD CONNECT OPTIONS CANCEL RESUME OK ENTER BACK AUX TUNER PC LINK OPEN CLOSE VIEW FAVORITES WOOX TREBLE BASS SOUND JOG 0 5 4 1 3 4 5 6 7 8 9 2 STANDBY ON ECO POWER MICRO HIFI SYSTEM iR 3 ...

Страница 6: ...ich you qualify for as the owner of your model t This bolt of lightning indi cates uninsulated material within your unit may cause an electrical shock For the safety of everyone in your household please do not remove product covering s The exclamation point calls attention to features for which you should read the enclosed literature closely to prevent operating and maintenance problems WARNING TO...

Страница 7: ...purchase guarantees you ll receive all the information and special offers for which you qualify plus easy access to accessories from our convenient home shopping network And most importantly you can count on our uncompromising commitment to your total satisfaction All of this is our way of saying welcome and thanks for investing in a Philips product Sincerely Lawrence J Blanford President and Chie...

Страница 8: ...s 11 Only use attachments accessories specified by the manufacturer 12 Use only with the cart stand tripod bracket or table specified by the manufacturer or sold with the apparatus When a cart is used use caution when moving the cart apparatus combination to avoid injury from tip over 13 Unplug this apparatus during lightning storms or when unused for long periods of time 14 Refer all servicing to q...

Страница 9: ...7 E n g l i s h Français E s p añ o l 3139 115 21472 English 8 Index Français 40 Español 73 ...

Страница 10: ... Disable Internet Software Upgrade Restore Defaults About My Philips com 22 CD MP3 CD Operations Discs for playback 23 Loading disc 23 Basic operations 24 Selecting a desired track passage 24 Repeat and Shuffle 24 Repeat play Random play Playing a MP3 CD 24 25 Marking favorite tracks 25 Activating deactivating the favorites list Playing a favorites list Cancelling a favorite track Deleting all fav...

Страница 11: ...ntilation to prevent internal heat build up in your system Allow at least 10 cm 4 inches clearance from the rear and the top of the unit and 5 cm 2 inches from each side Do not expose the system batteries or discs to excessive moisture rain sand or heat sources caused by heating equipment or direct sunlight If the system is brought directly from a cold to a warm location or is placed in a very dam...

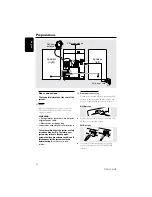
Страница 12: ...itions If this happens let the system cool down before reusing it not available for some versions B Antennas connection Connect the supplied AM loop antenna and FM antenna to the respective terminals Adjust the position of the antenna for optimal reception AM Antenna Position the antenna as far as possible from aTV VCR or other radiation source FM Antenna 1 2 For better FM stereo reception connect...

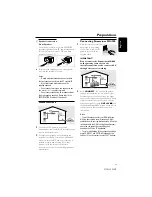
Страница 13: ...the setup of the internet connection contact your networking equipment manufacturer Connecting Streamium MC i200 1 After the internet connection has proven to be working connect the system to the gateway router with the supplied cable IMPORTANT Do not connect the Streamium MC i200 to the gateway router before the internet connection of the connected PC through the router is working INTERNET gatewa...

Страница 14: ... same time Otherwise noise will be generated and malfunction might occur If you are connecting equipment with a monaural output a single audio out terminal connect it to the AUX CDR IN left terminal Alternatively you can use a single to double cinch cable the output sound will still remain mono Subwoofer out connection Connect the subwoofer to the SUBWOOFER OUT terminal The subwoofer reproduces ju...

Страница 15: ...tray CD to enter CD mode TUNER to enter tuner mode or select waveband FM or AM AUX to select the input for an additional appliance Ç CANCEL for CD to stop playback forTuner to stop programming for Clock to exit clock setting or cancel timer for Plug Play to exit plug play mode 2 2 2 2 2 OK to start playback to confirm the selection to initiate and start plug play mode Navigation jog 3 4 for CD CON...

Страница 16: ...e the timer function ª SHUFFLE to playback all tracks favorites in random order º REPEAT to playback track disc favorites repeatedly INCR SURR to activate or deactivate the surround sound effect SLEEP to activate deactivate or set the sleep timer function DIM to select different brightness for the display screen DIM 1 DIM 2 DIM 3 or DIM OFF MUTE to interrupt or resume sound reproduction fi DIGITS 0...

Страница 17: ...UTO PROGRAM IN PROGRESS AUTO PROGRAM IN PROGRESS AUTO PROGRAM IN PROGRESS AUTO PROGRAM IN PROGRESS All available radio stations with sufficient signal strength will be stored automatically starting from FM and followed by AM band When all the available radio stations are stored or the memory for 40 presets is used the last preset radio station will be played To reinstall Plug and Play 1 In standby...

Страница 18: ...ing feature the system will automatically switch to Standby mode if you do not press any buttons within 30 minutes after a disc has stopped playing Dim mode You can select the desired brightness for the display Press DIM on the remote control repeatedly to select DIM 1 DIM 2 DIM 3 or DIM OFF display mode DIM and the corresponding dim level will appear on the display except for DIM OFF mode DIM mod...

Страница 19: ...unctions 1 Press BASS or TREBLE on the system to select Bass orTreble sound feature 2 Adjust SOUND JOG on the system to select the desired Bass orTreble level BASS LEVEL XX BASS LEVEL XX BASS LEVEL XX BASS LEVEL XX BASS LEVEL XX or TREBLE LEVEL XX TREBLE LEVEL XX TREBLE LEVEL XX TREBLE LEVEL XX TREBLE LEVEL XX is displayed XX XX XX XX XX denotes the level as follows MIN MIN MIN MIN MIN 2 2 2 2 2 0...

Страница 20: ...ck to Navigation view while music is playing to make your next selection Switching between Navigation view and Play view Press VIEW on the system Using the soft keys Each source service has different sort modes For example the sort modes when playing back an MP3CD are ALBUM PLAYLIST ARTIST and TRACK only some of the modes may be available depending on the disc The or at the bottom right or left ha...

Страница 21: ...gh a list Adjust the navigation jog clockwise to scroll down or counterclockwise to scroll up There are two scrolling speeds 1 slow and 2 fast OK s c r o l l u p sc r o l l d o w n 1 1 2 2 1 Enables you to skip forward backward to an item on the list 2 Enables you to skip forward backward by several items on the list Basic Functions ...

Страница 22: ...C Link server will always have the same favorites Connecting to online music services The CONNECT feature is not a source service by itself It works with on line services such as Internet radio stations to get access to music The services offer different types of Internet audio content that can be categorized by GENRE REGION LANGUAGE PERSONAL STATION etc 1 Press CONNECT A list of on line services ...

Страница 23: ...ress Ç 2 Press OK 2 to confirm your entry Your registration confirmation details will be e mailed to you Note Registration is only available for the default user Select User The user menu displays the available account s for easy selection Select a user account to retrieve user specific favorites within a source service Network Configuration Depending on the type of Internet connection you have DH...

Страница 24: ...ions You will remain registered at My Philips com Note To terminate internet access when switching the source mode to CD or AUX press OPTIONS and select accordingly About My Philips com My Philips com provides a personal online tool for managing your entertainment choices It is an exclusive service to owners of Philips premium internet connected products Once you have registered with My Philips co...

Страница 25: ...e recorded audio CDs All finalized audio CDR and audio CDRW discs CD s with MP3 and or MP3PRO files files end with mp3 Loading disc 1 Press OPEN CLOSE to open the disc tray 2 Load in a disc with the label side facing up 3 Press OPEN CLOSE again to close the disc tray The system detects the type of disc being loaded CD CD CD CD CD or MP3 CD MP3 CD MP3 CD MP3 CD MP3 CD is displayed The system then s...

Страница 26: ...ect the following REPEAT TRACK repeat the current track REPEAT ALL repeat the entire disc 2 To resume normal playback press REPEAT until REPEAT OFF REPEAT OFF REPEAT OFF REPEAT OFF REPEAT OFF is displayed Random play 1 Press SHUFFLE on the remote control SHUFFLE is shown and SHUFFLING SHUFFLING SHUFFLING SHUFFLING SHUFFLING is displayed All the tracks or favorite tracks if favorite mode is active ...

Страница 27: ...e selected track Repeat this step to select additional tracks to your favorite list The next selected track will appear at the end of the list If you attempt to program more than 50 CD 128 MP3 CD tracks NO MORE NO MORE NO MORE NO MORE NO MORE FAVORITES CAN BE ADDED FAVORITES CAN BE ADDED FAVORITES CAN BE ADDED FAVORITES CAN BE ADDED FAVORITES CAN BE ADDED is displayed Activating the favorites list...

Страница 28: ...s available the screen will display MULTIPLE MATCHES MULTIPLE MATCHES MULTIPLE MATCHES MULTIPLE MATCHES MULTIPLE MATCHES Press OPTIONS and use the navigation jog to select NEXT CD INFO NEXT CD INFO NEXT CD INFO NEXT CD INFO NEXT CD INFO and press OK 2 to confirm to access alternative CD information To return to default CD information numerical order Press OPTIONS and use the navigation jog to sele...

Страница 29: ...ramming Plug and Play setting refer to Basic Functions Plug and Play OR 1 Press TUNER to selectTUNER mode 2 Press and hold FAVORITES until AUTO AUTO AUTO AUTO AUTO PROGRAM FAVORITE STATIONS PROGRAM FAVORITE STATIONS PROGRAM FAVORITE STATIONS PROGRAM FAVORITE STATIONS PROGRAM FAVORITE STATIONS is displayed followed by YES YES YES YES YES and NO NO NO NO NO options 3 Press the soft key on the system...

Страница 30: ...RITES CAN BE NO MORE FAVORITES CAN BE ADDED ADDED ADDED ADDED ADDED is displayed Selecting a favorite radio station 1 Use the navigation jog or press 3 4 on the remote control to select the desired preset radio station from the favorite list 2 Press OK 2 to confirm The preset number radio frequency and waveband are displayed OR Press on the remote control Radio Reception Erasing a favorite radio s...

Страница 31: ... In any modes you can easily manage your favorite tracks and stations by using the FAVORITES and UN MARK buttons Creating your favorites list When in CD PC LINK CONNECT mode press UN MARK to add remove tracks or stations to from your favorites lists In TUNER mode press UN MARK to save and delete radio stations and hold down UN MARK to auto program radio stations Accessing your favorites list To pl...

Страница 32: ... TREBLE for example are available for selection Refer to the operating instructions for the connected equipment for details External Sources SLEEP INCR SURR ALL REPEAT SHUFFLE DIM 123 AM FM MW LW REC NEWS 1 2 3 NAVIGATE PLAY FAVORITES CD CONNECT OPTIONS AUX TUNER PC LINK VIEW FAVORITES CANCEL RESUME OK ENTER BACK iR To clean a CD wipe it in a straight line from the center toward the edge using a s...

Страница 33: ...gits flash 4 Use the navigation jog or press 3 4 on the remote control to set the hour and minutes 5 Press CLK TIMER again to store the setting The clock starts working To exit without storing the setting Press Ç Notes The clock setting will be cancelled when the power cord is disconnected or if a power failure occurs During clock setting if no button is pressed within 90 seconds the system will e...

Страница 34: ...the remote control If the timer has been activated the set timer information is displayed Activate deactivate the timer Press TIMER ON OFF repeatedly on the remote control If activated the last set timer information is displayed for a few seconds If deactivated TIMER OFF TIMER OFF TIMER OFF TIMER OFF TIMER OFF is displayed Sleep timer setting The sleep timer enables the system to switch to standby...

Страница 35: ...0 MP3 CD 128 Frequency response 20 20000 Hz Signal to noise ratio 76 dBA Channel separation 79 dB 1 kHz Total harmonic distortion 0 02 1 kHz TUNER FM wave range 87 5 108 MHz AM wave range 530 1700 kHz Number of presets 40 Antenna FM 300 Ω dipole wire AM Loop antenna SPEAKERS Front left right System 3 way Bass reflex system with top firing wOOx Impedance 6 Ω wOOx 1 x 6 5 top firing wOOx driver Woof...

Страница 36: ...Replace or clean the disc see Maintenance UNRECOGNIZED DISC FORMAT UNRECOGNIZED DISC FORMAT UNRECOGNIZED DISC FORMAT UNRECOGNIZED DISC FORMAT UNRECOGNIZED DISC FORMAT Check for any scratches or smudges on the disc is displayed Replace or clean the disc see Maintenance CONNECTIONTO INTERNET The set does not connect to the Press CONNECT again internet Make sure you have configured your home network ...

Страница 37: ...right sound outputs are Check the speaker connections and location reversed The remote control does not function Select the source CD orTUNER for example properly before pressing the function button É í ë Reduce the distance between the remote control and the system Insert the batteries with their polarities signs aligned as indicated Replace the batteries Point the remote control directly toward ...

Страница 38: ...purposes WHERE IS SERVICE AVAILABLE Warranty service is available in all countries where the product is officially distributed by Philips Consumer Electronics Company In countries where Philips Consumer Electronics Company does not distribute the product the local Philips service organization will attempt to provide service although there may be a delay if the appropriate spare parts and technical...

Отзывы: