background image

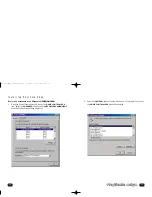
• Open your favorite recording application and start recording.

61

60

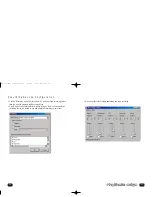
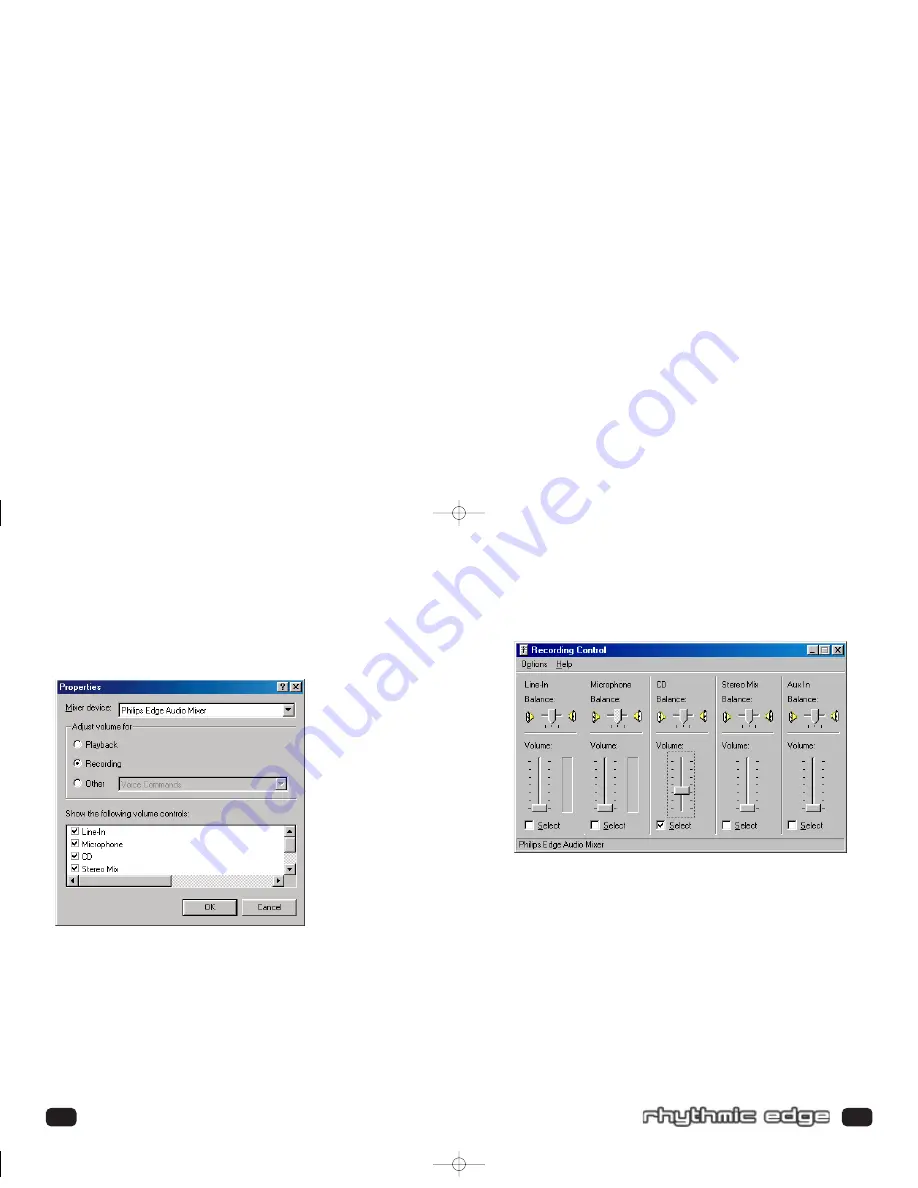
• Choose "Recording" under “Adjust Volume for”, and check the recording source

that you want to display in the Recording Mixer.

• Click OK, and the Recording Mixer window will open. Now you can select the

recording source you intend to use and adjust the recording volume level.

Recording Source Configuration

703_rhythmic_usermanual.qxd  3/12/01  10:30 AM  Page 60

Содержание PSC70317

Страница 1: ...User s Manual Philips Consumer Electronics Company A Division of Philips Electronics North America Corporation Knoxville TN 37914 1810 U S A Printed in the U S A PSC703 703 PSC ...

Страница 2: ...lips Rhythmic Edge 4 Channel PCI Sound Card PSC703 ____________________________ Philips Consumer Electronics Company One Philips Drive Knoxville TN 37914 703_rhythmic_usermanual qxd 3 12 01 10 30 AM Page 1 ...

Страница 3: ...tion 5 Changes of the agreement No changes of this Agreement are valid unless with Philips and your written approval Any terms and conditions provided by you are inapplicable whether or not contained in order forms or otherwise unless specifically accepted by Philips in writing by means of a duly signed addition to this Agreement 6 Limitations of liability PHILIPS ACCEPTS NO LIABILITY FOR ANY DAMA...

Страница 4: ...dge Sound Card 14 Software Installation Windows 95 98 Me 2000 Installation 16 Yamaha SoftSynthesizer Installation 24 Siren Express Installation 29 Windows NT Installation 30 Real Mode DOS Installation 31 Joystick Configuration for Windows 95 98 Me 32 Technical Support 35 Philips Rhythmic Edge DSP Special Effects and Algorithms 36 Philips Rhythmic Edge Control Panel 37 Help Button 37 Utilities Tab ...

Страница 5: ...ow you ll agree once you give it the edge that your PC will never sound the same again Now get ready to ignite your imagination with the most immersive soundstage ever created on a PC a full blown digital surround sound quadraphonic home theater experience through your new Philips Rhythmic Edge Sound Card Philips sound cards are the first to deliver the impact of 4 distinct channels of sound from ...

Страница 6: ...esktop My Computer then click on the Philips Edge icon Once the Philips Edge Series AutoRun window pops up you may make the same choices as stated above Part 1 Introduction mpg Part 2 Hardware mpg Part 3 Software mpg MINIMUM SYSTEM REQUIREMENTS Installation of your Philips Rhythmic Edge requires the following minimum hard ware and operating system One available PCI 2 1 compliant slot Intel Pentium...

Страница 7: ...d documentation for details Turn off computer and remove existing sound card If your computer has on board sound consult your PC documentation to disable it STATIC ELECTRICITY CAN CAUSE PERMANENT DAMAGE TO YOUR SOUND CARD To prevent damage please 1 Always hold your sound card by its edges Avoid touching any electronic components on your sound card 2 Use a grounding strap or touch any non painted s...

Страница 8: ...lected PCI Bus Slot and firmly push it into the slot Be sure the sound card is aligned properly and fits snugly into the slot Use the screw from the slot cover to secure the sound card to the frame of the computer chassis but do not over tighten Securing the card assures proper grounding 12 Installing Rhythmic Edge PCI Bus Slot Mounting Screw Sound Card Top Bottom View Align sound card and fit fir...

Страница 9: ...nstallation using Windows 98 98SE Windows 2000 screens are slightly different but the procedure is the same as described If you have older versions of Windows 95 then the installation will be slightly different than described below 15 14 CONNECTING TO YOUR RHYTHMIC EDGE SOUND CARD Speakers Connect your front speakers or headphones into the FRONT OUT stereo jack on the end bracket Connect your rear...

Страница 10: ...for Windows 95 98 Me 2000 1 Turn on the computer and place the Philips Rhythmic Edge CD in your CD ROM drive When the Add New Hardware Wizard dialog box reports that a new PCI Multimedia Audio Device has been detected click NEXT Installing Rhythmic Edge 703_rhythmic_usermanual qxd 3 12 01 10 30 AM Page 16 ...

Страница 11: ...he install to any other location select SPECIFY A LOCATION and browse to your directory where the setup files are located For Windows 95 98 Me select Win9x directory then choose english For Windows 2000 select WDM directory Click NEXT Installing Rhythmic Edge 703_rhythmic_usermanual qxd 3 12 01 10 30 AM Page 18 ...

Страница 12: ...se files in the same WDM install directory and Windows will finish installing the drivers for Philips Rhythmic Edge automatically Click FINISH on each screen to install each of these devices 21 20 5 Windows then copies the files You may be prompted to insert your Windows CD or floppy as the core sound components of the operating system may need to be copied as well These include audio Codecs the M...

Страница 13: ...ible during gameport installation Windows will detect newer versions of msanalog vxd vjoyd vxd and msjstick drv It is recommended that you keep your existing files ClickYES on all 3 screens that appear 8 Next the software launcher will allow you to open the Rhythmic Edge control panel and configure your speaker settings if desired SelectYES to modify these settings now or select NO to modify later...

Страница 14: ...r is case sensitive Click NEXT 25 YAMAHA SOFTSYNTHESIZER INSTALLATION 10 After Rhythmic Edge driver installation the software launcher will prompt you to install the Yamaha SoftSynthesizer Click YES 11 The Yamaha SoftSynthesizer Welcome page appears Click NEXT 24 Installing Rhythmic Edge 703_rhythmic_usermanual qxd 3 12 01 10 30 AM Page 24 ...

Страница 15: ...ogram Folder dialog box appears Click NEXT 13 The Choose Destination Location dialog box appears Follow the instructions in this box Click NEXT Installing Rhythmic Edge 703_rhythmic_usermanual qxd 3 12 01 10 30 AM Page 26 ...

Страница 16: ...ckage Siren XPress allows you to play and organize music 1 Insert your installation CD into your CD drive 2 From the Start Menu select Run and type D Applications Sonic Foundry Siren D represents your CD ROM drive 3 Double click on Sirensetup exe 4 Follow the on screen instructions for installation Congratulations You have successfully installed your Philips Rhythmic Edge 15 The Yamaha Software Li...

Страница 17: ... should not be run under Windows In Windows use the Windows mixer for adjusting playback and recording levels 31 WINDOWS NT INSTALLATION Installation of the drivers for your Philips Rhythmic Edge in a Windows NT envi ronment are as follows note you must have the appropriate privileges in order to install the drivers 1 Boot the system to the Windows NT desktop and insert your install CD in your CD ...

Страница 18: ... then click OK JOYSTICK CONFIGURATION FOR WINDOWS 95 98 Me 2000 1 Open the Control Panel and double click on the GAME CONTROLLERS icon Select the ADVANCED tab and under PORT DRIVER ASSIGNMENT and select Philips Rhythmic Edge GamePort Installing Rhythmic Edge 703_rhythmic_usermanual qxd 3 12 01 10 30 AM Page 32 ...

Страница 19: ...has been determined a Return Authorization number and address will be supplied A RETURN AUTHORIZATION NUMBER MUST ACCOMPANY THE RETURN OF THIS PRODUCT When returning the product for service The cost of shipment is at your expense and you assume all the risk It is recommended to ship the product through a carrier that provides proof of delivery and product should be insured Return Authorization num...

Страница 20: ... providing 5 1 output QSound Environmental Modeling QEM Effects Tab QSound Environmental Modeling QEM provides EAX game compatibility and the ability to apply reverb to non EAX sound sources including applications S PDIF In and external inputs QSound Multi Speaker System QMSS Settings and S PDIF Tabs QMSS QSound Multi Speaker System transforms stereo sources into 4 channel output QMSS is automatic...

Страница 21: ...DVD playback in 2 speaker mode This feature will provide the sensation of a full blown 5 1 speaker system by virtualizing the surround speakers For proper operation 5 1 output must be selected in the soft DVD player s control panel QSurround requires a soft DVD player capable of providing 5 1 channel output If your soft DVD player does not offer 5 1 output mode then select stereo or Pro Logic mode...

Страница 22: ...ional subwoofer 3D sounds generat ed by compatible applications will processed to the appropriate speaker and stereo sounds from applications will be expanded to four distinct channels using QMSS Stereo sources from external inputs CD In Line In will not be expanded to the rear speakers unless the source is selected in the Apply Reverb QXpander QMSS to External Input Source If your front or rear s...

Страница 23: ...menu located on the Settings tab Use this mode if you are using digital S PDIF speakers for your rear speakers For proper operation you must also be in 4 speaker or 5 1 speaker mode Please note that the volume settings on the Settings tab will have no affect on the signal on the S PDIF output DVD AC3 DTS Pass Thru Use this mode if you wish to play DVD audio using an external AC3 or DTS decoder suc...

Страница 24: ... none If you are playing a non EAX enabled game music or movies you can select an environment of your choice and adjust the level using the slider corresponding to the source If you are using the Philips Rhythmic Edge H W Synth rather than the Yamaha SXG default then the Environment you select will also be used when playing MIDI music and the intensity will be controlled on the reverb slider on th...

Страница 25: ...r sound Reverb is an acoustic effect that simulates the interaction of sound with the environment As an example imagine the sound of a gunshot in a large cathedral compare to the same sound in a tiled bathroom The entry under Default Environment allows you to select a certain surrounding environment such as a cave arena or hallway while the sliders provide for control over the intensity of the eff...

Страница 26: ... to adjust Rhythmic Edge WaveTable synth These adjustments will have no effect on MIDI playback unless the Rhythmic Edge Wavetable synth is selected as the MIDI device 48 Better Gaming Default Recommended Best setting for Windows DirectSound and DirectSound3D Gaming Maximum hardware acceleration for games Better Polyphony Setting for the highest MIDI WaveTable polyphony most simultaneous voices Th...

Страница 27: ...ate in sequence starting with LF and cycle through each speaker in the Output Mode you selected Use the Master Volume Slider to adjust the overall output level of your speaker system Adjust speaker connections as required to complete your sound card installation SPEAKER TEST TAB The speaker test tab is a utility to help verify proper speaker connections to your sound card The acronyms are defined ...

Страница 28: ...ither 2 speaker Stereo or 2 speaker Dolby Surround or ProLogic Either option will work well as the QMSS DSP algorithm does not depend on Dolby encoding Effectively you should follow the soft DVD player instructions for playing back over stereo speakers even though you have a quad speaker system connected 6 Close the control panel and play a DVD Rhythmic Edge will detect that it is in 4 speaker mod...

Страница 29: ...ribed in the preceding section If you only have stereo speakers 1 Make sure 2 speakers is selected in the Rhythmic Edge control panel settings tab 2 Select DVD QSurround under 2 speakers in the Rhythmic Edge control panel 3 Follow the soft DVD players instructions for 5 1 speaker playback If your soft DVD player does not provide a 5 1 speaker mode then select QXpander instead of DVD QSurround in l...

Страница 30: ...ucts visit www sonicfoundry com 57 Media Files A media file refers to any audio and video file that SIREN will play from your com puter SIREN supports the following media file formats wav mp3 wma pca aif ogg avi wmv asf mpg mpeg mov qt Finding Media After you install SIREN XPress a configuration wizard will scan your local hard drives for any mp3 and wma files and add them to your SIREN XPress med...

Страница 31: ...ion go Turn your wedding photos and special occasions into a creative slideshow for friends and family Keep your vacation memories alive forever Go on vacation without going on vacation Create an Internet Commercial to promote your business To install AudioPix follow these simple steps 1 Insert your install CD into your CD drive 2 Go to D Applications QSound Labs AudioPix D represents your CD ROM ...

Страница 32: ... and check the recording source that you want to display in the Recording Mixer Click OK and the Recording Mixer window will open Now you can select the recording source you intend to use and adjust the recording volume level Recording Source Configuration 703_rhythmic_usermanual qxd 3 12 01 10 30 AM Page 60 ...

Страница 33: ...raphics cards Add each card back until Device Manager indi cates that a conflict has occurred To resolve conflicts in Windows 95 98 1 Click the Start button point to Settings and then click Control Panel 2 In the Control Panel window double click the System icon 3 In the System Properties dialog click the Device manager tab 4 Under the Sound Video and Game Controllers entry select the conflicting ...

Страница 34: ...Notes 703_rhythmic_usermanual qxd 3 12 01 10 31 AM Page 64 ...

Отзывы: