

7
TSU9600 Starter’s Guide
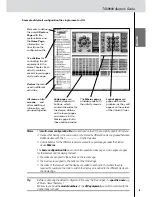
You need to take the following 6 steps to customize one of the dedicated configuration files:
1
Delete the activities that the customer does not use or add new activities.
You delete the unused activities in the tree view of the editor. By deleting the activity all links
to the buttons of this activity become inactive.
To add a new activity:
• Duplicate an existing activity and adjust the different pages.
• In the default configuration files single-room and multi-room, add a new activity macro
to the macros page.
Note
In the default configuration files single-room and multi-room for the US, the activities
‘Watch Live TV’, ‘Watch Recorded TV’ and ‘Listen to Music Channels’ are set up for
two
input components
: Cable and Satellite. You have to choose one of the input components
and remove the other one.
To remove the unused input component:
• Delete the
activity
with the unused component in the
tree view
.
• Delete the corresponding
activity macro
on the
Activity Macros
page.
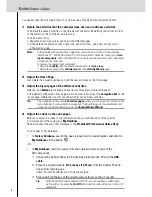
2
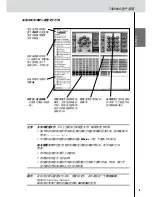
Adjust the Home Page.
Also delete the unused activities and add the new activities on the Home page.
3
Adjust the layout pages of the different activities.
Delete or add
buttons
to create a personal layout for every customer individually.
In the default configuration files single-room and multi-room, adjust the
navigation bar
on the
lay out page. Delete the icons for unused activities and add new activities.
Tip
The configuration files contain
Favorites pages
, where you can group the favorite TV and
radio channels of your customer in categories. Position the logo on the placeholder and
assign the correct channel macros via the
Channel Macro Wizard
.
4
Adjust the codes on the code pages.
Before you adjust the codes in the configuration file, you add the codes of the specific
A/V component of the customer in
My Database
.
Read more about the use of My Database in the
ProntoEdit Professional Online Help
.
To add codes to My Database:
•
In
Factory Database
, search the device, based on its model number and add it to
My Database
via the button
.
-Or-
•
In
My Database
, learn the codes from the original remote control of the
A/V component.
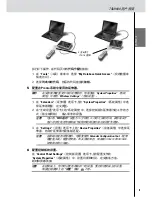
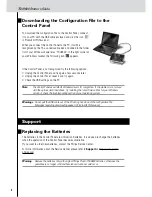
1
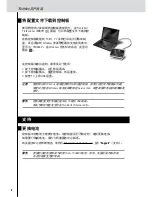
Connect the Control Panel (or the docking station) to the PC with the
USB
cable
.
2
Place the original remote
4 to 6 inches (10-15 cm)
from the Control Panel in
line with its learning eye.
Check if both the batteries are sufficiently charged.
3
Press and hold the key of the original remote for more than 1 second.
Tip
With the Control Panel connected to the PC, you can test newly added codes
via the editor. You press the
Test IR
button and the code will be sent to the A/V
equipment.
Содержание Pronto TSU9600
Страница 1: ...TSU9600 ZH 用户指南 安装和配置 EN Starter s Guide Installing and configuring ...
Страница 2: ......
Страница 3: ...简体中文 TSU9600 用户指南 ENGLISH 用户指南 Starter s Guide 安装和配置 Installing and Configuring TSU9600 ...
Страница 28: ......