background image

1.

Read these instructions.

2.

Keep these instructions.

3.

Heed all warnings.

4.

Follow all instructions.

5.

Do not use this apparatus near
water.

6.

Clean only with dry cloth.

7.

Do not block any ventilation
openings. Install in accordance with
the manufacturer´s instructions.

8.

Do not install near any heat sources

such as radiators, heat registers, stoves, or
other apparatus (including amplifiers) that
produce heat.

9.

Do not defeat the 
safety purpose

of the

polarized or 
grounding-type plug.
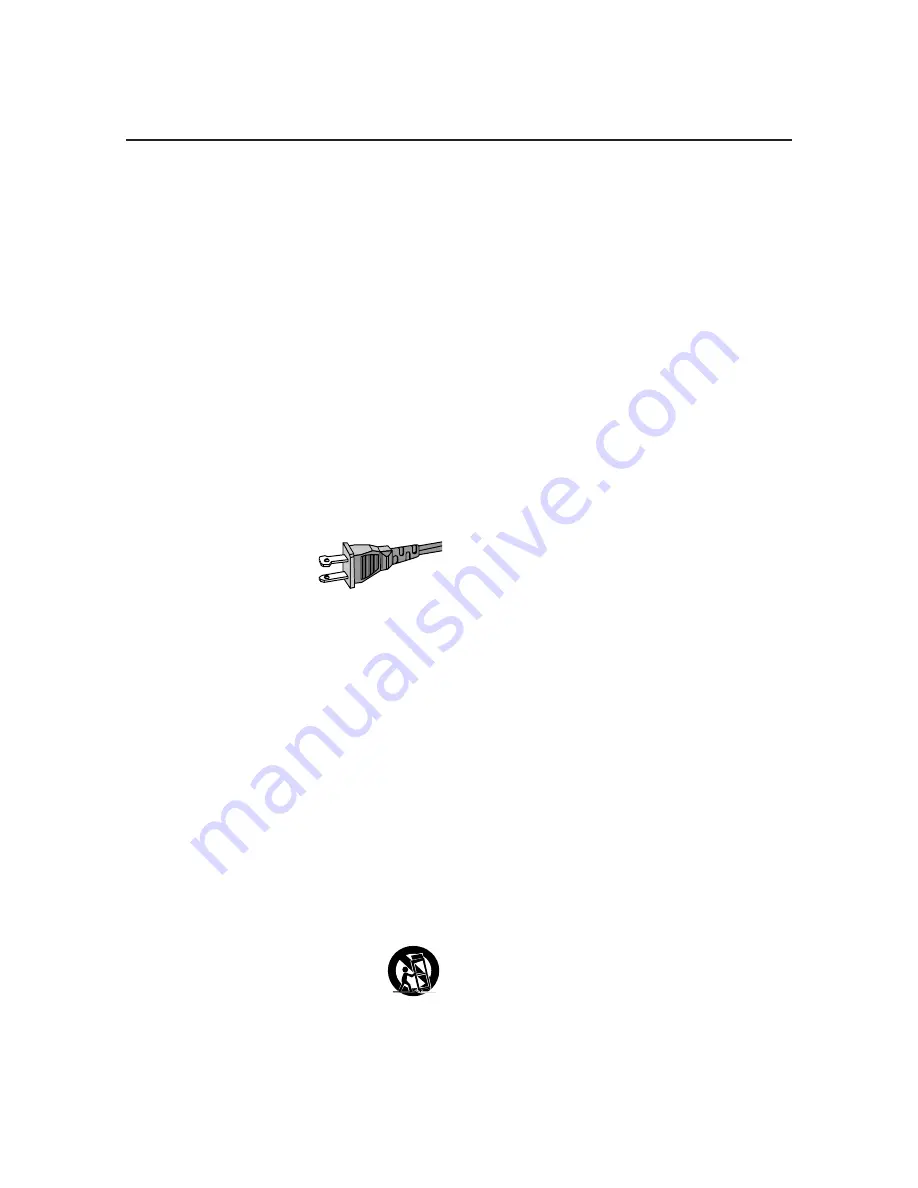
A polarized plug has two blades with one
wider than the other. A grounding type plug
has two blades and a third grounding prong.
The wide blade or the third prong are
provided for your safety. If the provided plug
does not fit into your outlet, consult an
electrician for replacement of the obsolete
outlet.

10.

Protect the power cord

from being

walked on or pinched, particularly at plugs,
convenience receptacles, and the point
where they exit from the apparatus.

11.

Only use attachments/accessories

specified by the manufacturer.

13.

Unplug this apparatus

during lightning

storms or when unused for long periods of
time.

14.

Refer all servicing

to qualified service

personnel. Servicing is required when the
apparatus has been damaged in any way,
such as power-supply cord or plug is
damaged, liquid has been spilled or objects
have fallen into the apparatus, the apparatus
has been exposed to rain or moisture, does
not operate normally, or has been dropped.

15.

Battery usage 

CAUTION

– To

prevent battery leakage which may result in
bodily injury, property damage, or damage
to the unit:

Install 

all

batteries correctly,

+

and 

-

as

marked on the unit.

Do not mix batteries (

old

and 

new

or

carbon

and 

alkaline

, etc.).

Remove batteries when the unit is not used
for a long time.

IMPORTANT SAFETY INSTRUCTIONS

AC Polarized

Plug

16.

Apparatus shall not be exposed to 
dripping or splashing. 

17.

Do not place any sources of danger  
on the apparatus

 (e.g. liquid filled 

objects, lighted candles). 

18.

This product may contain lead and mercury.  
Disposal of these materials may be regulated 
due to environmental considerations.  

For disposal or recycling information, 
please contact your local authorities 
or the Electronic Industries Alliance : 
www.eiae.org.

EL 6475-E005: 04/01

12.

Use only with the cart,

stand,

tripod, bracket, or table specified
by the manufacturer or sold with
the apparatus. When a cart is
used, use caution when moving
the cart/apparatus combination
to avoid injury from tip-over.

Содержание PET708

Страница 1: ...ips representatives are ready to help you with any questions about your new product CALL US BEFORE YOU CONSIDER RETURNING THE PRODUCT 1 888 PHILIPS 744 5477 or visit us on the web at www usasupport philips com Portable DVD player PET708 ...

Страница 2: ...h is locat ed on the rear of the cabinet Retain this information for future reference Model No __________________________ Serial No ________________________ Know these safetysymbols This bolt of lightning indicates unin sulated material within your unit may cause an electrical shock For the safety of everyone in your household please do not remove product covering The exclamation point calls atten...

Страница 3: ...ing to qualified service personnel Servicing is required when the apparatus has been damaged in any way such as power supply cord or plug is damaged liquid has been spilled or objects have fallen into the apparatus the apparatus has been exposed to rain or moisture does not operate normally or has been dropped 15 Battery usage CAUTION To prevent battery leakage which may result in bodily injury pro...

Страница 4: ...becomes Philips property When a refund is given your product becomes Philips property Note Any product sold and identified as refurbished or renewed carries a ninety 90 day limited warranty Replacement product can only be sent if all warranty requirements are met Failure to follow all requirements can result in delay WHAT IS NOT COVERED EXCLUSIONS AND LIMITATIONS This Limited Warranty applies only...

Страница 5: ...shipment and no signature verification receipt can be provided Failure to operate per Owner s Manual TO OBTAIN ASSISTANCE INTHE U S A PUERTORICO OR U S VIRGIN ISLANDS Contact Philips Customer Care Center at 1 888 PHILIPS 1 888 744 5477 TO OBTAIN ASSISTANCE IN CANADA 1 800 661 6162 French Speaking 1 888 PHILIPS 1 888 744 5477 English or Spanish Speaking REPAIR OR REPLACEMENT AS PROVIDED UNDER THIS ...

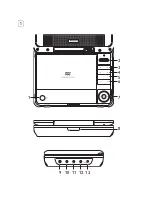
Страница 6: ...1 1 2 7 3 8 9 4 5 6 10 11 12 13 ...

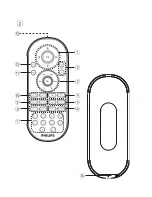
Страница 7: ...2 FRONT VIEW REAR VIEW ...

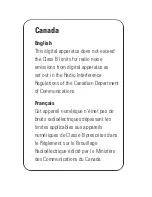
Страница 8: ... the Radio Interference Regulations of the Canadian Department of Communications Français Cet appareil numérique n émet pas de bruits radioélectriques dépassant les limites applicables aux appareils numériques de Classe B prescrites dans le Règlement sur le Brouillage Radioélectrique édicté par le Ministère des Communications du Canada ...

Страница 9: ... playback and store the stop position Press twice to stop playback completely 2 Start pause resume playback 4 J Search backward J or search forward K 5 VOL Volume control 6 SETUP Enters SETUP menu MENU Display MENU page 7 3 4 1 2 Up down left right cursor OK Confirm selection Front of player see figure 1 8 POWER CHR IR Power and charging indicator Remote sensor ...

Страница 10: ...AV IN Audio Video input jack AV OUT Audio Video output jack COAXIL Digital audio output jack DC IN 12V Power supply socket CAUTION Use of controls or adjustments or performance of procedures other than herein may result in hazardous radiation exposure or other unsafe operation ...

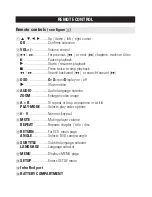
Страница 11: ...forward 6 4 OSD On Screen Display on off Slow motion 5 AUDIO Audio langauge selector ZOOM Enlarges video image 6 A B To repeat or loop a sequence in a title PLAY MODE Selects play order options 7 0 9 Numeric keypad 8 MUTE Muting player volume REPEAT Repeats chapter title disc 9 RETURN For VCD menu page ANGLE Selects DVD camera angle 0 SUBTITLE Subtitle language selector LANGUAGE Language selector ...

Страница 12: ...tion with the remote control Unpacking First check and identify the contents of your package as listed below Portable DVD player Remote Control Car adaptor 12V AC power adaptor AY4130 Rechargeable battery pack User Manual Warranty Audio Video cable Second LCD screen PAC13X Car headrest mounting kit Placement Place the player on a firm flat surface Keep away from domestic heating equipment and dire...

Страница 13: ...and also between Chapters Video CD Depending on the material on the disc a movie video clips a drama series etc these discs may have one or more Tracks and tracks may have one or more indexes as indicated on the disc case To make access easy and convenient your player lets you move between tracks and between indexes Audio CD MP3 Audio CDs MP3 CD contain music tracks only You can play them in the c...

Страница 14: ...isassemble the unit for laser rays are dangerous to eyes Any service should be done by qualified service personnel Unplug the AC adaptor to cut the power if liquid or objects get inside the unit Take care not to drop the unit or subject it to strong shocks which may cause malfunction Do not expose to excessive heat caused by heating equipment or direct sunlight This product is not waterproof do no...

Страница 15: ... establish a safe volume level Set your volume control at a low setting Slowly increase the sound until you can hear it comfortably and clearly without distortion Listen for reasonable periods of time Prolonged exposure to sound even at normally safe levels can also cause hearing loss Be sure to use your equipment reasonably and take appropriate breaks Be sure to observe the following guidelines w...

Страница 16: ...ng process and does not indicate a malfunction Environmental information We have reduced the packaging to its minimum and made it easy to separate into mono materials cardboard PS PE and PET Your set consists of material which can be recycled if disassembled by a specialized company Please observe the local regulations to dispose of packaging exhausted batteries and old equipment Copyright informa...

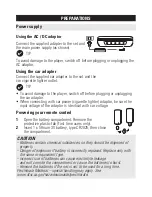
Страница 17: ...the adaptor is identical with car voltage Powering your remote control 1 Open the battery compartment Remove the protective plastic tab first time users only 2 Insert 1 x lithium 3V battery type CR2025 then close the compartment CAUTION Batteries contain chemical substances so they should be disposed of properly Danger of explosion if battery is incorrectly replaced Replace only with the same or e...

Страница 18: ...t is normal for the battery pack to become warm during charging is shown on the screen when battery power is running low Detaching the battery pack 1 Switch off the set 2 Unplug the AC adapter 3 Turn the player upside down 4 Press down the battery pack lock switch 5 Slide off the battery pack as shown Rechargeable batteries have a limited number of charge cycles and may eventually need to be repla...

Страница 19: ...ff your set before connecting to any additional equipment You can connect the player to a TV or an amplifier to enjoy DVDs or karaoke AV IN On the DVD player panel press AV IN to select A V IN AUX Connection Color Video Yellow Audio Left White Audio right Red AV OUT On the DVD player panel press AV IN OUT to select A V OUT White Red Yellow White Red Yellow ...

Страница 20: ...ating commands When this occurs please refer to the instructions in the disc inlay When a appears on the screen the operation is not permitted by the player or the disc Remote control operation Unless otherwise stated all operations can be carried out with the remote control Always point the remote control directly at the player making sure there are no obstructions in the path of the infrared bea...

Страница 21: ...o ON to switch on the player 2 Press SET UP for the set up menu 3 Select GENERAL SETUP and press OK 4 Scroll and select OSD LANG and press 2 to select from OSD language options 5 Select your preferred language and press OK Loading discs and switching on 1 Press OPEN to open the disc door 2 Insert your chosen disc label side up also when a double sided DVD disc is inserted Make sure it is sitting p...

Страница 22: ...ayers have region codes and discs can have an optional region code If you load a disc of a different region code to your player you will see the region code notice on the screen The disc will not play and should be unloaded Playing an audio or video CD disc After switching on inserting the disc and closing the door the screen shows the type of disc loaded as well as information about the disc s co...

Страница 23: ... picture folder Press OK The player will then automatically enter the slide show mode Using the full display screen this shows the rest of the JPEG files one by one located in the selected current folder Use the 1 2 to rotate the picture Use the 3 to filp up down Use the 4 to flip left right During the slide show press MENU to go back to folder screen Press 9 to go to group preview Use the 3 4 1 2...

Страница 24: ...l keys 0 9 Still picture and step frame Press once or more for the following still picture and step frame options x 1 Pause Still picture x 2 screen shows 2 After the icon 2 is displayed press repeatedly to play frame by frame Press OK to resume normal playback Search Press K repeatedly for the following forward search options Press J repeatedly for the following backward search options J K 2 X ba...

Страница 25: ...ight x 3 Mixed mono x 4 Stereo ZOOM The Zoom function allows you to enlarge the video image and to pan through the enlarged image Press ZOOM repeatedly to select the following zooming options Zoom x 1 2X Zoom x 2 3X Zoom x 3 4X Zoom x 4 1 2 Zoom x 5 1 3 Zoom x 6 1 4 Zoom x 7 normal MUTE Press MUTE once to mute player volume Press MUTE again to disable REPEAT Press REPEAT repeatedly for the followi...

Страница 26: ...s To exit the sequence press A B Play modes Press PLAY MODE repeatedly for the following play order options x 1 Shuffle x 2 Random x 3 Program Use 0 9 and OK to key in specific settings Volume Control During playback press to increase or decrease playback volume in the Remote Control or in the DVD player Setup on the main unit Press Setup repeatedly and use 1 2 to adjust brightness color and displ...

Страница 27: ...angles the angle icon appears showing the number of available angles and the angle being shown You can then change the camera angle if you wish Press ANGLE repeatedly until you have reached your desired viewing angle To resume to normal viewing angle press ANGLE repeatedly until no angle related message is shown on the screen Changing the language Press LANGUAGE If the current disc has different l...

Страница 28: ... key in desired title number CHAPTER key in desired chapter number AUDIO select audio options SUBTITLE select subtitle options ANGLE select camera angle options FILE TIME key in starting point for file play time TT TIME key in starting point for title play time CH TIME key in starting point for chapter play time REPEAT select repeat options TIME DISP select time display options 3 Use 0 9 to key in...

Страница 29: ...lect audio options PREFERENCES select playback preferences PASSWORD SETUP select password options 3 Press 1 to abort current settings or go back to previous menu level 4 Press SETUP to exit General Setup When the cursor highlights these settings press OK to TV DISPLAY select display ratio TV TYPE select video standard of external TV set OSD LANG select on screen display language SPDIF select digit...

Страница 30: ...settings press OK to AUDIO select audio language options SUBTITLE select subtitle language options DISC MENU select disc menu language options PARENTAL select parental options DEFAULT Restore factory settings Press 1 to abort current settings or go back to previous menu level Note Parental options are only selectable when password mode is deactivated Password Setup When the cursor highlights these...

Страница 31: ...Check if both plugs of the mains cord are properly connected Check if there is power at the AC outlet by plugging in another appliance Check if battery pack is inserted appropriately Check if car adaptor is connected appropriately Distorted picture Check the disc for fingerprints and clean with a soft cloth wiping from centre to edge Sometimes a small amount of picture distortion may appear This i...

Страница 32: ...et used PAL NTSC No audio at digital Check the digital connections output Check the SETUP menu to make sure that the digital output is set to on Player does not respond Operations are not permitted by the disc to all operating commands Refer to the instructions in the disc inlay during playback Player feels warm When the player is in use for a long period of time the surface will be heated This is...

Страница 33: ...Hz 1dB Signal noise ratio t 85dB Audio distortion noise d 80 1KHz Channel separation t 85dB Dynamic range t 80dB Output Audio out analog audio Output level 2V 10 Load impedance 10K Video out Output level 1Vp p 20 Load impedance 75 PHILIPS reserves the right to make design and specification changes for product improvement without prior notice Modifications not authorized by the manufacturer may voi...

Страница 34: ...d and manufactured with high quality materials and components which can be recycled and reused When this crossed out wheeled bin symbol is attached to a product it means the product is covered by the European Directive 2002 96 EC Please inform yourself about the local separate collection system for electrical and electronic products Please act according to your local rules and do not dispose of yo...

Страница 35: ...NSUMER ELECTRONICS COMPANY Marietta GA 30006 0026 Printed in China PXP 0811 CLASS 1 LASER PRODUCT Specifications are subject to change without notice Trademarks are the property of Koninklijke Philips Electronics N V or their respective owners 2008 Koninklijke Philips Electronics N V All rights reserved ...

Отзывы: