background image

16

English

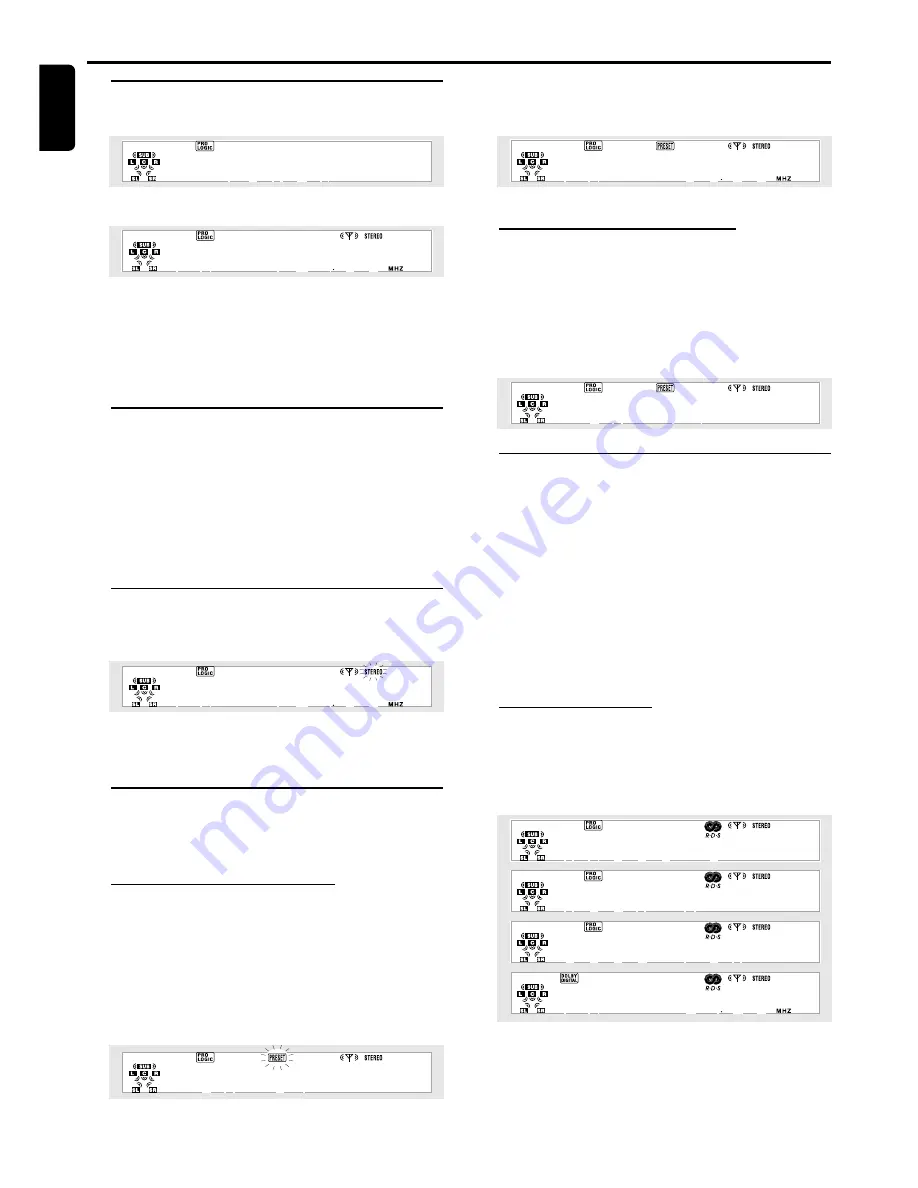
Manual tuning

1

Press 

TUNER

 to select tuner mode.

After 2 seconds, the display will show the current

waveband and frequency.

2

To switch between FM and MW waveband, press 

TUNER

again.

3

Press 

FREQUENCY


or 

(or 

à

 / 

á


on the remote

control) repeatedly to change the frequency.  The frequency
changes in 50kHz steps in FM and 9kHz steps in MW
waveband.

Automatic tuning

1

Press 

TUNER

 to select tuner mode.

2

To switch between FM and MW waveband, press 

TUNER

again.

3

Press and hold 

FREQUENCY


or 

for more than one

second to activate auto tuning mode.

When a station is reached, auto tuning stops.

Repeat 

steps 2–3

 to search for other radio stations.

Tuning to a weak FM station

1

Press 

FREQUENCY


or 

repeatedly to tune in the

weak FM station manually.

2

Press 

FM MODE


(

Ç

)

 to switch to mono mode.  This

should reduce the noise and make the station easier to
hear.

Preset Radio Stations

When a preset station is selected, the preset number will
appear shortly and the display will show the waveband and
frequency.

Storing Preset Radio Stations

You can store up to 20 stations in the FM waveband and 20
stations in the MW waveband in the memory.

1

In tuner mode, press 

TUNER


to switch between FM and

MW waveband.

2

Press 

FREQUENCY


or 

to tune in the desired

station.

3

Press and hold 

PRESETS

 until “

PRESET

” icon flashes.

4

Press 

/

 )

  (or 

numeric keys 0-9

 on the remote control)

to select the desired preset channel number to store.

5

Press 

PRESETS

 again to store the radio station.

Repeat 

steps 2–5

 to store other preset radio stations.

Selecting Preset Radio Stations

1

In tuner mode, press 

TUNER


to switch between FM and

MW waveband.

2

Press 

PRESETS 

and followed by 

FREQUENCY


or 

3

(or 

/

 ) 

on the remote control) to select the desired

preset station.

You can also use the remote control’s direct access numeric
keys.

RDS

IMPORTANT!
RDS functions are only available in areas that use the
RDS system.

RDS (Radio Data System) is a broadcasting service that
allows FM stations to send additional information along
with the regular FM radio signal.  This additional information
can contain the following :
– Station Name
– Radio Text
– Programme Type
– Frequency

Displaying RDS data

When an RDS radio station is received, the RDS icon ( 

Ç

 )

and station name (if available) will appear on the display.
While receiving an RDS radio station, you can change the
display information by pressing 

RDS DISPLAY

 on the

remote control repeatedly.

Note:
– If the tuned station is not transmitting an RDS signal or not
an RDS station, “

NO PS

” will be displayed.

Tuner

T

UNER

Содержание MX-1050D

Страница 1: ...1 DVD CD PLAYER DIGITAL A V SURROUND RECEIVER MX 1050D MX 1060D DVD SURROUND RECEIVER DVD SURROUND RECEIVER ...

Страница 2: ...your plug proceed as follows Connect the blue wire to the terminal marked N or coloured black Connect the brown wire to the terminal marked L or coloured red Do not connect either wire to the earth terminal in the plug marked E or e or coloured green or green and yellow Before replacing the plug cover make certain that the cord grip is clamped over the sheath of the lead not simply over the two wi...

Страница 3: ... o l Nederlands Italiano Français Ï Ï Ë Ó È Î Por tuguês Suomi Dansk Svenska Polski Index INDEX English 5 Français 30 Español 56 Deutsch 82 Nederlands 108 Italiano 134 Svenska 160 Dansk 186 Suomi 212 Português 238 ÏÏËÓÈÎ 264 Polski 290 ...

Страница 4: ...raten används på annat sätt än i denna bruksanvisning specificerats kan användaren utsättas för osynlig laserstrålning som överskrider gränsen för laserklass 1 Observera Stömbrytaren är sekundärt kopplad och bryter inte strömmen från nätet Den inbyggda nätdelen är därför ansluten till elnätet så länge stickproppen sitter i vägguttaget SF Luokan 1 laserlaite Varoitus Laitteen käyttäminen muulla kui...

Страница 5: ...g the sound 14 Dimming the display screen 14 Selecting output modes surround sound sound effects 14 15 Tuner Manual tuning 16 Automatic tuning 16 Tuning to a weak FM station 16 Preset Radio Stations 16 RDS 16 17 Clock Timer Setting the Clock 18 Setting the On Off Timer 18 Activating Deactivating On Off Timer 18 Setting the SleepTimer 18 DVD CD Operation Loading Discs 19 When the DVD is playing 19 ...

Страница 6: ...title to suit yourself You can play the whole disc or just part of it and view it from different angles However availability of these features varies among discs Check the disc menu or outer case to see if such features for example subtitles angles are available on the disc Player Zones There are six world zones for the distribution of DVD Discs The zone your player is intended for is indicated on...

Страница 7: ...he radio frequency down or up 6 Display screen to display details for user s information 7 VCR to select the VCR as the input source 8 DVD to select the DVD CD mode 9 CDR to select the CDR as the input source 0 TV to select the TV as the input source TUNER to select the Tuner mode It can also switch between MW and FM band VOLUME to adjust the master volume Turn clockwise to increase and anti clock...

Страница 8: ...p Disc Contents Active Navigation menus 0 in DVD CD mode to slow reverse or slow forward the disc in Tuner mode to select a preset channel number to select movement direction in Disc Setup Disc Contents Active Navigation menus in DVD CD mode to start disc playback in Tuner mode to enter preset programming mode or to confirm a preset to enter or confirm menu and setup navigation Ç FM Mode in DVD CD...

Страница 9: ...nnecting analogue Left Right audio signals from external sources to the unit VCR connect toVideo Cassette Recorder AUDIO OUT terminal TV connect to Television AUDIO OUT terminal CDR connect to CD Recorder AUDIO OUT terminal 3 VIDEO IN For connecting to the corresponding VIDEO OUT terminal on a VCR TV or CDR 4 DIGITAL OUT in DVD CD mode only Digital Coaxial Output RCA terminal For connecting to ext...

Страница 10: ...t surround speaker to SR terminals Connect the coloured marked wire to and the black unmarked wire to 0 SUBWOOFER OUT Connect this terminal to the AUDIO INPUT terminal of the powered subwoofer After completing all the connections connect the AC power cord of the player and subwoofer to the wall outlet Notes To prevent damage to circuits never short circuit the positive and negative speaker output ...

Страница 11: ...channel surround sound audio signal Dolby Digital or DTS to a CD R To convert the digital multichannel signal into a stereo signal following settings have to be activated in the Disc Setup Menu In Audio Set set to 2 audio channel see page 25 In Digital Out set to PCM see page 26 Note Digital recording is not possible when the digital source material is copy protected ...

Страница 12: ...rom the listening position Positioning the centre speaker The centre speaker should be placed in the centre between both front speakers and should always be placed in line with the television e g underneath or on top of theTV The best height for the centre speaker is the height of the listener s ears while seated Positioning the surround speakers The surround speakers should face each other and be...

Страница 13: ...ont panel of subwoofer until you hear a click clockwise to switch on and anti clockwise to switch off The LED indicator will light up in green when the subwoofer is switched on Volume Adjustment You can adjust the subwoofer to suit the sound level of your front speakers Reinforcing the bass sound gives you a greater sense of atmosphere 1 Adjust the VOLUME on the player until the sound from the fro...

Страница 14: ...input source A list of all output modes is shown below IMPORTANT For proper surround sound make sure you have followed the Connections and System Setup procedure fully Press SURR MODE or MODE on the remote control to select the available output modes Dolby Digital Surround The Dolby Digital Surround system requires connection of all five speakers front left centre front right surround right surrou...

Страница 15: ...ng very long reverberation times STAGE This effect recreates a stage environment emphasizing sound from the front speakers HALL The surround effect recreates a hall using lots of reflections Suitable for orchestral music such as classical and opera DISCO This surround effect generates a feeling of being in a disco or club It is suitable for all types of music that are played in discos LIVE This so...

Страница 16: ... mode press TUNER to switch between FM and MW waveband 2 Press FREQUENCY 4 or 3 to tune in the desired station 3 Press and hold PRESETS until PRESET icon flashes 4 Press or numeric keys 0 9 on the remote control to select the desired preset channel number to store 5 Press PRESETS again to store the radio station Repeat steps 2 5 to store other preset radio stations Selecting Preset Radio Stations ...

Страница 17: ...lay 3 Press and hold FREQUENCY 4 or 3 until auto search is activated The search will stop when a radio station with the same programme type is detected After a few seconds the station name will appear on the display To continue searching for another RDS station within the same programme type repeat step 3 RDS Clock Some RDS stations may transmit the time If the clock has not been set manually AM 1...

Страница 18: ...r SET OFF 7 Press to confirm and return to the last selected source Repeat steps 1 5 again to set the OffTime Note When the on time is reached the player will switch on to the last selected source Activating Deactivating On Off Timer 1 Press SYSTEM MENU to enter System Setup mode 2 Press to select theTimer Setup mode and press to confirm 3 Press twice and press à á to select SET ON or SET OFF mode...

Страница 19: ...l be muted Press Åagain will show the next frame of picture 2 To resume normal play press Stop Resume Stop 1 While playing a disc press Ç once will select Resume Stop mode The disc can resume playback from the point at which it stopped when you press In resume stop mode you can display the Setup Menu 2 While resume stop mode pressÇ again to enter stop mode The disc will start playback from the beg...

Страница 20: ... the desired passage 2 Press again at the end of the passage The passage will now repeat continuously 3 To resume normal play press again You can also press RDS DISPLAY on the remote control to direct access to Repeat A B mode Zoom The zoom function allows you to enlarge or reduce the video image Press repeatedly to select the zoom factor 1 0x 2 0x and 0 5x The picture will change accordingly Play...

Страница 21: ...e disc will play from the time you entered Repeat A B Repeat A B allows a passage to play repeatedly 1 Press at the start of the required passage 2 Press again at the end of the passage The passage will now repeat continuously 3 To resume normal play press again Repeat This function is to repeat playback a track or the whole disc Press repeatedly to select 1 or ALL If 1 is selected the current tra...

Страница 22: ...EP BWD One frame backward in pause mode CONTINUE É Continue playing after pause RESUME STOP Stop the disc but allow the disc to be resumed from the same place later RESUME Playback is resumed STOP Ç The disc is completely stopped This function is not available NEXT CHAPTER Playback from beginning of next chapter PREV CHAPTER Playback from beginning of previous chapter FAST FWD Fast forward speed 1...

Страница 23: ...TANT To access the Disc Setup Menu playback must be stopped Language Example showing how to change the audio language from ENGLISH to FRENCH Language Audio Return Francais X 2 X 4 Subtitle Example showing how to turn off the subtitle Subtitle OFF X 1 X 1 Return DVD CD OPERATION 1 Press SYSTEM MENU The Disc Setup Menu will be displayed across the top of theTV screen 2 Press à á or to move through t...

Страница 24: ...reen however some parts to left and right may not be visible The picture will automatically Pan and Scan to left and right to centre the most important part of the picture Not all discs support Pan and Scan so the Letter Box display may remain even though P Scan is selected Example shows setting of Letter Box display on a normal TV Audio Set Example shows setting of Dynamic Range Compression DRC t...

Страница 25: ...h Audio Set Example shows setting of 2 audio channel to 5 1 audio channel only available on 5 1 Channel models Audio Set Exit or or or or Center Speaker Subwoofer or Rear Speakers Exit or or or DVD CD OPERATION ...

Страница 26: ...layer s rating to a higher number Alternative scenes with a lower rating might be included The player plays the highest rated scene that the parental setting allows For example consider a disc that generally is suitable for most audiences and it is rated as level 2 for the most part However in the middle there are also scenes rated at 5 not suitable for children Example showing how to set parental...

Страница 27: ...tion Set panel keys to OFF and the player can only be operated by the remote control On Screen Off On Screen X 1 Return If the On Screen Display is on various icons and messages will show on the screen for a few seconds to confirm that a function has been selected Example showing how to turn off the On Screen Display DVD CD OPERATION ...

Страница 28: ...and close the disc tray The player will go into CD mode when it identifies the disc 2 Press RDS DISPLAY CD Programme Menu will appear Index DVD To display the DVD Index Menu DVD must be playing 1 While playing a disc press RDS SEARCH The film will pause and the Index Menu will appear 2 Press to select the desired index marker DVD CD OPERATION 3 Press à á to display the information of the selected ...

Страница 29: ...Ω S Video Output Y 1 0Vp p 75 Ω C 0 3Vp p 75 Ω Audio DAC 24 Bits 96 kHz Frequency Response 4 Hz 20 kHz 44 1 kHz 4 Hz 22 kHz 48 kHz 4 Hz 44 kHz 96 kHz Digital Output SPDIF Coaxial Optical MISCELLANEOUS Power Supply Rating 230V 50 Hz Power Consumption DFR1500 DFR1600 216 W Dimensions w x h x d 435 mm x 140 mm x 430 mm Weight 13 kg IR REMOTE CONTROL Effective Range 8 Metre Number of Keys 39 Battery 1...

Отзывы: