background image

18

U

NDERSTANDING

A

UTO

L

OCK

MOVIE RATING

AutoLock

ON

G

PG
PG-13
R
NC-17

T

he AutoLock™ feature receives

and processes data sent by

broadcasters or other program
providers that contain program con-
tent advisories. When programmed
by the viewer, a TV with AutoLock™
can respond to the content advisories
and block program content that may
be found objectionable (such as
offensive language, violence, sexual
situations, etc.). This is a great fea-
ture to censor the type of program-
ming children may watch.

In the AutoLock™ section, you’ll
learn how to block channels and pro-
gramming that is not rated, is unrat-
ed, or has no rating. You will also
find out how to turn these blocking
features ON or OFF. Following are
brief explanations of some terms and
ratings related to the AutoLock™
feature.

AutoLock™ offers various
Blocking Options from which to
choose:

BLOCKING:

The BLOCKING con-

trol is what can be thought of as the

Òmaster switchÓ for AutoLockª.

This control affects the settings you

have chosen for blocking programs

according to movie ratings or TV

ratings, or for blocking programs

that have no rating or are unrated.

When the BLOCKING control is

OFF, the blocking or censoring of

programs is disabled. When the

BLOCKING control is ON, blocking

will occur according to the settings

you have chosen.

BLOCK UNRATED: ALL unrated
programs will be blocked if this fea-
ture is set to ON.

UNRATED programming is encoded
with information from the MPAA
(Motion Picture Association of
America) or TV broadcasters, but it
does not have a specific rating. In
other words, the MPAA or the TV
broadcasters have chosen not to
assign a rating to the programming.

NO RATING: ALL programming
with no content advisory data can be
blocked if NO RATING is set to
ON.

Programming that has No Rating is
not encoded with any rating infor-
mation from the MPAA or the
Parental Guidelines. Any program-
ming could fall into this category.

You also can block individual
channels or block programming
based on ratings of the MPAA and
TV broadcasters. (See a description
of the ratings on this page.)

G: General Audience All ages admitted.
Most parents would find this program-
ming suitable for all ages. This type of
programming contains little or no vio-
lence, no strong language, and little or no
sexual dialogue or sexual situations.

PG: Parental Guidance Suggested This
programming contains material that parents
may find unsuitable for younger children. It
may contain one or more of the following:
Moderate violence, some sexual situations,
infrequent coarse language, or some sugges-
tive dialogue.

PG-13: Parents Strongly Cautioned This
programming contains material that parents
may find unsuitable for children under the
age of 13. It contains one or more of the
following: violence, sexual situations,
coarse language, or suggestive dialogue.

R: Restricted -This programming is specifi-
cally designed for adults.  Anyone under the
age of 17 should view this programming
only with an accompanying parent or adult
guardian. It contains one or more of the fol-
lowing: intense violence; intense sexual sit-
uations; strong, coarse language; or intense-
ly suggestive dialogue.

NC-17: No one under the age of 17 will be
admitted. 
This type of programming
should be viewed by adults only. It contains
graphic violence; explicit sex; or crude,
indecent language.

X: Adults Only This type of programming
contains one or more of the following: very
graphic violence, very graphic and explicit
or indecent sexual acts, very coarse and
intensely suggestive language.

M

OVIE

R

ATINGS

(M

OTION

P

ICTURE

A

SSOCIATION OF

A

MERICA

)

TV-Y:  (All children -- This program
is designed to be appropriate for all
children.
) Designed for a very young

audience, including children ages 2-6. This
type of programming is not expected to
frighten younger children.

TV-Y7:  (Directed to Older
Children 
-- This program is designed
for children ages 7 and above.
) It

may be more appropriate for children who
have acquired the development skills needed
to distinguish between make-believe and
reality. This programming may include mild
fantasy and comic violence (FV).

TV-G:  (General Audience -- Most
parents would find this program suit-
able for all ages.
) This type of pro-

gramming contains little or no violence, no
strong language, and little or no sexual dia-
logue or sexual situations.

TV-PG:  (Parental Guidance
Suggested 
-- This program contains
material that parents may find unsuit-

able for younger children.) This type of pro-
gramming contains one or more of the fol-
lowing: Moderate violence (V), some sexual
situations (S), infrequent coarse language
(L), or some suggestive dialogue (D).

TV-14:  (Parents Strongly
Cautioned 
-- This program contains
some material that many parents

would find unsuitable for children under 14
years of age.
) This type of programming
contains one or more of the following:
intense violence (V); intense sexual situa-
tions (S); strong, coarse language (L); or
intensely suggestive dialogue (D).

TV-MA:  (Mature Audience Only --
This program is specifically designed
to be viewed by adults and therefore

may be unsuitable for children under 17.)
This type of programming contains one or
more of the following: graphic violence (V);
explicit sexual situations (S); or crude, inde-
cent language (L).

TV P

ARENTAL

G

UIDELINES

(TV B

ROADCASTERS

)

TV

G

TV

PG

TV

Y

TV

Y7

TV

14

TV

MA

TV RATING

AutoLock

ON

TV-Y

TV-Y7
TV-G
TV-PG
TV-14

Содержание M-Link 32PT41B1

Страница 1: ...Instructions for use This television contains Color Television 32PT41B1 3135 015 17541 ...

Страница 2: ...ause an electrical shock For the safety of everyone in your household please do not remove product covering sThe exclamation point calls attention to features for which you should read the enclosed lit erature closely to prevent operating and maintenance problems WARNING TO PREVENT FIRE OR SHOCK HAZARD DO NOT EXPOSE THIS EQUIPMENT TO RAIN OR MOISTURE CAUTION To prevent electric shock match wide bl...

Страница 3: ...ibed in the operating instructions or as marked on the appliance 11 Power Cord Protection Power supply cords should be routed so that they are not likely to be walked on or pinched by items placed upon or against them paying particular attention to cords and plugs convenience receptacles and the point where they exit from the appliance 12 Cleaning The appliance should be cleaned only as recommende...

Страница 4: ...ound Using the AVL Audio Volume Leveler 30 Sound Using Incredible Surround 31 Sound Setting the TV for Stereo and SAP Second Audio Program 32 Sound Setting the Audio Out Control 33 Sound Using the TV Speaker Control and Audio Output Jacks 34 Sound Using the Surround Sound External Speaker Connections 35 Sound Using the Audio Video Input Jacks 36 38 TABLE OF CONTENTS AutoChron AutoLock AutoPicture ...

Страница 5: ...peration of the TV and Remote Control Selection of the Onscreen Menu Language QUICK USE AND INSTALLATION GUIDE QUICK USE AND INSTALLATION GUIDE TABLE OF CONTENTS Getting Started Warning Precautions 1 Hooking Up Your TV 1 Basic TV and Remote Control Operation 2 How to Use the INSTALL Controls 3 4 Using the Language Control 3 Setting the TV to Auto Program Channels 3 Setting the TV for a Cable or An...

Страница 6: ...ill be shown to the right Use the CURSOR LEFT or CUR SOR RIGHT button to adjust the BRIGHTNESS level of the picture After adjusting the BRIGHTNESS control press the CURSOR DOWN button to select another picture adjust ment COLOR PICTURE SHARP NESS TINT OR COLOR TEMP Press the CURSOR LEFT or CUR SOR RIGHT button to adjust the selected control NOTE The menu will show only five items at a time so you ...

Страница 7: ...to switch DNR ON or press the CURSOR LEFT button to switch DNR OFF Press the STATUS EXIT button to remove the menu from the screen TURNING ON THE DYNAMIC NOISE REDUCTION CONTROL BEGIN SLEEP TV VCR ON OFF POSITION FREEZE INCR SURR SURF SOUND PICTURE MENU CH MUTE SWAP SOURCE CC CLOCK ITR REC HOME HOME PERSONAL POWER A CH PIP M LINK VOL STATUS EXIT SOURCE 4 PICTURE SOUND FEATURES INSTALL BRIGHTNESS C...

Страница 8: ...t a CAPTION MODE CC1 CC2 CC3 CC4 CMUTE TXT1 TXT2 TXT3 or TXT4 CC DIS PLAY turns text OFF or ON if the TV station broadcasting on the channel is making CLOSED CAP TIONING available With CC DIS PLAY highlighted press the CUR SOR RIGHT button to toggle Closed Captioning ON or OFF NOTE You also can press the CC button on the remote control to turn the CC TEXT ON or OFF Press the STATUS EXIT but ton to...

Страница 9: ... 3 aspect ratio to com pletely fill the screen There also is a compressed 16 9 aspect ratio which allows movies to be viewed in their full width known as letter box style Press the MENU button on the remote control to show the on screen menu Press the CURSOR DOWN button twice to highlight FEA TURES Press the CURSOR RIGHT button and the menu will shift to the left Press the CURSOR DOWN button repea...

Страница 10: ...pres ent by displaying a pleasent blue screen This occurs in cases such as when a VCR tape is removed or an antenna signal is broken To turn the Blue Mute feature ON or OFF fol low the steps below Press the MENU button on the remote control to show the on screen menu Press the CURSOR DOWN button twice to highlight FEA TURES Press the CURSOR RIGHT button and the menu will shift to the left Press th...

Страница 11: ...ments up to 60 minutes then 30 minute increments up to 90 min utes then 60 minute increments up to 240 minutes Press the SLEEP button on the remote control The SLEEP timer onscreen display will appear in the upper part of the screen Within five seconds press the SLEEP button repeatedly to pick the amount of time 15 minute increments up to 60 minutes then 30 minute increments up to 90 min utes then...

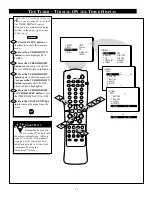
Страница 12: ...highlight FEATURES Press the CURSOR RIGHT but ton and the menu will shift to the left TIMER will be highlighted With TIMER selected press the CURSOR RIGHT button again to shift the display left and highlight the TIME control Press the CURSOR RIGHT but ton again to highlight the time indica tor area Press the CURSOR LEFT or CURSOR RIGHT button to select the position or digit you wish to enter Press...

Страница 13: ...or at the same time every day Follow these steps to set the Start Time Press the MENU button on the remote control to show the onscreen menu Press the CURSOR DOWN button twice to highlight FEA TURES Press the CURSOR RIGHT button and the menu will shift to the left TIMER will be highlighted Press the CURSOR RIGHT button again to shift the display left Then press the CURSOR DOWN button once to highl...

Страница 14: ...e fol lowing steps will guide you in set ting the TV to turn itself OFF once or at the same time every day Press the MENU button on the remote control to show the on screen menu Press the CURSOR DOWN button twice to highlight FEA TURES Press the CURSOR RIGHT button and the menu will shift to the left TIMER will be highlight ed Press the CURSOR RIGHT button again to shift the display left Then pres...

Страница 15: ...cific channel that the television will tune to when the timer turns the set ON Follow these steps to select the channel Press the MENU button on the remote control to show the onscreen menu Press the CURSOR DOWN button twice to highlight FEA TURES Press the CURSOR RIGHT button and the menu will shift to the left TIMER will be highlighted Press the CURSOR RIGHT button again to shift the menu to the...

Страница 16: ... on the remote control to show the onscreen menu Press the CURSOR DOWN button twice to highlight FEA TURES Press the CURSOR RIGHT button and the menu will shift to the left TIMER will be highlight ed Press the CURSOR RIGHT button again to shift the display to the left Then press the CURSOR DOWN button repeatedly until the ACTIVATE control is highlighted Press the CURSOR RIGHT button again to set A...

Страница 17: ...tly display the time in the upper right corner of the screen Press the MENU button on the remote to show the onscreen menu Press the CURSOR DOWN button twice to highlight FEA TURES Press the CURSOR RIGHT button and the menu will shift to the left TIMER will be highlighted Press the CURSOR RIGHT button again to shift the menu left Then press the CURSOR DOWN button repeatedly until the DIS PLAY cont...

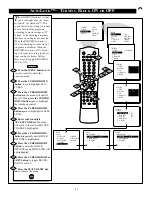
Страница 18: ...ive dialogue PG 13 Parents Strongly Cautioned This programming contains material that parents may find unsuitable for children under the age of 13 It contains one or more of the following violence sexual situations coarse language or suggestive dialogue R Restricted This programming is specifi cally designed for adults Anyone under the age of 17 should view this programming only with an accompanyi...

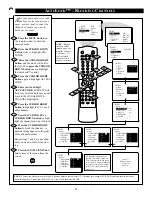
Страница 19: ...ild to unblock a channel without know ing your access code or changing it to a new one If your code has been changed without your knowledge then you will become aware that blocked channels may have been viewed AutoLockTM allows parents to block out or ÒcensorÓ any channels they think children should not watch A channel blocked by the AutoLockTM control cannot be viewed until a correct access code ...

Страница 20: ...other sources that can be shown through the A V input jacks Select AV1 AV2 or AV3 and then select BLOCK After your personal access code has been set see the previous page you are ready to select the channels or inputs you want to block out or censor Press the MENU button on the remote control to show the onscreen menu Press the CURSOR DOWN button twice to highlight FEA TURES Press the CURSOR RIGHT...

Страница 21: ... want to censor Press the MENU button on the remote control to show the onscreen menu Press the CURSOR DOWN button twice to highlight FEA TURES Press the CURSOR RIGHT button and the menu will shift to the left Then press the CURSOR DOWN button once to highlight the AutoLock control Press the CURSOR RIGHT button again to highlight ACCESS CODE Enter your four digit ACCESS CODE CORRECT will flash ver...

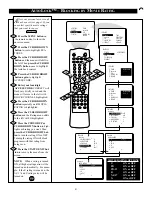
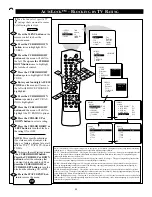
Страница 22: ...ence sexual content dia logue or fantasy violence are avail able for TV Y7 TV PG TV 14 and TV MA To access these subratings press the CURSOR RIGHT button Press the CURSOR UP or DOWN button to select the subrating that you want to block or unblock Then press the CURSOR RIGHT or CURSOR LEFT button to turn the block on the subrating ON or OFF Press the STATUS EXIT but ton to remove the menu BEGIN 10 ...

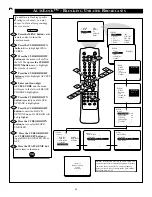
Страница 23: ...what can be thought of as the Òmas ter switchÓ for AutoLockª This control affects the settings you have chosen for blocking programs according to movie ratings or TV ratings or for blocking programs that have no rating or are unrated When the BLOCKING control is OFF the blocking or censoring of programs is disabled When the BLOCKING control is ON block ing will occur according to the set tings you...

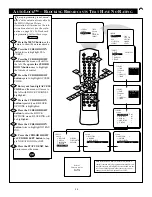
Страница 24: ...n to blocking specific ratings or channels you may choose to block all programming that is unrated Press the MENU button on the remote control to show the onscreen menu Press the CURSOR DOWN button twice to highlight FEA TURES Press the CURSOR RIGHT button and the menu will shift to the left Then press the CURSOR DOWN button once to highlight the AutoLock control Press the CURSOR RIGHT button agai...

Страница 25: ...the MPAA Motion Picture Association of America or the tele vision broadcasters see the expla nation on page 18 To block such programming follow these steps Press the MENU button on the remote to show the onscreen menu Press the CURSOR DOWN button twice to highlight FEA TURES Press the CURSOR RIGHT button and the menu will shift to the left Then press the CURSOR DOWN button once to highlight the Au...

Страница 26: ... SMART HELP Remember the review screen will appear only if BLOCKING is set to ON For details see page 23 MOVIE RATING R NC17 X BLOCK UNRATED NO RATING TV RATING Y7 PG 14 MA ON OFF MOVIE RATINGS Shows all blocked movie ratings that were set within the MOVIE RATING feature Some or all may be blocked at one time NOTE If a lower rating is blocked higher ratings also will be blocked automatically for e...

Страница 27: ...sage is determined by how the current programming is blocked You may view the blocked program ming and turn OFF the AutoLock feature by clearing all blocking options or by entering your access code Press the MENU button on the remote to show the onscreen menu Press the CURSOR DOWN button twice to highlight FEA TURES Press the CURSOR RIGHT button and the menu will shift to the left Then press the C...

Страница 28: ...playback of TV programs Press the MENU button on the remote control to show the onscreen menu Press the CURSOR DOWN button once to highlight SOUND Press the CURSOR RIGHT button and the menu will shift to the left TREBLE will be highlight ed and an adjustment bar will be shown to the right Use the CURSOR RIGHT or CURSOR LEFT button to adjust the TREBLE high frequency level of the televisionÕs sound...

Страница 29: ...see the TVÕs volume level settings on the TV screen The Volume Bar will be seen each time the VOLUME buttons on the TV or remote con trol are pressed Press the VOLUME or Ð button on the remote control to show the VOLUME bar display on the screen Press the VOLUME or Ð button to adjust the televisionÕs sound level SOUND ADJUSTING THE VOLUME BEGIN SMART HELP Try it out Press the VOL and Ð buttons The...

Страница 30: ...h the AVL Audio Volume Leveler control turned ON you can have the TV level out sound that is being heard This makes for a more consistent sound by reducing the peaks and valleys that occur during program changes or commercial breaks To turn the AVL ON follow these steps Press the MENU button on the remote control to show the onscreen menu Press the CURSOR DOWN button once to highlight SOUND Press ...

Страница 31: ... the INCR SURR but ton on the remote control to turn the Incredible Surround feature ON When the TV signal is being received in Stereo pressing this button will give you these options STEREO or INCR SURROUND When the TV signal is in MONO the choices displayed will read SPATIAL or MONO BEGIN NOTE If the TV signal is being received from a stereo source press ing the INCR SURR button will toggle thre...

Страница 32: ...lect STEREO or MONO When STEREO has been selected the television will reproduce any stereo broadcast signal it receives Press the STATUS EXIT but ton to remove the menu from the screen An SAP is an additional part of the stereo broadcast system Sent as a third audio channel an SAP can be heard apart from the cur rent TV program sound TV sta tions are free to use SAP for any number of purposes If a...

Страница 33: ...T jacks on a stereo receiver set AUDIO OUT to either VARIABLE or FIXED to determine whether you adjust the volume at the stereo or at the TV If you select VARIABLE change the vol ume at the TV using the TVÕs remote control If you select FIXED adjust the volume at the stereo using the stereoÕs controls To select FIXED or VARIABLE follow these steps Press the MENU button on the remote control to sho...

Страница 34: ...he TV to the R and L audio input jacks on your amplifier or sound system Set the audio systemÕs volume to a normal listening level Turn the TV and audio sys tem ON You can now adjust the sound level coming from the audio system with the VOLUME or Ð buttons on the TV or remote control To hear the TV sound from only the audio system speakers Press the MENU button on the remote control to show the on...

Страница 35: ...er terminals on the TV Place the speakers so that the viewing area is between the TV and the rear surround speakers See overhead view drawing Turn the TV and the STEREO control ON After setup whenever a stereo sig nal is received the audio will be heard in Surround Sound REAR SURROUND SOUND SPEAKER TERMINALS SMART HELP Remember Surround Sound will not work with only one speaker connected nor with ...

Страница 36: ...ontrol until the AV1 source is selected After AV1 appears insert a prerecord ed tape into the VCR and press the PLAY button to view the tape on the television If AV1 did not appear perform steps 5Ð9 NOTE the actions described in steps 5Ð9 are not illustrated on this page If AV1 did not appear onscreen as one of the choices available to you by pressing the SOURCE button press the M Link button on t...

Страница 37: ...VIDEO CABLE to the S VIDEO output jack on the accessory device Then connect the red and white AUDIO cables to the AUDIO left and right output jacks on the rear of the accessory device Turn the accessory device ON Press the AV button on the remote control to tune the AV2 channel You are now ready to view the tape or disc on the TV AUDIO IN RED WHITE SMART HELP The S VIDEO and VIDEO AV2 in puts are ...

Страница 38: ...DVD play ers The color difference signals Pb Pr and the luminance Y signal are connected and received separately which allows for improved color bandwidth infor mation not possible when using composite video or S Video con nections Connect the Component Y Pb Pr Video OUT jacks from the DVD player or similar device to the Y Pb Pr in put jacks on the TV Connect the red and white AUDIO CABLES to the ...

Страница 39: ...and viewing conditions that you may have in your home The Movies Sports Weak Signal and Multmedia AutoPicture controls have been preset at the factory to automatically adjust the TV s brightness color picture sharp ness tint and color temperature levels The Personal AutoPicture settings are the ones that you made through the PICTURE options with in the onscreen menu Press the PICTURE button on the...

Страница 40: ...ref erences through the onscreen Sound menu The three factory set controls Voice Music and Theatre enable you to tailor the TV sound so as to enhance the particular program you are watching Follow these steps to select any of the options Press the SOUND button on the remote control The current AutoSoundTM setting will appear in the middle of the screen Press the SOUND button repeatedly to toggle a...

Страница 41: ...creen dis play may read ÒSURF LIST EMPTY Ó The number of the cur rent channel will be shown with ÒADD Ó to the right While the SURF list message or the SURF channel list appears on the screen press the CURSOR RIGHT button to add the present channel to the SURF list If you want to delete the present channel from the SURF list press the CURSOR RIGHT button again Repeat steps 1 through 3 to add more ...

Страница 42: ... AUDIO red and white AV1 in put right and left jacks on the television NOTE In order to get a picture in the PIP window you must select a source by pressing the PIP SOURCE button on your remote control and toggling among the sources see page 43 Selecting the Signal Source To view the signal supplied by your VCR or another accessory device such as a DVD be sure that you select the external AV sourc...

Страница 43: ... device hooked to the exter nal A V connections ON Press the PIP button on the remote control The PIP window should appear in the upper right hand portion of the screen Press the SOURCE button on the remote control to toggle among the different external con nections The PIP SOURCE may come from the following AV1 AV2 AV3 S VIDEO Ð for picture signal coming from the external audio video jacks on the...

Страница 44: ...P window from the main screen Press the POSITION button on the remote control to move the PIP picture to any of the four corners Press the FREEZE button on the remote control to stop the action within the PIP window Press the FREEZE button again to resume the normal view ing action Press the SWAP button to swap the main screen picture with the PIP picture Pressing the SWAP button again will return...

Страница 45: ...emote control to show the onscreen menu Press the CURSOR DOWN button twice to highlight FEA TURES Press the CURSOR RIGHT button and the menu will shift to the left Press the CURSOR DOWN button twice to highlight PIP Press the CURSOR RIGHT button again to shift the display to the COLOR adjustment bar Press the CURSOR RIGHT or the CURSOR LEFT button to adjust the COLOR bar to the desired level Press...

Страница 46: ... cable converter and the ANTENNA plug on the rear of the television Connect the CABLE OUT on the Converter to the ANTENNA IN on the VCR Connect the VIDEO OUT jack on the VCR to the VIDEO IN jack on the TV Also connect the AUDIO OUT right and left jacks from the VCR to the AUDIO IN jacks on the television PIP MORE CONNECTIONS BEGIN REAR OF TV AUDIO CABLES RED AND WHITE VIDEO CABLE YELLOW VCR CABLE ...

Страница 47: ...o the AV1 in put VIDEO jack on the TV Then con nect the red and white audio cables from the AUDIO OUT jacks L and R on the VCR to the AV1 in put AUDIO jacks on the rear of the TV Connect the yellow video cable from the VIDEO OUT jack on the DVD or similar device to the AV2 in put VIDEO jack on the TV Then connect the red and white audio cables from the AUDIO OUT jacks L and R on the DVD or similar...

Страница 48: ...HANNEL EDIT control into the TV s memory Check to be sure the TUNER MODES are set to the CABLE option and run the Auto Program feature to find all available channels Please make these simple checks before calling for service Because charges for TV installa tion and adjustment of customer controls are not covered under your warranty these tips can save you time and money CAUTION A video source such...

Страница 49: ...io signal that produces a dramatic expansion of the wall of sound that surrounds the listener and heightens overall viewing pleasure Menu An onscreen listing of feature controls that are available for you to adjust Multichannel Television Sound MTS The broadcast stan dard that allows for stereo sound to be transmitted with the TV picture Onscreen Displays OSD The wording or messages generated by t...

Страница 50: ...ent Video Input Jacks 36 DVD or similar device Hookup 36 38 47 Dynamic Noise Reduction DNR Control 7 External Speaker Connections 35 Features 5 Format Screen Control 9 Glossary of Television Terms 49 ImageMax 7 Incredible Surround 31 Language Control Q U 3 M Link specific Remote Control Buttons MLink ITR REC Home Video Home Movies Personal Q U 2 Picture Adjustment Controls 6 PIP Picture in Picture...

Страница 51: ...ce Mid Atlantic 352 Dunks Ferry Rd Bensalem PA 19020 215 638 7500 EL4482 3 Rev BB 3135 015 07541 Miami SE Florida Chicago Cleveland N Ohio Tampa W Florida Ft Myers SW Florida San Francisco Metro Area Detroit Toledo Pittsburgh WV Area Philadelphia S New Jersey Atlanta N Georgia Houston Galveston Beaumont Knoxville E Tennessee Charlotte Los Angeles Dallas Columbus Wash Balt Orlando Indicates In Home...

Страница 52: ... AVAILABLE Warranty service is available in all countries where the product is offi cially distributed by Philips Consumer Electronics Company In coun tries where Philips Consumer Electronics Company does not distribute the product the local Philips service organization will attempt to pro vide service although there may be a delay if the appropriate spare parts and technical manual s are not read...

Отзывы: