background image

47

English

Radio Operations 

(continued)

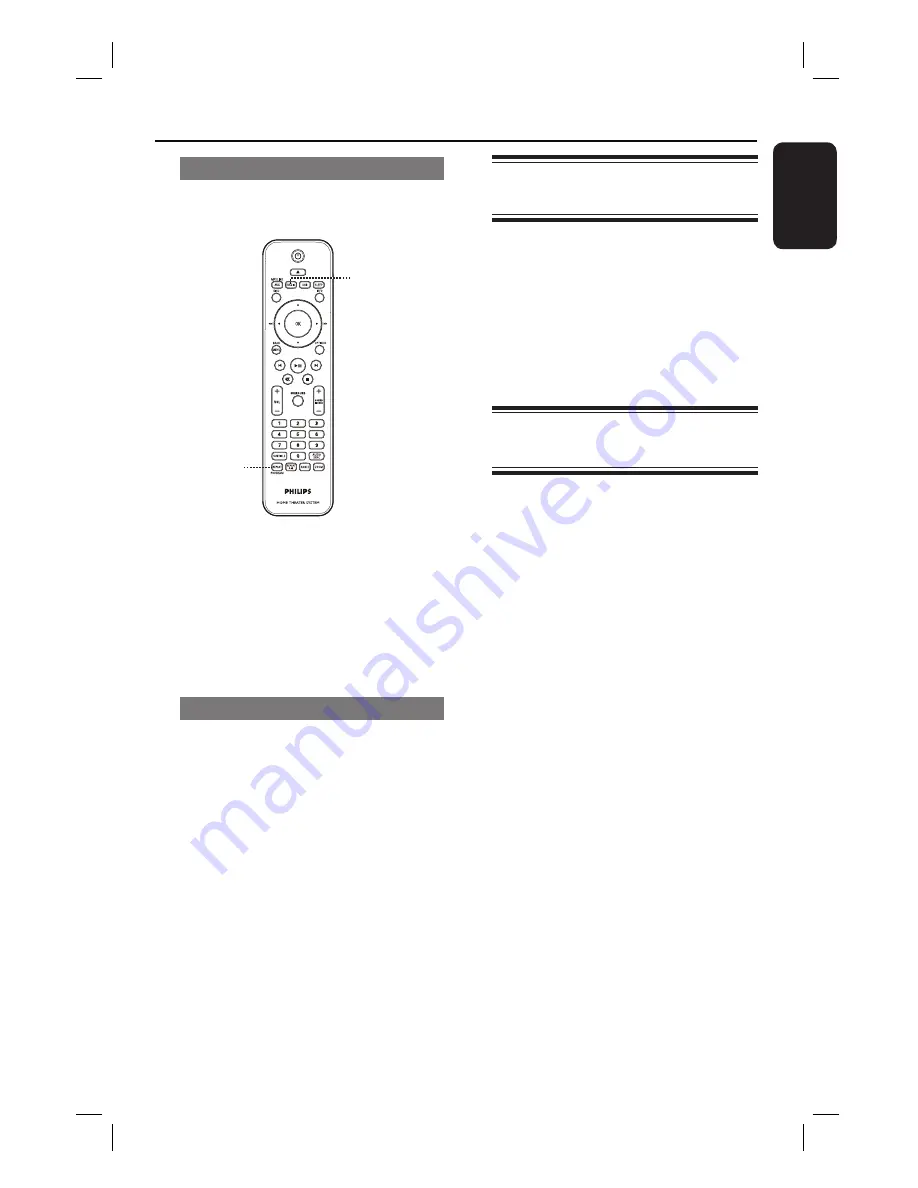
Using automatic preset

Use automatic presetting to store or 
reinstall all the preset radio stations.

RADIO

REPEAT

PROGRAM

A

 Press 

RADIO


B

 Press and hold 

REPEAT (PROGRAM)


until ‘START ...’ appears on the display 
panel.

 All previously stored radio stations 

will be replaced.

Using manual preset

Use manual presetting to store your 
favourite radio stations.

A

 Tune to your desired radio station (see 

‘Tuning to radio stations’).

B

 Press 

REPEAT (PROGRAM)

.

C

 Press 

í

 / 

ë

 or use the 

numeric 

keypad 0-9


to select a preset number 

that you want to store the current radio 
station. 

D

 Press 

REPEAT (PROGRAM)

 to store.

Selecting a preset radio 
station

A

 Press 

RADIO

.

B


Press 

í

 / 

ë

 or use the 

numeric 

keypad 0-9

 to select a preset radio 

stations.

 The preset number and radio 

frequency appear on the display panel.

Deleting a preset radio 
station

A

 In radio mode, press 

í

 / 

ë

 to select a 

preset radio station.

B

 Press and hold


x


until

 ‘FM X DELETED’ 

appears.

 ‘X’ is the preset number.
 

The radio station continues to play 

but has been deleted from the preset list.

 The rest of the preset radio stations 

remain unchanged.

1_hts3164_12_eng 5 Finalwk752.in47   47

1_hts3164_12_eng 5 Finalwk752.in47   47

2007-12-28   1:26:16 PM

2007-12-28   1:26:16 PM

Содержание HTS3164

Страница 1: ...m 6 FR Système Home Cinéma DVD 56 ES Sistema de cine en casa con DVD 106 DE DVD Home Entertainment System 156 NL DVD home theatre systeem DVD home theatre systeem 206 HTS3164 1_hts3164_12_eng 5 Finalwk752 in1 1 1_hts3164_12_eng 5 Finalwk752 in1 1 2007 12 28 1 26 04 PM 2007 12 28 1 26 04 PM ...

Страница 2: ...een or green and yellow Before replacing the plug cover make certain that the cord grip is clamped over the sheath of the lead not simply over the two wires Copyright in the U K Recording and playback of material may require consent See Copyright Act 1956 and The Performer s Protection Acts 1958 to 1972 ATTENTION For Customer Use Read carefully the information located at the bottom or rear of your...

Страница 3: ...t så länge stickproppen sitter i vägguttaget SF Luokan 1 laserlaite Varoitus Laitteen käyttäminen muulla kuin tässä käyttöohjeessa mainitulla tavalla saattaa altistaa käyttäjän turvallisuusluokan 1 ylittävälle näkymättömälle lasersäteilylle Oikeus muutoksiin varataan Laite ei saa olla alttiina tippu ja roiskevedelle Huom Toiminnanvalitsin on kytketty toisiopuolelle eikä se kytke laitetta irti sähk...

Страница 4: ...Bestandteilen hergestellt die dem Recycling zugeführt und wiederverwertet werden können Falls dieses Symbol eines durchgestrichenen Müllcontainers auf Rollen auf diesem Produkt angebracht ist bedeutet dies dass es von der Europäischen Richtlinie 2002 96 EG erfasst wird Bitte informieren Sie sich über die örtlichen Sammelstellen für Elektroprodukte und elektronische Geräte Bitte beachten Sie die lo...

Страница 5: ...nufactured under license under U S Patent s 5 451 942 5 956 674 5 974 380 5 978 762 6 487 535 other U S and worldwide patents issued pending DTS and DTS Digital Surround are registered trademarks and the DTS logos and Symbol are trademarks of DTS Inc 1996 2007 DTS Inc All Rights Reserved DivX DivX Ultra Certified and associated logos are trademarks of DivX Inc and are used under license Windows Me...

Страница 6: ...Started 19 23 Finding the correct viewing channel 19 Switching to different play source 19 Setting language preferences 20 21 On screen display OSD language 20 Audio Subtitle and Menu language for DVD playback 20 21 Setting up Progressive Scan feature 22 Setting the speakers channels 23 Disc Playback Disc Operations 24 32 Playable discs 24 Playing a disc 24 Basic playback controls 25 Selecting var...

Страница 7: ...6 Audio Setup 37 38 Video Setup 39 42 Preferences 43 45 Radio Tuning Radio Operations 46 47 Tuning to radio stations 46 Presetting radio stations 46 47 Using auto install 46 Using automatic preset 47 Using manual preset 47 Selecting a preset radio station 47 Deleting a preset radio station 47 Others Sound and Volume Controls 48 Volume control 48 Selecting surround sound 48 Selecting digital sound ...

Страница 8: ...xposed to dripping or splashing Never place any object or items that can damage this unit e g liquid filled objects lighted candles Accessories supplied 1 subwoofer 2 front speakers 2 rear speakers 1 centre speaker 1 remote control with batteries 1 scart cable 1 FM wire antenna Quick Start Guide Cleaning discs To clean a disc use a micro fibre cleaning cloth and wipe the disc from the centre to th...

Страница 9: ...next title chapter track DISC press and hold this button for fast forward and backward search RADIO selects a preset radio station Stop Exits an operation DISC stops playback RADIO press and hold this button to erase the current preset radio station Note The following sockets are under the flap at the right corner of the front panel OPEN h USB socket Input for USB flash drive or USB memory card re...

Страница 10: ... frequency RADIO press left or right to start auto search h OPTIONS Enters or exits the system setup menu i u Play Pause DISC starts pauses playback RADIO starts auto radio installation for first time setup j x Stop Exits an operation DISC stops playback RADIO press and hold this button to erase the current preset radio station k Numeric keypad 0 9 Enters a track title chapter of the disc Enters a...

Страница 11: ... s SOUND MODES Selects a predefined sound effect t SUBTITLE Selects a DVD subtitle language u REPEAT PROGRAM DISC Selects various repeat or shuffle modes turns off repeat or shuffle mode RADIO Press this button to start manual preset programming RADIO Press and hold this button to start automatic preset programming REPEAT A B Repeat a specific section of a disc v ANGLE Select a different viewing a...

Страница 12: ... you wish to control by pressing the AUX MP3 LINK RADIO USB or DISC button on the remote control F Then select the desired function for example í ë CAUTION Remove batteries if they are exhausted or if the remote control is not to be used for a long time Never mix batteries old and new or carbon and alkaline etc Batteries contain chemical substances they should be disposed of properly 1_hts3164_12_...

Страница 13: ... the corner of the room Otherwise keep it at least one metre away from the TV Helpful Hints The placement diagram shown here is only a guideline that provides great system performance You may find other placement choices that are more suitable for your room layout that provide the sound experience you enjoy To avoid magnetic interference never position the front speakers too close to your TV The r...

Страница 14: ...t panel Option 1 Connecting to the Scart socket Connect the scart cable supplied from the SCART TO TV socket on the main unit to the corresponding SCART input socket on the TV Helpful Hint With this connection audio connection is not required you can press AUX MP3 LINK repeatedly on the remote control to select SCART IN to route the TV s audio to the speakers Option 2 Connecting to theVideo socket...

Страница 15: ... Connecting to a HDMI compatibleTV HDMI High Definition Multimedia Interface is a digital interface that allows pure digital video transmission without the loss of image quality It provides best picture quality A Use the HDMI cable not supplied to connect the HDMI OUT on the main unit to the HDMI IN on a HDMI compatible device e g HDMI TV HDCP compliant DVI TV It provides best picture quality Note...

Страница 16: ...the colours of the cables and sockets are matched Helpful Hint To prevent unwanted noise never place the speakers too close to the main unit subwoofer AC power adapter TV or any other radiation sources REAR LEFT REAR RIGHT SUBWOOFER FRONT CENTRE FRONT LEFT FRONT RIGHT 1_hts3164_12_eng 5 Finalwk752 in16 16 1_hts3164_12_eng 5 Finalwk752 in16 16 2007 12 28 1 26 10 PM 2007 12 28 1 26 10 PM ...

Страница 17: ...ED on the main unit lights up Helpful Hints Refer to the type plate at the rear or bottom of the product for identification and supply ratings Before making or changing any connections make sure that all the devices are disconnected from the power outlet 1_hts3164_12_eng 5 Finalwk752 in17 17 1_hts3164_12_eng 5 Finalwk752 in17 17 2007 12 28 1 26 10 PM 2007 12 28 1 26 10 PM ...

Страница 18: ...r A Keep the existing connections between your TV and other devices B Use the scart cable to connect this unit to your TV If your TV does not have double scart connectors see Step 2 Connecting to TV for other video connection options C Connect an audio cable red white not supplied from the AUDIO IN AUX sockets on the main unit to the AUDIO output sockets on the Cable Satellite Box To listen to the...

Страница 19: ...user manual on how to select the correct input on your TV Getting Started Switching to different play source On the main unit Press the SOURCE button on the main unit repeatedly to select DISC FM SCART IN AUX MP3 LINK DISC Or On the remote control Press AUX MP3 LINK repeatedly to hear the audio output from the external device SCART IN for device connected to SCART TO TV sockets AUX for device conn...

Страница 20: ...n select your preferred language settings for DVD playback If the selected language is recorded on the DVD disc this unit automatically plays the disc in that language Otherwise the disc s default language will be used instead A Press Ç twice to stop playback if any then press OPTIONS B Press repeatedly to select Preferences icon and press C Use keys to select one of the options below and press Pr...

Страница 21: ...Hints During DVD playback you can press the AUDIO SYNC and SUBTITLE on the remote control to change the audio and subtitle languages respectively However this does not change the default settings you have made here For some DVDs the subtitle audio disc menu language can only be changed via the DVD disc menu Getting Started continued 1_hts3164_12_eng 5 Finalwk752 in21 21 1_hts3164_12_eng 5 Finalwk7...

Страница 22: ...sive On in the menu and press OK to confirm F Read the notification message on the TV and confirm your action by selecting the OK in the menu and press OK There will be no picture on your TV at this state until you have turned on the progressive scan mode on your TV G Turn on your TV progressive scan mode refer to your TVs user manual A message appears on the TV H Confirm your action by selecting ...

Страница 23: ...me Speakers Delay HDMI Audio CD Upsampling Audio Sync D Use keys to set the volume level for each speaker 6dB 6dB and press OK to confirm E Use keys to highlight Speakers Delay and press Press OPTIONS to exit menu Audio Setup Center Rear Left Rear Right Speakers Distance Setup 0ms 0ms 0ms Speakers Volume Speakers Delay HDMI Audio CD Upsampling Audio Sync F Use keys to set the delay times 0 ms 15 m...

Страница 24: ... disc or at the current time Never put any objects other than discs on the disc tray Doing so may cause the unit to malfunction Playing a disc A Press SOURCE repeatedly until DISC appears on the display panel or press DISC on the remote control B Turn on the TV to the correct viewing channel for this unit The blue DVD background screen appears on the TV C Press ç to open the disc tray D Load a dis...

Страница 25: ...ndby mode if you do not press any buttons within 15 minutes after a disc has stopped playing Screen saver starts automatically if the disc playback is stopped for about 5 minutes Selecting various repeat shuffle functions The available of the repeat play options and shuffle play mode are vary depending on the disc type While playing a disc press REPEAT PROGRAM on the remote control repeatedly to c...

Страница 26: ...AT A B again to end the section The section will now repeat continuously C Press REPEAT A B again to resume normal playback Helpful Hints The marked section for repeat playback is only possible within the same track chapter 1_hts3164_12_eng 5 Finalwk752 in26 26 1_hts3164_12_eng 5 Finalwk752 in26 26 2007 12 28 1 26 12 PM 2007 12 28 1 26 12 PM ...

Страница 27: ...ation for example title or chapter number audio subtitle language and a number of operations can be done without interrupting disc playback A During playback press INFO A list of available disc information appears on the TV DVD Menu Title Chapter Audio Subtitle 01 01 02 99 2ch Chi Off Bitrate 7 Title Elapsed VCD SVCD Bitrate 8 Total Elapsed Track DiscTime TrackTime Repeat 09 16 1 16 05 0 04 32 Off...

Страница 28: ...VCDs SVCDs with multiple audio channels For DVD Press AUDIO SYNC repeatedly to select the available audio languages For VCD and SVCD Press AUDIO SYNC repeatedly to select the available audio channels provided by the disc STEREO MONO LEFT MONO RIGHT or MIX MONO Setting the delay times for audio playback This feature allows you to adjust the audio delay times if the video playback is slower than the...

Страница 29: ...ferent tracks on one screen each time It allows you to have a quick glance at all the tracks on the disc Disc Interval View the whole disc in six thumbnail pictures It divides a disc into six portions at regular intervals and displays them on one screen Track Interval View the content of a single track in six thumbnail pictures It divides a single track into six portions at regular intervals and d...

Страница 30: ...tinue till the end of the folder Disc Operations continued During playback Press í ë to playback another file in the current folder Press m M to fast reverse forward search for a track To select another folder from the current disc press repeatedly to highlight Previous folder and press OK to return to the root menu D To stop playback press x Helpful Hints You can set to display or skip the folder...

Страница 31: ...annot display progressive JPEG Motion JPEG or pictures in formats other than JPEG or sound clips associated with pictures Preview function A During playback press INFO 12 thumbnail pictures will be displayed on the TV B Press í ë to display the other pictures on the previous next page C Use keys to select one of the pictures and press OK to start playback D Press MENU BACK to return to Picture CD ...

Страница 32: ...e keys to navigate to the file you want to play C Press OK to start playback During playback If the DivX disc has multilingual subtitles you can press SUBTITLE on the remote control to change the subtitle language If the DivX title has different audio tracks you can press AUDIO SYNC on the remote control to change the audio stream Use m M keys on the remote control to perform fast reverse forward ...

Страница 33: ...ary from different card readers D Select the file to play and press u For more playback information see Playing a DivX disc Playing a JPEG photo file slide show or Playing a MP3 WMA disc for details E Before you remove the USB device press Ç to stop playback or press DISC to switch to disc mode Helpful Hints The USB socket does not support the connection of other USB devices except to a USB flash ...

Страница 34: ...t on this unit to the headphone output socket on your portable audio player B Press AUX MP3 LINK repeatedly on the remote control until MP3 LINK is displayed C Start playback on your portable audio player The music will be heard through the speakers D To stop playback press the STOP button on the portable audio player Helpful Hint Stop playback on your portable audio player before you switch this ...

Страница 35: ...this unit to suit your particular requirements OPTIONS OK A In disc mode press OPTIONS on the remote control The setup menu appears B Use keys to select one of the setup menu options then press General Setup Audio Setup Video Setup Preferences If you are not able to access the Preferences press OPTIONS to exit the menu Then press x twice before you press the OPTIONS again C Use keys to select an o...

Страница 36: ... on screen display Screen Saver The screen saver prevents damage to the TV screen by avoiding exposure to a static image for too long On Switch to TV screen saver mode when playback has been stopped or paused for about 5 minutes Off Disable the screen saver function Sleep The sleep timer enables the unit to switch to standby mode automatically after at a preset time 15 30 45 60 mins Select the pre...

Страница 37: ...akers HDMI Audio This setting is only required if you are using the HDMI OUT socket to connect your TV or other display device see Option 4 Connecting to a HDMI compatible TV Off Turn off the HDMI audio output You can still enjoy the sound output through the speaker system All The HDMI audio output will be same as the audio stream being played back In the case when the playback audio format is not...

Страница 38: ...you switch to Multi channel mode If you press SURROUND on the remote control it turns off the CD upsampling feature Audio Sync This feature allows you to adjust the audio delay times if the video playback is slower than the audio output streams Use keys to set the delay times for the audio output between 0 200ms Audio Setup underlined options are the factory default settings Setup Menu Options con...

Страница 39: ...and that you have connected this unit to your TV using the Y Pb Pr See Getting Started Setting up Progressive Scan feature for details Off Turn off the progressive scan mode On Turn on progressive scan mode Read the instructions on the TV and confirm your action by pressing OK on the remote control Picture Setting This unit provides three predefined sets of picture colour settings and one personal...

Страница 40: ...re disc on the wide screen TV without stretching Black bars will be shown on the both sides of the TV screen Off No aspect ratio adjustment is made when this option is selected Note The Superwide is only applicable for resolution 720p or 1080i HDMI Video Select a suitable video resolution that is compatible with your TV display capability Auto It detects and selects the best supported video resolu...

Страница 41: ... this feature select Off System Standby Press STANDBY POWER button to turn off this unit and all the HDMI CEC compliant devices To disable this feature select Decline Note However press and hold 2 button on this unit remote control can still turn off all the HDMI CEC compliant devices System Audio Control This unit automatically switches to the audio input of the active device and output the sound...

Страница 42: ... connection RGB For scart TV OUT connection Closed Caption This feature is only available if the disc contains of special video signal data It shows sound effects on the screen if your TV supports this feature such as phone ringing and footsteps On Turn on closed caption feature Off Turn off closed caption feature 1_hts3164_12_eng 5 Finalwk752 in42 42 1_hts3164_12_eng 5 Finalwk752 in42 42 2007 12 ...

Страница 43: ...ntry dependent 1 is considered material that is least offensive and 8 is most offensive To disable parental controls and allow all discs to play select 8 Some DVDs are not encoded with a rating though the movie rating may be printed on the disc cover The rating level feature does not prohibit playback of such discs VCD SVCD and CD have no level indication so parental control has no effect on these...

Страница 44: ...pad 0 9 on the remote control to enter your existing six digit password at Old Password Note When doing this for the first time or if you forget your existing password key in 136900 3 Enter the new six digit password at New Password 4 Enter the new six digit password again at Confirm PWD 5 Press OK to confirm and exit the menu DivX Subtitle Select the font type that supports the recorded DivX subt...

Страница 45: ...ock and Parental Press OK to confirm the default reset Version Info This shows you informations about the current version of the software installed in this unit You may require this information for future online firmware upgrade Press OK to display the software version of this unit Setup Menu Options continued 1_hts3164_12_eng 5 Finalwk752 in45 45 1_hts3164_12_eng 5 Finalwk752 in45 45 2007 12 28 1...

Страница 46: ...tation is transmitting RDS Radio Data System data the RDS name will be displayed and stored Presetting radio stations You can store up to 40 FM preset radio stations in the memory There are three different ways to program the radio stations Using auto install for first time setup only Using automatic preset Using manual preset Helpful Hints This unit exits presetting mode if no button is pressed w...

Страница 47: ... 9 to select a preset number that you want to store the current radio station D Press REPEAT PROGRAM to store Selecting a preset radio station A Press RADIO B Press í ë or use the numeric keypad 0 9 to select a preset radio stations The preset number and radio frequency appear on the display panel Deleting a preset radio station A In radio mode press í ë to select a preset radio station B Press an...

Страница 48: ...output to the center rear left and rear right speakers Selecting digital sound effects Select a preset digital sound effect that matches your disc s content or that optimises the sound of the musical style you are playing Press SOUND MODES to select the available sound effect Movies Music Description CONCERT CLASSIC Flat and pure sound mode Ideal for listening to classical music and watching live ...

Страница 49: ...n of this unit with the latest software version available at the Philips website A Press OPTIONS to select Preferences menu B Select Version Info and press OK to check the software version of this unit Press OPTIONS to exit menu DivX Subtitle Default Parental Disc Menu PBC MP3 JPEG Nav Password Preferences Version Info C Write down the version number then press OPTIONS to exit the menu D Go to www...

Страница 50: ...w 1 Press ç to open the disc tray 2 Press on the remote control 3 Press AUDIO SYNC on the remote control If this happens when you change the HDMI video setting wait for 15 seconds for the auto recover or switch to the default mode as below 1 Press ç to open the disc tray 2 Press on the remote control 3 Press ZOOM on the remote control Check the video connection Sometimes a small amount of picture ...

Страница 51: ...c for playback Moisture may have condensed inside this unit Remove the disc and leave this unit turned on for about an hour The aspect ratio is fixed on the DVD disc Depending on the TV it may not be possible to change the aspect ratio The features may not be available on the DVD Changing the language for the sound or subtitle is prohibited on this DVD Press x twice before selecting the system set...

Страница 52: ... High bandwidth Digital Content Protection compatible It is not possible to output SACD or copy controlled DVD Audio sources from the HDMI connection Make sure that the audio output setting is not turned off See Setup Menu Options Audio Setup HDMI Audio for details HDMI connection can only be made to HDMI equipped devices with HDCP High Bandwidth Digital Content Protection If you wish to connect t...

Страница 53: ...Hz PCM IEC 60958 Dolby Digital IEC 60958 IEC 61937 DTS IEC 60958 IEC 61937 USB Compatibility Hi Speed USB 2 0 Class Support UMS USB Mass Storage Class MTP Media Transfer Protocol MAIN UNIT Power Supply Rating 220 240V 50Hz Power Consumption 60 W Dimensions 360 x 58 x 332 mm w x h x d Weight 2 8 kg FRONT AND REAR SPEAKERS System Full range satellite Impedance 4 Ω Speaker drivers 3 full range speake...

Страница 54: ... sound system developed by Dolby Laboratories containing up to six channels of digital audio front left and right surround left and right centre and subwoofer Dolby Surround Pro Logic II It is an improved matrix decoding technology that provides better spatiality and directionality on Dolby Surround programme material provides a convincing three dimensional sound field on conventional stereo music...

Страница 55: ...vigating a Video CD Super VCD through on screen menus recorded onto the disc You can enjoy interactive playback and searching Progressive Scan The progressive scan displays twice the number of frames per second than in an ordinary TV system It offers higher picture resolution and quality Region code A system allowing discs to be played only in the region designated This unit will only play discs t...

Отзывы: