background image

15

Q

L

M

G

J

H

I

V

D

C

B

K

O

F

E

R

S

T

U

P

A

N

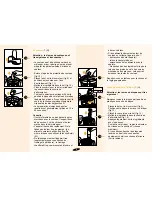
Description générale

(fig.1)

A

Bloc moteur

B

Bol

C

Couvercle du bol

D

Doigt de sécurité du bol (active et

désactive l'interrupteur de sécurité)

E

Ergot du bol (couvre l'orifice de la
poignée) 

F

Interrupteur de sécurité incorporé

G

Couteau 

£

H

Disque à émincer / râper 

(moyennement fin, deux faces)

I

Batteur 

ß

J

Accessoire de pétrissage 

©

K

Axe d'entraînement

L

Cheminée de remplissage

M

Poussoir

N

Sélecteur de vitesse
O

= Arrêt

1 - 2 =  réglage variable des vitesses

= vitesse minimum, 
= vitesse maximum)

M

= Touche Eclair (impulsions)
(l'appareil est en marche tant que 
vous appuyez sur le bouton)

O

Enrouleur de cordon avec serre câble

(pour maintenir le câble enroulé)

P

Capuchon fileté (pour couvrir l'ouverture
ou se fixe le bol mélangeur lorsqu'on ne
l'utilise pas)

Accessoires du bol mélangeur 

®

Q

Bouchon

R

Couvercle

S

Bol mélangeur

T

Joint en caoutchouc

U

Couteaux

V

Spatule

1

Français

Содержание HR7725/02

Страница 1: ...2 English Page 3 Français Page 15 Deutsch Seite 27 Nederlands Pagina 39 Italiano Pagina 51 Ελληνικά Σελίδα 63 ...

Страница 2: ...ium fine double sided I Beater ß J Kneading accessory K Driving shaft L Chute M Pusher N Speed control O Off 1 2 variable speed control 1 lowest speed 2 highest speed M Moment Pulse button appliance runs as long as button is pressed O Cord clip for fixing the cord when wrapped P Screw cap for closing the attaching hole for the blender jar when it is not used Blender accessories Q Stopper R Lid S B...

Страница 3: ...ou use it Be very careful when you pick up the blade the knife of the blender and the slicing grating disc They are very sharp Thoroughly clean the parts that will come into contact with food before you use the appliance for the first time Place the lid on the bowl in the right position The built in safety lock will now be deblocked and you will be able to turn on the appliance Note that if both t...

Страница 4: ...he chute while the appliance is running to prevent dust or drops of liquid from escaping through the chute fig 9 Built in safety lock F The motor unit as well as the lid C have been provided with marks The appliance will only function if the arrow on the motor unit is placed directly opposite the mark on the lid In this position the projection E of the lid will cover the opening in the handle of t...

Страница 5: ...rd cheese the cheese will get too hot and will start to melt and become lumpy If food sticks to the blade or to the inside of the bowl turn the appliance off remove the lid from the bowl remove the ingredients from the blade or the inside of the bowl with a spatula Do not chop very hard ingredients like coffee beans nutmeg and ice cubes They could cause the blade to get blunt Check the table for t...

Страница 6: ... the appliance on If you have doubts about the correct speed always select the highest speed position 2 fig 21 Applications recipes mentioned in the table will be ready after 2 5 minutes Kneading accessory J The kneading accessory can be used for kneading bread dough and for mixing batters and cake mixtures Put the bowl on the motor unit fig 2 and fit the kneading accessory onto the driving shaft ...

Страница 7: ...e blender is running Assembly and disassembly Put the rubber sealing ring T around the edge of the knife unit U fig 27 Turn the knife unit to the left to attach it to the blender jar fig 28 Make sure it is firmly fixed Remove the screw cap P fig 29 Mount the blender jar onto the attaching hole and turn it in the direction of the arrow until it is firmly fixed fig 30 Warning do not exert too much p...

Страница 8: ...proximately 2 cm Cleaning Always unplug the appliance before you start cleaning the motor unit You can clean the motor unit with a damp cloth Do not immerse the motor unit in water and do not rinse it either Always clean the parts that have come into contact with food in hot water with washing up liquid immediately after use Clean the blade the knife unit of the blender and the slicing disc very c...

Страница 9: ...ut the cheese into pieces that fit into the chute Press carefully with the pusher Use hard plain chocolate Break into pieces of 2 cm Use the pulse setting M during the first few seconds and then switch to max speed to chop very finely Use cold margarine and cold water Put flour in the bowl and add the margarine cut into pieces of 2 cm Mix at max speed until the dough has become crumbly then add co...

Страница 10: ...n a smooth puree Wash and dry the herb s before chopping Fill the chute with leeks pieces of cucumber or carrots and press carefully with the pusher Use all ingredients at room temperature Note use at least one big egg two smal eggs or two big egg yolks First remove sinews and fish bones Cut the meat fish into cubes of 3 cm Use the pulse setting for a coarser chopping result Puree the fruit e g ba...

Страница 11: ...onions and cut them into 4 pieces Note use at least 100 g Peel the onions and cut them into pieces that fit into the chute Note use at least 100 g Use cooked beans or peas If necessary add some liquid to improve the consistency of the mixture Do not overcook the potatoes The amount of milk necessary depends on the kind of potato used Use warm milk max 80 C Add the milk slowly while the metal blade...

Страница 12: ...ing disc n 4822 690 10139 single sided slicing disc for French fries and e g Swedish turnip HR 2912 n 4822 690 10141 Storage box for discs HR 2922 n 4822 690 40267 Ask your supplier if these accessories are also available in your country If you want to order additional parts or replacements please mention the relevant service and or type numbers 4822 418 10343 4822 418 10342 4203 065 61850 4822 46...

Страница 13: ...in the socket Switch on the appliance again If the automatic cut out system is activated repeatedly contact your Philips dealer or the Philips Service Centre in your country Select the correct speed Look at the indications on the appliance and in the directions for use You can try adding some lemon juice or salt Make sure the beater and the bowl are grease free and select the right speed Use the b...

Страница 14: ...ire de pétrissage K Axe d entraînement L Cheminée de remplissage M Poussoir N Sélecteur de vitesse O Arrêt 1 2 réglage variable des vitesses 1 vitesse minimum 2 vitesse maximum M Touche Eclair impulsions l appareil est en marche tant que vous appuyez sur le bouton O Enrouleur de cordon avec serre câble pour maintenir le câble enroulé P Capuchon fileté pour couvrir l ouverture ou se fixe le bol mél...

Страница 15: ...ntion en prenant le couteau et les disques à émincer râper car ils sont très aiguisés et tranchants Avant la première utilisation nettoyez toutes les pièces en contact avec les aliments Placez correctement le couvercle du bol pour qu il déverrouille l interrupteur de sécurité permettant ainsi la marche du moteur Notez que si le mélangeur et le bol ont été montés correctement seul le mélangeur fonc...

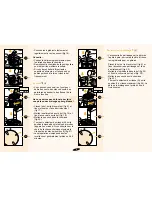
Страница 16: ...servir à fermer la cheminée pendant que l appareil est en marche pour empêcher toute projection fig 9 Verrouillage de sûreté incorporé F Le bloc moteur et le couvercle C comportent des repères L appareil ne peut fonctionner que si la flèche du bloc moteur coïncide exactement avec le repère du couvercle Dans cette position l ergot E du couvercle couvre l ouverture de la poignée du bol Utilisation d...

Страница 17: ...hés trop fins De même lorsque vous utilisez la touche Eclair M Ne laissez pas tourner l appareil trop longtemps lorsque vous hachez du fromage à pâte dure le fromage chaufferait trop commencerait à fondre et à devenir pâteux Si des aliments s enroulent autour du couteau ou collent à la paroi du bol débranchez d abord l appareil retirez le couvercle du bol enlevez ensuite les aliments avec la spatu...

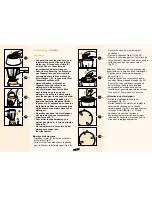
Страница 18: ...bol fig 18 et fixez le couvercle sur le bol fig 19 Mettez le poussoir dans la cheminée fig 20 Tournez le sélecteur de vitesse N sur la position indiquée dans le tableau et mettez l appareil en marche Si vous hésitez sur le choix de la vitesse choisissez toujours la vitesse la plus élevée position 2 fig 21 Les préparations indiquées dans les recettes sont généralement prêtes en 2 à 5 minutes Access...

Страница 19: ...fonctionnement Montage et démontage Disposez le joint T autour du rebord du bloc moteur fig 27 Faites tourner le couteaux vers la gauche pour le fixer sur le bol mélangeur fig 28 Assurez vous qu il est correctement enclenché Retirez le capuchon fileté P fig 29 Montez le bol mélangeur sur l ouverture de raccordement et tournez le dans le sens de la flèche jusqu à son enclenchement fig 30 Attention ...

Страница 20: ... couteaux environ 2 cm Nettoyage Débranchez toujours l appareil avant de nettoyer le bloc moteur Le bloc moteur peut être nettoyé avec un chiffon humide N immergez jamais le bloc moteur dans l eau Ne le placez pas sous l eau Lavez immédiatement après utilisation les accessoires en contact avec les aliments à l eau chaude savonneuse Ne les lavez pas dans le lave vaisselle Faites attention en nettoy...

Страница 21: ... en morceaux de 2 cm Utilisez la touche Eclair pendant quelques secondes et passez ensuite à la vitesse maximum pour hacher très fin Utilisez de la margarine et de l eau froide Versez la farine dans le bol et ajoutez la margarine coupée en morceaux de 2 cm Mélangez à la vitesse maximum jusqu à ce que la pâte devienne friable puis ajoutez de l eau froide tout en mélangeant Arrêtez dès que la pâte c...

Страница 22: ...soir Tous les ingrédients doivent être à température ambiante Remarque utilisez au minimum un gros œuf deux petits œufs ou deux gros jaunes d œufs Retirez d abord les nerfs les os les arêtes Coupez la viande le poisson en dés de 3 cm Utilisez la touche Eclair pour un hachage plus grossier Réduisez en purée le fruit par ex bananes fraises avec du sucre et du jus de citron Ajoutez du lait et de la c...

Страница 23: ...100 g Pelez les oignons et coupez les en morceaux pour les introduire dans la cheminée Remarque utilisez au moins 100 g Utilisez les légumes cuits Si nécessaire ajoutez du liquide pour améliorer la consistance du mélange Ne cuisez pas trop les pommes de terre La quantité de lait nécessaire dépend de la qualité des pommes de terre utilisées Utilisez du lait chaud 80 C max Ajoutez le lait lentement ...

Страница 24: ...ux pommes de terre n 4822 690 10139 disque simple à râper des pommes de terre frites ou par ex HR 2912 N 4822 690 10141 boîte de rangement pour les disques HR 2922 N 4822 690 40267 Demandez à votre revendeur ou Centre Service Agréé Philips si ces accessoires sont disponibles Si vous désirez commander des accessoires supplémentaires ou les remplacer mentionnez les numéros de service 4822 418 10343 ...

Страница 25: ...nouveau l appareil remettez l appareil en marche Si le système d interruption automatique continue à se déclencher contactez votre Centre de Service Agréé Choisissez la bonne vitesse Essayez d ajouter du jus de citron ou du sel Assurez vous que le batteur et le bol ne sont pas gras et choisissez la bonne vitesse Utilisez le fouet Utilisez de la crème à fouetter préalablement refroidie environ 6 C ...

Страница 26: ... Schneebesen ß J Kneteinsatz K Antriebswelle L Einfüllöffnung M Stopfer N Geräteschalter mit stufenlosem Geschwindigkeitsregler 0 Aus 1 Minimal Geschwindigkeit 2 Maximal Geschwindigkeit M Momentschalter Loslassen Aus O Kabelaufwicklung mit Kerbe zum Fixieren von überschüssigem Netzkabel P Schutzverschluß verschließt die Öffnung wenn der Mixbecher nicht aufgesetzt ist Mixbecher Aufsatz Q Einsatz fü...

Страница 27: ...heit des Mixbecher Aufsatzes um sie sind sehr scharf Waschen Sie vor dem ersten Gebrauch sorgfältig alle Teile ab die mit Lebensmitteln in Berührung kommen Achten Sie auf den richtigen Sitz des Deckels der Schüssel Erst dann ist die Sicherheitsverriegelung entriegelt so daß Sie das Gerät einschalten können Hinweis Wenn sowohl die Schüssel wie der Mixbecher aufgesetzt sind ist nur der Mixbecher bet...

Страница 28: ...ken Abb 8 Wenn Sie während des Betriebs den Stopfer in der Einfüllöffnung lassen verhindern Sie Spritzer oder Staubentwicklung Abb 9 Die integrierte Sicherheitsverriegelung F Das Motorgehäuse und der Deckel zur Schüssel C sind mit Markierungen versehen Nur wenn der Deckel auf die Schüssel aufgesetzt und sich die Markierungen auf dem Motorgehäuse und dem Deckel gegenüberstehen ist das Gerät betrieb...

Страница 29: ...ötigen Sie ca 10 bis 60 Sekunden Hinweise Füllen Sie nicht zu große Teile ein Schneiden Sie Stücke in Würfel von ca 3 cm Kantenlänge vor Das Gerät schneidet sehr schnell Bearbeiten Sie darum die Zutaten nicht zu lange selbst wenn Sie die Schalterstellung M verwenden damit das Ergebnis nicht zu fein ausfällt Wenn Sie Hart Käse schnitzeln dann lassen Sie den Motor nicht zu lange laufen Der Käse könn...

Страница 30: ...tzen Sie die Schüssel auf das Motorgehäuse Abb 2 und bringen Sie den Schneebesen auf der Antriebswelle an Abb 17 Geben Sie die Zutaten in die Schüssel Abb 18 und setzen Sie den Deckel ordnungsgemäß auf die Schüssel Abb 19 Verschließen Sie die Einfüllöffnung Abb 20 mit dem Stopfer Stellen Sie den Geräteschalter N auf die erforderliche Position vgl die Tabelle und schalten Sie das Gerät ein Wenn Sie...

Страница 31: ...als bei laufendem Gerät vom Mixbecher Zusammensetzen und Auseinander nehmen des Mixbecher Aufsatzes Legen Sie den Dichtungsring T auf den Rand der Messereinheit U Abb 27 Schrauben Sie dann die Messereinheit in Pfeilrichtung Abb 28 2 fest auf den Mixbecher Schrauben Sie den Schutzverschluß P vom Motorgehäuse ab Abb 29 Setzen Sie den Mixbecher mit der Messereinheit unter Drehung im Uhrzeigersinn auf...

Страница 32: ...feuchten Tuch abgewischt werden Tauchen Sie das Motorgehäuse nie in Wasser und lassen Sie auch nie fließendes Wasser darüber laufen Spülen Sie alle Teile die mit Lebensmitteln in Berührung gekommen sind sofort nach Gebrauch in warmem Wasser dem Sie etwas Spülmittel zugesetzt haben Diese Teile sind für den Geschirrspüler nicht geeignet Seien Sie vorsichtig bei der Reinigung des Messers der Messerei...

Страница 33: ...halter M benutzen Für grobes Püree nur wenig Flüsssigkeit zufügen Für feines Püree Flüssigkeit langsam zufügen bis ein feines glattes Püree entstanden ist In Würfel von ca 3 cm Kantenlänge vorschneiden Einfüllöffnung mit dem Gemüse ausfüllen Mit dem Stopfer leicht nachdrücken Zuerst Hefe warme Milch und etwas Zucker mischen Mehl Salz Eier und weiche Butter Margarine zufügen Kneten Sie den Teig ca ...

Страница 34: ...rank kühlen Kalte Butter Margarine und kaltes Wasser verwenden Das Mehl in die Schüssel geben Butter Margarine in Stücke von ca 2 cm Kantenlänge darauflegen Mischen bis der Teig krümelig ist Dann während des Rührens nach und nach kaltes Wasser zufügen Ausschalten sobald der Teig zur Kugel wird Vor der weiteren Verarbeitung im Kühlschrank kühlen Momentschalter M für grobes Position 2 für feines Erg...

Страница 35: ...n Zucker bis die Mischung geschmeidig und sahnig ist Geben Sie dann die Milch die Eier und das Mehl hinzu Im Kühlschrank gekühlte Sahne verwenden Hinweis Mindestens 125 ml nehmen Reine harte Schokolade in Stücke von ca 2 cm Kantenlänge brechen Mit Momentschalter M beginnen Zum Feinraspeln nach wenigen Sekunden auf maximale Geschwindigkeit schalten Gekochtes Gemüse verwenden Warmes Wasser mit Hefe ...

Страница 36: ...Standardzubehör n 4822 690 10139 Einseitige Schnetzelscheibe für Pommes frites und Kohlrabic HR 2912 Service Nr 4822 690 10141 Kassette für die Scheiben HR 2922 Service Nr 4822 690 40267 Fragen Sie Ihren Händler unter Angabe der Servicenummer ob das gewünschte Teil in Ihrem Lande erhältlich ist oder wenden Sie sich an das Philips Service Center in Ihrem Lande 4822 418 10343 4822 418 10342 4203 065...

Страница 37: ...te an Ihren Philips Händler oder das Philips Service Center in Ihrem Lande Stellen Sie die richtige Geschwindigkeit ein Schauen Sie nach den Angaben auf dem Gerät oder in der Gebrauchsanweisung Sie können versuchen etwas Zitronensaft oder Salz hinzuzufügen Achten Sie darauf daß die Schüssel und der Schneebesen völlig fettfrei sind und wählen Sie die angemessene Geschwindigkeit Verwenden Sie den Sc...

Страница 38: ...kkelmes H Snij raspschijf dubbelzijdig middelfijn I Klopper ß J Kneedhulpstuk K Aandrijfas L Vulopening M Stamper N Snelheidschakelaar O Uit 1 2 variabele snelheidsregeling 1 laagste snelheid 2 hoogste snelheid M Moment Pulse loslaten motor stopt O Snoerklem netsnoer er omheen wikkelen en vastklemmen P Draaideksel voor afsluiten montage opening Mengkan hulpstukken Q Afsluitdeksel R Deksel S Mengka...

Страница 39: ... het mes van de mengkan en de snijschijf Deze zijn zeer scherp Was alle onderdelen die met voedsel in aanraking komen af voordat u het apparaat in gebruik neemt Plaats het deksel op de juiste manier op de kom Dan wordt de ingebouwde beveiliging ontgrendeld en kan het apparaat worden ingeschakeld Let op als de blender en de kom gelijktijdig en juist zijn gemonteerd dan werkt alleen de blender Laat ...

Страница 40: ...ns het gebruik de stamper in de vulopening zetten om deze af te sluiten Zo voorkomt u spatten en stuiven fig 9 Ingebouwde beveiliging F Zowel het apparaat als het deksel C zijn gemarkeerd met pijlen Alleen wanneer de pijlen van het apparaat tegenover het streepje van het deksel staan kan het apparaat werken In deze positie staat ook het uitstekende afsluitklepje van het deksel C precies boven de o...

Страница 41: ...aaien De kaas wordt dan te warm waardoor het gaat smelten en klonteren Als voedsel om het sikkelmes is geslingerd of wanneer stukjes voedsel tegen de binnenkant van de kom kleven schakel dan eerst het apparaat uit neem het deksel van de kom verwijder de ingrediënten van het sikkelmes of van de binnenkant van de kom met behulp van een spatel Hak geen zeer harde ingrediënten zoals koffiebonen nootmu...

Страница 42: ... in de kom fig 18 en plaats het deksel fig 19 Zet de stamper in de vulopening om deze af te sluiten fig 20 Zet de snelheidsregelaar N in de stand die in de tabel wordt aanbevolen en schakel het apparaat in Kies bij twijfel altijd de hoogste snelheid stand 2 fig 21 Recepten ingrediënten vermeld in de tabel zijn klaar na 2 5 minuten Kneedhulpstuk J Het kneedhulpstuk is geschikt voor het kneden van b...

Страница 43: ...engkan werkt Montage en demontage van de mengkan Leg de rubber afsluitring T in de rand van het messenblok U fig 27 Draai het messenblok linksom vast aan de mengkan fig 28 Stevig vastdraaien Draai het draaideksel los fig 29 Zet de mengkan op de montage opening Draai de mengkan vast in de richting van de pijl fig 30 Waarschuwing Forceer de handgreep van de mengkan niet Druk het deksel op zijn plaat...

Страница 44: ...jd de stekker uit het stopcontact voordat u het motorgedeelte gaat schoonmaken U kunt het motorgedeelte schoonmaken met een vochtige doek Dompel het motorgedeelte niet in water en spoel het niet af Maak de delen die met voedsel in aanraking zijn gekomen meteen na gebruik schoon in warm sop Maak het sikkelmes het messenblok van de mengkan en de snijkant van de snijschijf voorzichtig schoon Pas op d...

Страница 45: ...kamertemperatuur afkoelen duurt enkele minuten Gebruik droog bros brood Gebruik korstloze kaas en snij deze in stukken die door de vulopening passsen Snij de kaas in stukken die door de vulopening passen Voorzichtig met de stamper aandrukken Gebruik harde pure chocolade Breek in stukjes van 2 cm Eerst enkele keren stand M Daarna voor fijn resultaat maximale snelheid Gebruik zachte boter voor een l...

Страница 46: ...en voor verdere verwerking Gebruik eieren op kamertemperatuur Let op gebruik tenminste eiwit van 2 eieren Tip voeg wat citroensap toe om verkleuren te voorkomen Voeg wat vloeistof toe voor een gelijkmatige puree Kruiden eerst wassen en drogen Doe prei komkommer of wortel in de vulopening en druk de stukken voorzichtig aan met de stamper Gebruik alle ingrediënten op kamertemperatuur Let op gebruik ...

Страница 47: ... fijn resultaat De aardappelen niet té gaar koken De hoeveelheid melk hangt af van de aardappelsoort Gebruik warme melk max 80 C Melk langzaam toevoegen terwijl het mes draait Gebruik gekookte bonen of erwten Voeg wat vocht toe voor een gelijkmatig resultaat Gebruik gekookte groenten Vóórsnijden in blokjes van 3 cm Pellen en vóórsnijden in 4 stukken Let op gebruik minstens 100 gram uien Pel en sni...

Страница 48: ...ardappel raspschijf n 4822 690 10139 enkelzijdige snijschijf voor frietjes en bijv koolraap HR 2912 nr 4822 690 10141 opbergdoos voor schijven HR 2922 nr 4822 690 40267 Vraag uw leverancier of deze accessoires ook in uw land leverbaar zijn Wilt u extra of vervangende onderdelen bestellen schrijf dan de bijbehorende service en of typenummers op 4822 418 10343 4822 418 10342 4203 065 61850 4822 462 ...

Страница 49: ...ste snelheid Zie de aanwijzingen op het apparaat en in deze gebruiksaanwijzing Voeg desgewenst wat citroensap of zout toe zorg ervoor dat klopper en kom vetvrij zijn en kies de juiste snelheid Gebruik de klopper ß Verwerk slagroom op koelkasttemperatuur ca 6 C Met deze klopper alleen slagroom ei wit en vloeistoffen kloppen Niet gebruiken voor beslag of deeg Volg de aanwijzingen in deze gebruiksaan...

Страница 50: ...fine su entrambi i lati I Frusta ß J Accessorio per impastare K Albero motore L Apertura per inserimento cibo M Pestello N Controllo velocità O OFF 1 2 controllo velocità 1 velocità minima 2 velocità massima M funzionamento ad intermittenza l apparecchio funziona tenendo premuto il pulsante O Gancio per fissare il cavo arrotolato P Cappuccio a vite per chiudere il foro del vaso del frullatore quan...

Страница 51: ...a al coltello del frullatore e al disco per affettare grattugiare perché sono estremamente affilati Pulite accuratamente le parti a contatto con il cibo prima di usare l apparecchio per la prima volta Mettete il coperchio nella corretta posizione Il dispositivo automatico di sicurezza sarà quindi sbloccato e voi potrete utilizzare l apparecchio Nel caso in cui sia il frullatore che il vaso siano m...

Страница 52: ...ona mento dell apparecchio evitando schizzi e fuoriuscite di prodotto fig 9 Dispositivo di sicurezza incorporato F Sia il blocco motore che il coperchio C sono provvisti di tacche L apparecchio potrà funzionare soltanto se la freccia posta sul gruppo motore si trova esattamente di fronte alla tacca riportata sul coperchio In questa posizione il beccuccio E del coperchio coprirà l apertura dell imp...

Страница 53: ...la lama o alle pareti del vaso spegnete l apparecchio togliete il coperchio dal vaso togliete il cibo dalle lame e dalle pareti usando l apposita spatola Non tritate ingredienti molto duri come ad esempio chicchi di caffè noce moscata e cubetti di ghiaccio per evitare di danneggiare la lama Consultate la tabella per individuare la velocità più appropriata Disco per affettare grattugiare H Attenzio...

Страница 54: ...ccendete l apparecchio In caso di dubbi sulla velocità da utilizzare selezionate sempre quella massima numero 2 fig 21 Le applicazioni ricette descritte nella tabella saranno pronte dopo 2 5 min Accessorio per impastare J L accessorio per impastare è adatto per preparare pasta da pane e miscele per torte Posizionate il vaso sul blocco motore fig 2 e successivamente l accessorio per impastare sull ...

Страница 55: ...ntaggio e smontaggio Inserite la guarnizione in gomma T attor no al bordo del gruppo coltello fig 27 Ruotate il coltello verso sinistra per attaccarlo al vaso del frullatore fig 28 Controllate che sia fissato saldamente Togliete il cappuccio a vite P fig 29 Inserite il vaso sull apposito foro e ruota telo nella direzione della freccia fino a quando sarà saldamente fissato fig 30 56 27 1 2 28 2 1 2...

Страница 56: ...oltello circa 2 cm Pulizia Prima di pulire il blocco motore togliete sempre la spina dalla presa di corrente Il blocco motore può essere pulito con un panno umido Non immergete né risciacquate mai il motore nell acqua Lavate i pezzi che sono venuti a contatto con il cibo con acqua saponata subito dopo averli utilizzati Non metteteli in lavastoviglie Fate attenzione quando pulite la lama il coltell...

Страница 57: ...e M per i primi secondi poi passate alla velocità massima per tritarlo finemente Usate margarina fredda e acqua fredda Mettete la farina nel vaso ed aggiungete la margarina tagliata a cubetti di 2 cm Mescolate alla velocità massima fino ad ottenere un ammasso di briciole quindi aggiungete l acqua fredda con l apparecchio in funzione Spegnete non appena avrete ottenu to una palla Lasciate raffredda...

Страница 58: ... carota o cetriolo e premete delicatamente con il pestello Utilizzate ingredienti a temperatura ambiente Nota usate almeno un uovo intero oppure due tuorli Togliete le ossa e le lische Tagliate la carne o il pesce in cubetti di 3 cm Usate il tasto M per tritare grossolanamente Riducete la frutta in purè banane fragole ecc unite lo zucchero il succo di limone il latte e un po di gelato Frullate con...

Страница 59: ... le cipolle e tagliatele in 4 Usatene almeno 100 g Pelate le cipolle tagliatele a pezzi e introducetele nel vaso Usatene almeno 100 g Usate piselli o fagioli cotti Se necessario aggiungete un po di liquido fino a raggiungere la consistenza desiderata Cuocete le patate al dente La quantità di latte dipende dal tipo di patate utilizzate Usate latte tiepido max 80 C e aggiungetelo lentamente tenendo ...

Страница 60: ...astoncino n 4822 690 10139 Disco semplice per patatine a fiammifero HR 2912 n 4822 690 10141 Scatola per riporre i dischi HR 2922 n 4822 890 40267 Rivolgetevi al vostro rivenditore di fiducia per sapere se tali accessori sono disponibili anche nel vostro paese Per ordinare gli accessori aggiuntivi o sostituire quelli standard citare sempre il numero di riferimento e o il codice 4822 418 10343 4822...

Страница 61: ...urriscaldamento Togliete la spina dalla presa Mettete l interruttore in posizione O Lasciate raffreddare l apparecchio per circa 15 minuti Rimettete la spina nella presa Riaccendete l apparecchio Nel caso in cui il dispositivo di sicurezza intervenisse troppo spesso contattate un rivenditore autorizzato Philips o un centro di assistenza Philips Selezionate la giusta velocità Fate riferimento alle ...

Страница 62: ...εως i Kτυπητήρι ß J Zυµωτήρι K Άξονας οδηγ ς L Στ µιο M Ωθητής N ιακ πτης ταχύτητας O Off 1 2 µεταβλητή ταχύτητα 1 ελάχιστη ταχύτητα 2 µέγιστη ταχύτητα M Πλήκτρο για λειτουργία στιγµής η συσκευή λειτουργεί σο κρατάτε το πλήκτρο πατηµένο O Συνδετήρας καλωδίου για στερέωση του καλωδίου ταν είναι τυλιγµένο P Bιδωτ πώµα για να κλείνετε το στ µιο της κανάτας ταν δεν την χρησιµοποιείτε Eξαρτήµατα του µπ...

Страница 63: ... πιάνετε τον κ πτη το µαχαίρι και τον δίσκο γιατί είναι πολύ κοφτερά Kαθαρίστε προσεκτικά τα µέρη που έρχονται σε επαφή µε την τροφή πριν χρησιµοποιήσετε τη συσκευή για πρώτη φορά ταν βάλετε το καπάκι στο µπωλ σωστά ξεπλοκάρεται η ενσωµατωµένη κλειδαριά ασφαλείας και µπορείτε τώρα να ανάψετε τη συσκευή Σηµειώστε τι ταν η κανάτα και το µπωλ τοποθετηθούν σωστά µ νο η κανάτα θα λειτουργεί Mην αφήνετε...

Страница 64: ...κά µέσα εικ 8 Mπορείτε επίσης να χρησιµοποιήσετε τον ωθητή για να κλείσετε το στ µιο ταν η συσκευή λειτουργεί για να µην πετιέται τροφή έξω εικ 9 Eνσωµατωµένη ασφάλεια F To µοτέρ καθώς επίσης και το καπάκι C έχουν σηµάδια H συσκευή λειτουργεί µ νον αν το βέλος στο µοτέρ είναι ακριβώς απέναντι απ το σηµάδι στο καπάκι Στη θέση αυτή η προεξοχή E του καπακιού θα καλύψει το άνοιγµα στη χειρολαβή του µπ...

Страница 65: ...νετε τη συσκευή να λειτουργεί πάρα πολύ ταν κ βετε σκληρ τυρί γιατί το τυρί θα ζεσταθεί πάρα πολύ και θα αρχίσει να λυώνει και να σβωλιάζει Aν κολλήσει τροφή στον κ πτη ή στο εσωτερικ του µπωλ Σβήστε τη συσκευή Bγάλτε το καπάκι απ το µπωλ Bγάλτε την τροφή απ τον κ πτη ή το εσωτερικ του µπωλ χρησιµοποιώντας τη σπάτουλα Mη κ βετε πολύ σκληρά υλικά πως κ κκους καφέ καρύδια και παγάκια γιατί ο κ πτης ...

Страница 66: ...χύτητας N στη θέση που φαίνεται στους πίνακες και ανάψτε τη συσκευή Aν έχετε αµφιβολία για τη σωστή ταχύτητα επιλέγετε πάντοτε την µεγαλύτερη ταχύτητα θέση 2 εικ 21 Oι εφαρµογές συνταγές που αναφέρονται στον πίνακα θα είναι έτοιµες µετά απ 2 5 λεπτά Zυµωτήρι J Mπορείτε να χρησιµοποιήσετε το ζυµωτήρι για να κάνετε ζύµη για ψωµί για να κάνετε κουρκούτι και µείγµατα για κέικ Bάλτε το µπωλ στον οδηγ ά...

Страница 67: ... γηση Bάλτε το πλαστικ δακτυλίδι εφαρµογής T γύρω απ την µονάδα του µαχαιριού εικ 27 Στρέψτε τη µονάδα του µαχαιριού προς τα αριστερά για να την στερεώσετε στην κανάτα εικ 28 Bεβαιωθείτε τι έχει στερεωθεί καλά Bγάλτε το βιδωτ πώµα P εικ 29 Tοποθετήστε την κανάτα στην οπή σύνδεσης και στρέψτε την προς την κατεύθυνση του βέλους µέχρι να στερεωθεί καλά εικ 30 Προσοχή Mην πιέσετε πάρα πολύ τις χειρολα...

Страница 68: ...ικ της κανάτας βγάλτε την µε την σπάτουλα Φυλάσσετε την σπάτουλα σε ασφαλή απ σταση απ την µονάδα του µαχαιριού περίπου 2 εκ Kαθαρισµ ς Aποσυνδέστε πρώτα τη συσκευή απ την πρίζα του τοίχου πριν αρχίσετε να καθαρίζετε την µονάδα του µοτέρ Mπορείτε να καθαρίσετε τη µονάδα του µοτέρ µε ένα υγρ πανί εν πρέπει να τη βάλετε µέσα σε νερ και υγρ πλυσίµατος αµέσως µετά τη χρήση εν πρέπει να τα καθαρίσετε σ...

Страница 69: ...ρώχνο Σάλτσες πίτσες τρίψιµο ντάς τα προσεκτικά µε τον ωθητή φαγη τά ογκρατέν φοντύ Σοκολάτα 200 γρ 1 M Xρησιµοποιείστε απλή σκληρή σοκολάτα Σπάστε την σε κοµµάτια Γαρνιρίσµατα σάλτες κ ψιµο των 2 εκ Xρησιµοποιείστε την ταχύτητα M κατά τη διάρκεια των πρώτων πάστα πουτίγκα λίγων δευτερολέπτων και µετά τη µέγιστη ταχύτητα για πολύ ψιλ κ ψιµο µους Zύµη τάρτα πίττα 300 γρ 2 Xρησιµοποιείτε κρύα µαργαρ...

Страница 70: ...αλ ς πουρές Σάλτσες µαρµε λάδες πουτίγκα τροφή για παιδιά Xορταρικά π χ µαϊνταν ς τουλάχιστον 2 M Πλύνετε και στεγνώστε τα χορταρικά πριν το κ ψιµο Σάλτσες σούπες κ ψιµο 75 γρ γαρνιρίσµατα βούτυρο απ χορταρικά Πράσα αγγούρια τουλάχιστον 2 M Γεµίστε το στ µιο µε πράσσα κοµµάτια αγγουριού ή καρ του Σούπες σαλάτες καρ τα και σπρώξτε τα απαλά µε τον ωθητή κ ψιµο Mαγιονέζα 3 αυγά 1 2 Xρησιµοποιείστε λα...

Страница 71: ...ρ 2 Xρησιµοποιείστε µαγειρεµένα φασ λια ή αρακά Aν χρειάζεται Πουρέδες λυώσιµο χρησιµοποιείστε λίγο υγρ για να βελτιώσετε τη συνοχή του µείγµατος σούπες Πατάτες µαγ νες 750 γρ 1 2 Mη παραµαγειρέψετε τις πατάτες H ποσ τητα του αναγκαίου γάλακτος Φαγητά φούρνου λυώσιµο πατάτες εξαρτάται απ το είδος της πατάτας Xρησιµοποιείστε ζεστ γάλα πουρέδες µεγ 60 C Προσθέστε το γάλα αργά ενώ περιστρέφεται ο κ π...

Страница 72: ...ος κοπής σε φέτες µονής ψεως για τηγανιτές πατάτες HR 2912 Αρ 4822 690 10141 Κουτί αποθήκευσης δίσκων HR 2922 Aρ 4822 690 40267 Pωτήστε τον προµηθευτή σας αν τα εξαρτήµατα αυτά είναι διαθέσιµα στη χώρα σας Aν θέλετε να παραγγείλετε επιπρ σθετα εξαρτήµατα ή για αντικατάσταση παρακαλούµε αναφέρετε τον αντίστοιχο αριθµ κατασκευής και ή του τύπου του εξαρτήµατος 4822 418 10343 4822 418 10342 4203 065 ...

Страница 73: ...στε σε λειτουργία πάλι τη συσκευή Aν η αυτ µατη ασφάλεια της συσκευής ενεργοποιείται επαναληπτικά συµβουλευτείτε τον προµηθευτή σας ή το Kέντρο Eξυπηρέτησης Πελατών της Philips Tα αποτελέσµατα κοψίµατος ιαλέξτε τη σωστή ταχύτητα είτε τις ενδείξεις στη συσκευή και στις οδηγίες χρήσεως σε φέτες ή τριψίµατος δεν είναι τα αναµεν µενα Tα αποτελέσµατα απ το κτύπηµα Προσπαθήστε πάλι χρησιµοποιώντας λεµ ν...

Страница 74: ...Omslag Binnenkant laatste pagina WIT ...

Страница 75: ...Omslag Full color Buitenkant laatste pagina ...

Отзывы: