background image

21

EN

Note


‡

>  ! ">

 to the list 

8@: >

 > 

*9 J 0

*9 J$0

 from 


"   ,


:" 

 to power, select 

*9 J 0

 > 

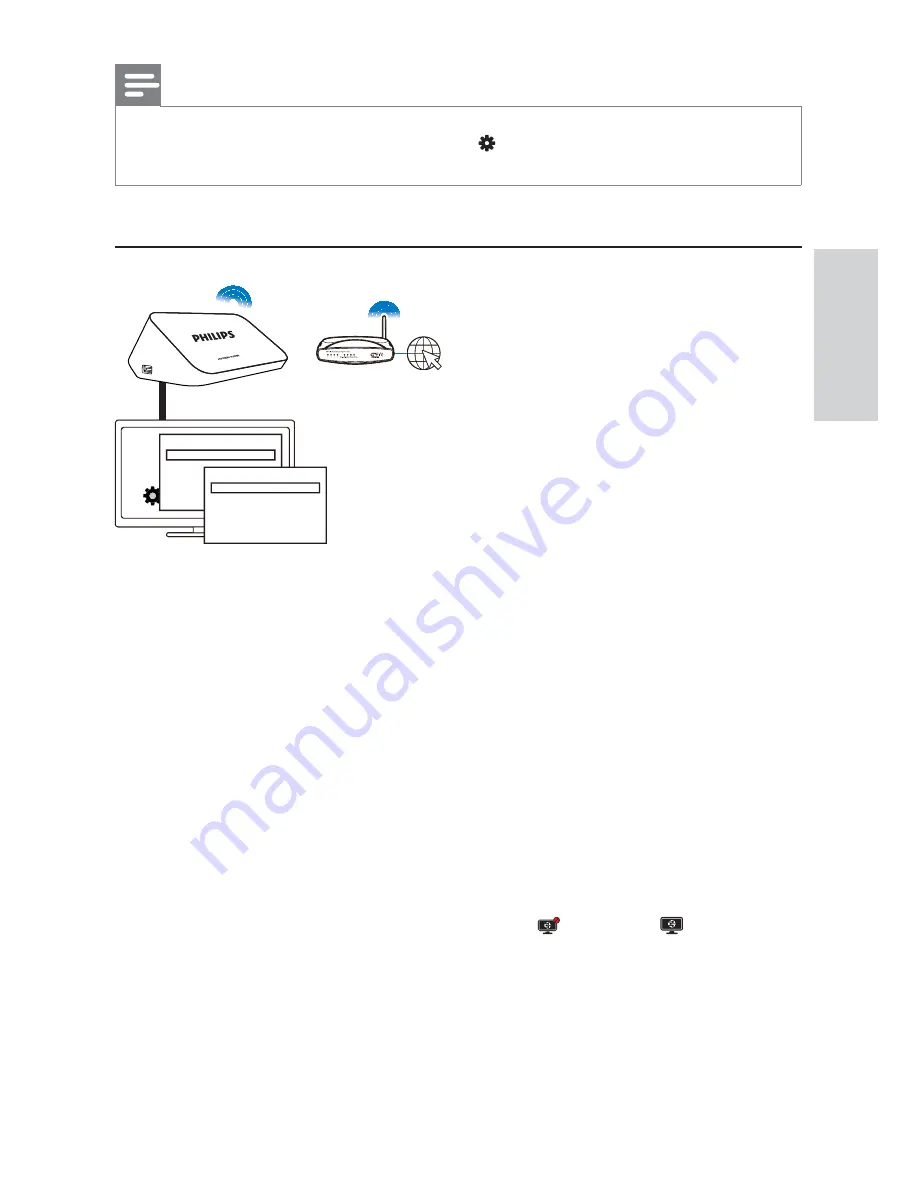
[Wireless (Wi-Fi)]

 99


»

A pop-up screen is displayed for you to select connection options. 

< 999

[Scan Wi-Fi  (Recommended)]

.


»

‘   8  

‡

To refresh the list of networks, press 

!#$@

 on the remote control. 

Select your network. 

"   9 (

PIN

PBC

, or 

[Standard]

.


»

A message is displayed when the connection is complete. 


»

Next time you switch on 

 connects to the 

previously connected network automatically. 


»

When 

 is connected to Wi-Fi, 

 changes to 


screen. 

Ԟൗഥᇆ

WWW

HDMI

Җ֊იခ

ອ઒ഥᇆ

ႹཐIJၟขອij

໱ཐ:L)L

English

Содержание HMP5020

Страница 1: ...www philips com welcome Always there to help you Register your product and get support at Question Contact Philips Question Contact Philips HMP5020 User manual ...

Страница 2: ...Trademark notice 1 1 346 14 1 41 3 7 8 8 9 7 9 7 6 8 B C B 9 C DB E 8 ...

Страница 3: ...3 EN ...

Страница 4: ...ঙࡱd ф ੬ d ᅾС ࡱޓ dࠅ ੬ EN Press to switch on The indicator lights up white Press again to switch off The indicator lights up red ሱ ᅿ ت ࡱႌে ൪ĩ ᄊ ߞ ᅙ ာᆖHMP5020 HDMIෝ നశ d EN On the remote control of the TV use the source button to select the HDMI input channel of HMP5020 ঙࡱ Switch on ...

Страница 5: ...ect Scan Wi Fi to search for networks in range Select a network Follow onscreen instructions to complete Wi Fi connection ሱ ത நာᆖPBC ڼ බ ࣞHMP5020ࢨനந ીᄐ ķതᅿ ીᄐ ൪СበPBC ĥ Ԓণந ીᄐ ᄊࠞාԊ൪ ᄊ ڼ බĦdᅿHMP5020൪ आ Րඪĩూ ྣභ ཱd EN If you select PBC add HMP5020 to the router for example press and hold the PBC button on the router consult the user manual of your router for information On HMP5020 a message is display...

Страница 6: ...Wired Ethernet Select Auto Recommended to acquire auto IP Follow onscreen instructions to complete connection ሱ ົ Ⴝ ྮआന EN Connect through an Ethernet cable ሱ ത நာᆖಉсĩෝനୃ d ᅿႌে ൪ĩС ာᆖෝന୨බdෝന ඪĩС ာᆖూ ௯൪ С d Ր ෝനඪĩᅿూ ௯ ൪ာᆖ OKd EN If you select Standard enter your password On the remote control press to select an input mode To enter text press to select a key on the onscreen keyboard To complete text...

Страница 7: ...service ሱ ᅾֳঙ HMP5020ඪĩ ࡱܠ ናِआന൪ֳआന d HMP5020 आനWi Fiཏྮ ඪĩ ү d ָቘూ ൪ĩ ာᆖ ఛॉᜰd ᄊႌে ာᆖศ cӎ ۄ ာ d EN Next time you switch on HMP5020 the device connects to the previously connected network changes to From the Home screen selectVoole Use the remote control to select search and play options ...

Страница 8: ... have connected your Philips Android device to the same network as HMP5020 ሱ ᅿந ੈۈ Пቾඃ ൪ĩ ِ dැֳ ᄊඪĩෝനࡹࡥ d EN On your Philips Android device launch Enter the activation code for your rst time use ࣞந ੈۈ Пቾඃ ന HMP5020d Drag your Philips Android device to HMP5020 ာᆖந ੈۈ П ቾඃ d ئ ࢨ നົ HMP5020ӎ ۄ ତບ d Select your Philips Android device Tap to add media that you want to play through HMP5020 ...

Страница 9: ...droid devices ሱ ᅿ ੈۈ Пቾඃ ൪Ԃেତບӎ ۄ ඪĩာ ܠى Пቾඃ dኲcᄙِࠣာᆖӎ ۄ েሧూ ࡩӎ ۄ Ҹĥာ ى ତບ Ħ EN To control media play on the Philips Android device select the Android device Swipe left right to switch between the playback controls panel and the playlist of selected media les ...

Страница 10: ... ఛॉᜰ ሀѓ ܼೄ H6 7 HDMI ഥᇆ 86 9RROH ࡉ ອ ఛॉᜰ ሀѓ ܼೄ H6 7 eSATA ָ ևඃ ൪ӎ ۄ Play from a mass storage device ሱ ָUSB ևඃ ൪ӎ ۄ EN Play from a USB mass storage device ሱ ָ ם eSATAआ ჹ௯൪ӎ ۄ EN Play from a hard disk drive with a eSATA connector ...

Страница 11: ... 2 Basics 16 Connect 16 Switch on or off 17 Use the remote control 18 3 First time setup 20 Connect to your home network 20 4 Play 24 Play from online services 25 Play from your home network 26 Play from a mass storage device 30 5 Setup 34 System 35 Audio 35 Video 35 Network 36 Engl ish ...

Страница 12: ...12 EN 6 EasyLink 36 37 9 8 37 9 8 B 38 8 Troubleshooting 38 39 ...

Страница 13: ...cause an electrical shock For the safety of everyone in your household please do not remove the covering The exclamation mark calls attention to features for which you should read the enclosed literature closely to prevent operating and maintenance problems E E 9 8 not be placed on the device E 9 9 C 8 9 9 9 8 8 9 The product shall not be exposed to dripping or splashing 9 9 Engl ish ...

Страница 14: ...power cord plug or adaptor to disconnect the product from the power Where the mains plug or an appliance coupler is used as the disconnect device the disconnect device shall remain readily operable Compliance Class II equipment symbol 99 8 9 9 Use this product in the areas of an altitude of no more than 2000 meters only Note The type plate is located on the bottom of the product ...

Страница 15: ...f injury damage to the product and will void your warranty Use the product and accessories only as intended by the manufacturer The caution sign printed on the back of the product indicates risk of electric shock Never remove the cover of the product Always contact Philips Customer Support for service or repairs Any operation expressly prohibited in this manual or any adjustments and assembly proc...

Страница 16: ... EN 2 Basics Connect a D D b Connects to power supply through the AC power cord To connect to a TV through AV cables Through AV use the supplied AV cable to connect to aTV 9 HDMI IN HDMI a b TV R L VIDEO ...

Страница 17: ...uality audio Through OPTICAL 9 to the OPTICAL or 9 1 press on the remote control to switch on The power indicator lights up white 2 D 8 9 D input channel of SOURCE TV AV HDMI 1 HDMI 2 HDMI 3 Side HDMI Side AV Engl ish ...

Страница 18: ...9 for 15 minutes switches to standby mode automatically C Setup System to switch on 0 9 9 for a selected time duration the screen saver is activated To exit the screen saver press any button on the remote control Use the remote control 7 Press 9 7 Navigate through options OK 9 B 9 Press OPTIONS Control the play Start pause or resume the play Stop the play ...

Страница 19: ...ect aspect ratio or zoom in or out To pan through an enlarged photo press SUBTITLE Access subtitle options Press and hold and select the option Press Enter text With the onscreen keyboard use the remote control to enter text Select input modes Press on the remote control 9 9 99 9 8 9 OK ௗၿ DEF ௗၿ Engl ish ...

Страница 20: ...OK on the onscreen keyboard to exit 3 First time setup First time setup 8 9 G 0 select the menu language on 9 J 0 connect to your home network through Wi Fi or an Ethernet cable To exit the setup screen 9 To change your setup options C Setup J Connect 8 cable You can connect to the network that is built around the router 9 9 ...

Страница 21: ...Scan Wi Fi Recommended 8 To refresh the list of networks press on the remote control 3 Select your network 4 9 PIN PBC or Standard A message is displayed when the connection is complete Next time you switch on connects to the previously connected network automatically When is connected to Wi Fi changes to screen Ԟൗഥᇆ WWW HDMI Җ იခ ອ ഥᇆ ႹཐIJၟขອij ཐ L L Engl ish ...

Страница 22: ...outer that also supports the WPS 8 9 Y or 9 Y 9 7 Tip C 9 C secure wireless home network PBC 1 Consult the user manual of the router to learn how to add a WPS C 9 press and hold the WPS push button The router starts to search for 2 select PBC a message is displayed when the connection is complete HDMI 3 1 3 їም ࢨ ...

Страница 23: ...page 19 Connect through an Ethernet cable 1 Use an Ethernet cable to connect to the router 2 to power select 9 J 0 Wired Ethernet 9 9 A pop up screen is displayed for you to select connection options To use an IP address that the router assigns automatically Select Auto Recommended Ԟൗഥᇆ WWW HDMI Җ იခ ອ ഥᇆ ႹཐIJၟขອij ཐ L L Engl ish ...

Страница 24: ...the IP address of the player manually 1 Consult the user manual of the router or 9 4 8 8 9 9 9 9 9 2 select YZ 0 manually a _ 7 same subnet as the router For example if the router has 4 666 8 9 4 8 255 255 255 000 4 Play D 9 Ԟൗഥᇆ Җ იခ ອ ഥᇆ ႹཐIJၟขອij ཐ L L ౬ ᄸອ ഥᇆ ྜ ስ ײ IJࡽၴij ײ IJ ij ...

Страница 25: ...ole 1 Voole Voole is displayed 2 Use the remote control to select your options Search for videos by category 1 Voole 2 9 9 and OK on the remote control to select a category 9 repeatedly to go back to the left pane Videos under the category are displayed 3 Press Press to move to the previous or next page Press and OK to select a video _ Press on the remote control Search for videos by keyword 1 Voo...

Страница 26: ...Press to fast forward or rewind To select a speed press repeatedly J 6 6 8 C see First time setup on page 20 With you can play media from a DLNA compliant device on the same 8 8 9 D connect to E 9 a Philips Android device that runs SimplyShare such as an Android tablet a computer or device that runs the software of DLNA media server 8 Z SimplyShare ...

Страница 27: ...edia from the Android device 1 tothe same Wi Fi network as your Philips Android device 2 9 SimplyShare a _ J _ _ and install SimplyShare b _ as prompted c Z j 3 Select 9 Drag your Philips Android device to Engl ish ...

Страница 28: ...28 EN 4 9 8 9 Tap the icon of the Philips Android device 9 8 Pictures and 9 on the device 5 Tap ...

Страница 29: ...29 EN 9 Control the media play remotely 9 9 9 8 9 8 8 9 On the play screen 9 9 9 9 9 9 Tap to stop play On the shared list Tap 9 9 Engl ish ...

Страница 30: ... EN Y G9Z 1 and the PC to the same network 2 8 E sharing function C 9 8 8 a G 7 v jjj b Select the check box next to Share my media to in the device list c _ J Z j 3 select 8 Shared Folder 8 E 0 4 9 D 9 B ...

Страница 31: ...ce to C B on For an eSATA hard disk drive connect to eSATA on 2 USB or eSATA 8 Folder 9 0 9 0 9 Photos 9 9 3 9 9 OPTIONS 9 Folder _ Select Thumbnails List or 0 7 _ Select Z 0 0 Photos or 0 HDMI ഥᇆ 86 9RROH ࡉ ອ ఛॉᜰ ሀѓ ܼೄ H6 7 HDMI ഥᇆ 86 9RROH ࡉ ອ ఛॉᜰ ሀѓ ܼೄ H6 7 文件夹 电影 音乐 照片 Engl ish ...

Страница 32: ...g play press OPTIONS on the remote control 2 Press to select an option Press OK _ Subtitle Audio GOTO 9 9 9 Repeat Title 9 Repeat All 9 Repeat Off 8 9 Video Setting 9 9 For music Repeat Off 8 9 Repeat One 9 Repeat All 9 G 0 _ Slide Timing 8 Slide Transition 8 8 Repeat Off 8 9 Repeat All 9 9 G 0 9 J 0 8 Video Setting 9 9 select USB or eSATA Folder and B ...

Страница 33: ...b 0j c Press j j 2 9 3 9 9 9 9 Copy or 0 4 Select a folder as the destination Press 9 1 C 8 9 3 9 see Copy or move 9 33 2 9 9 9 9 0 1 Folder 2 9 3 9 9 9 9 Rename 4 9 9 9 see Enter text on page 19 Create music playlists 9 8 9 1 Folder 文件夹 电影 音乐 照片 Engl ish ...

Страница 34: ...4 Name the playlist as needed A music playlist is created Create photo albums 9 9 1 Folder 9 a _ j A list of options is displayed b 0j c Press j j 2 9 3 9 9 9 9 Z 7 0 4 Name the photo album as needed A photo album is created 5 Setup You can change the setup options of 1 Setup 9 ...

Страница 35: ...en saver mode press any key Automatic Standby 8 to standby mode when there is no button press or media play on for 15 minutes 9 J 9 0 8 isdiscovered by name in your home network Request to Resume Play 8 8 play from the last stop position 0 Audio Z 0 9 Optical output 9 OPTICAL connector Lip Sync 8 9 Video Aspect Ratio 9 9 TV System D 99 TV manual for details Video Zoom 0 6469 9 8 6469 denotes the r...

Страница 36: ...this feature Note 9 8 D display wait for 10 seconds 9 J Wired Ethernet 8 Wireless Wi Fi C 8 9 J 0 9 8 6 EasyLink 99 9 8 9 9 1 D 9 8 protocol 2 D 8 8 9 D 3 switch on Easy Link Setup Easy Link Select On 4 Easy Link 8 9 One Touch Play When you start play on D 8 9 automatically ...

Страница 37: ...eTV can switch on automatically from the standby mode Note 9 66 9 8 Setup 0 switch on Auto Upgrade Reminder 8 8 9 connected B 9 8 8 Setup 0 Version Info 1 Connect 2 select Setup 0 Check for Online Upgrades 8 9 9 9 9 3 Follow onscreen instructions to complete the update When the update is complete switches off automatically and then switches on again Engl ish ...

Страница 38: ...9 update 3 Follow onscreen instructions to complete the update When the update is complete switches off automatically and then switches on again Caution Keep 9 8 8 9 complete 8 Troubleshooting 9 8 player The model number and serial number are at the bottom of this player ...

Страница 39: ...to select the correct video input channel 7 j B 99 99 B 9 99 Playable media 9 Specification Note 9 8 9 66 6D 6 6 8 9 8 9 Supported formats D D D D DB 4 6 D D C D B D C C D 6 46 3 D 3 B E C C C CC 9 9 B 6 E C C 3 C 3 C B 99 B 99 B 99 Subtitle support Engl ish ...

Страница 40: ...40 EN Video 9 46 469 1 1 9 1 69 646 6469 6469 9 9 D99 1 Audio 9 9 9 Analog stereo output 6 B 8 46 B 8 C 9 6 B 6 E 6 3 ...

Страница 41: ... E E E E E C C C E E B E D E E E D C C E C E C E C C C E C E C C E E 36 C C 1 Grant of License This Agreement grants you a non exclusive nontransferable non sub licensable license to install and use on the Device 99 9 9 8 in object code format as set out in the user documentation solely for your personal use The Software is in use when it is loaded into the temporary 9 Engl ish ...

Страница 42: ...xcept as provided otherwise herein you shall not rent lease sublicense sell assign loan or otherwise transfer the Software You shall not and you shall not permit any third party to reverse engineer decompile or disassemble the Software except to the extent that applicable law expressly prohibits the foregoing restriction You may not remove or 9 9 9 9 markings or restrictions from the Software All ...

Страница 43: ...ed off When these features are switched off you will still be able to play Secure Content if you have a valid license for such content 8 8 8 8 9 title and intellectual property rights in and to the Secure Content is the property of the respective Secure Content owners and may be protected by applicable copyright or other intellectual property laws and treaties This Agreement grants you no rights t...

Страница 44: ... shall be effective upon installation or first 8 9 9 8 9 destruction of all copies of the Software and related materials provided to 9 9 the termination of this Agreement 7 Upgrades Philips may at its sole option make upgrades to the Software available by general posting on a website or by any other means or methods Such upgrades may be made available pursuant to the terms of this Agreement or the...

Страница 45: ... limited warranty shall be void if failure of the Software has resulted from any accident abuse misuse or wrongful application Any replacement Software will be warranted for the remainder of the original warranty period or thirty 36 8 8 99 if the Software was provided to you free of charge on an evaluation only basis j 9 Z Z9 j C B D E E E E C C E E E E B C E C C D E E E C E E C C E B E C C E B B ...

Страница 46: ...hich the United States Export Administration Act or any similar United States law or 9 99 99 9 9 99 B 8 8 9 provision j j This Agreement is governed by the laws of your country of 8 8 9 9 9 between you and Philips regarding this Agreement shall be subject to the non exclusive jurisdiction of the courts of your country of residence 15 General This Agreement contains the entire agreement between you...

Страница 47: ... Property Standards P Box 220 5600 AE Eindhoven The Netherlands rത ிଢᄗࢅඪ ഌ߈ ĩೊ ڡ ฤ ت ኒᄑ ൪෯ ت ኒᄑ መd WRITTEN OFFER 9 9 9 of the complete corresponding source code for the copyrighted open source 8 9 9 8 respective licenses This offer is valid up to three years after product purchase to anyone in receipt of this information To obtain source code please contact 9 9 9 9 9 8 8 9 8 9 9 9 7 B 6 66 E your ...

Страница 48: ......

Страница 49: ......

Страница 50: ... 7 J J 9j j Z j j J j ...

Отзывы: