4
General description
(fig. 1)
A
Steam tank
B
Switch "Steam tank on/off"
≤
with
integrated pilot light
C
Pilot light "Steam tank heating up"
U
(The pilot light goes out when the appliance is
ready for steam-ironing.)
D
Switch "Iron on/off"
≥
with integrated
pilot light
E
Filling opening with screw cap
F
Iron stand (removable)
G
Steam activator (press-in for steam ironing)
H
Pilot light "Iron heating up"
I
Temperature dial (rotate)
J
Soleplate
K
Supply hose
L
Mains cord
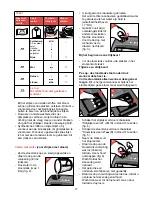
Ironing temperature
- Always check first if a label with ironing
instructions is attached to the article to be
ironed. Follow these ironing instructions in
all cases.
- If ironing instructions are missing but you know
the kind of fabric, then see the table for
recommended ironing temperatures.
- After the pilot light "Iron heating up" (H) has
gone out and come on again you can start
ironing.
• During ironing the pilot light will come on from
time to time. When this happens, the soleplate
is being heated-up to the required temperature
again. You can continue ironing.
• The table is valid for the fibre materials only.
If some kind of finish has been applied (gloss,
wrinkle, relief etc.), the textile can best be
ironed at a lower temperature.
• First sort out the fabrics according to ironing
temperature: wool with wool, cotton with cotton,
etc.
The iron heats up quicker than it cools down.
Therefore, start ironing the articles requiring the
lowest temperature such as those made of
synthetic fibres. Then progress to the higher
temperatures.
• If the article is made of a mixture of different
fibres, you must always select the lowest
ironing temperature of the composition of those
fibres.
(E.g. an article consisting of "60% polyester and
40% cotton" should be ironed at the
temperature indicated for polyester (
1
) and
without steam.)
If you do not know what kind(s) of fabric(s) the
article has been made of, find a spot which will
be invisible when wearing or using the article to
try out the ironing temperature. (Always start at
a low temperature and increase to one which
gives the required results.)
Important
• Please read these instructions for use carefully in conjunction with the illustrations before
using the appliance.
• Never use the appliance if damaged in any way. Regularly check if the mains cord and the
supply hose are still in a good and safe condition.
If the mains cord of this appliance is damaged, it must only be replaced by Philips or their
service representative, as special tools and/or parts are required.
• Check if the voltage rating on the typeplate (under the steam tank) corresponds to the mains
voltage in your home.
• Only connect the appliance to an earthed mains wall socket.
• Never immerse the iron or the steam tank in water.
• Never fill the steam tank with perfumes, vinegar, descaling agents or other chemicals.
• Take care that children cannot touch the iron when hot and that they cannot pull the mains
cord or supply hose.
• When leaving the iron, even for a short while, always remove the mains plug from the wall
socket and place the iron on the stand.
• Always place the steam tank on a stable flat surface.
• Always place the iron on the iron stand. Do not place the hot iron on the steam tank, the
supply hose or the mains cord. The cordset should not be allowed to touch the soleplate
when it is hot.
English
Содержание HI981/03
Страница 1: ...HI 980 HI 981 ...
Страница 3: ...FILLING OPENING WITH SCREW CAP 1 A B D C E L F H G I J K ...
Страница 28: ...28 ...
Страница 29: ...29 ...
Страница 30: ...4222 001 76712 u ...


