background image

3

7

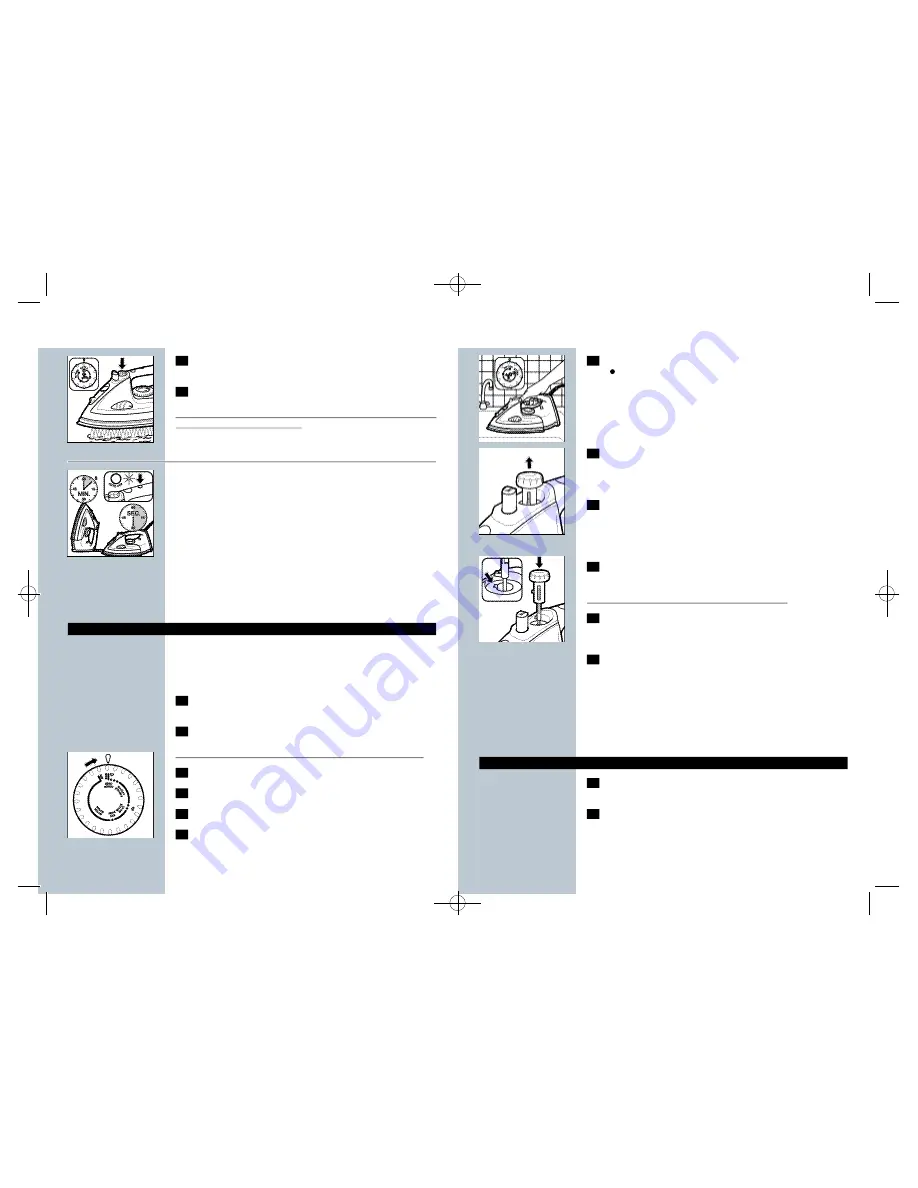
Hold the iron over the sink, set the Steam Control to position

(self clean).

3

8

Pull up Steam Control slightly and gently shake the iron until all 
the water in the removable water reservoir has drained out.

4

Steam and boiling water will come out of the soleplate. Impurities and
scale (if any) will be flushed out.

9

Press the Steam Control button and set it to O after self

cleaning.

Repeat the self-cleaning process if the iron still contains a lot of
impurities.

10

To remove scale from the needle, pull the Steam Control

further up and clean the needle. For this purpose you may soak
the needle ONLY, in vinegar.

Avoid bending or damaging the Steam Control needle.

3

11

To replace the Steam Control needle, insert the point of the

needle exactly in the center of the aperture and fit the small
notch at the side into the spacing.

12

Press the Steam Control and set it to position O.

After self-cleaning
- Plug in the iron and reheat for 2 minutes.This will enable interior of

the iron to dry before storing.

- Unplug the iron when the Amber Pilot Light has gone out.
- Move the hot iron gently over a piece of used cloth to remove any

water stains that may have formed on the soleplate.

- Let the iron cool down completely before you store it.

Maintenance and Storage

1

Set Temperature Control to Min position. Unplug cord from

electrical outlet and let the iron cool down completely.

2

Wipe scale and any other deposits off the soleplate with a

damp cloth and a non-abrasive (liquid) cleaner.

Keep the soleplate smooth: avoid hard contact with metal objects.

7

3

2

Press and hold the Extra Steam button for a maximum of 5

seconds.

3

Release the button.

Wait at least 1 minute before using Extra Steam again to prevent water
from dripping out of the soleplate.

Auto-off 

An electronic safety device will automatically switch off the iron if it has
not been moved for a while.

3

To indicate that the iron has been switched off, the Red Auto-Off
Pilot Light will start blinking.

In a horizontal position, this will happen after 30 seconds.
In a vertical position, this will happen after 8 minutes.

To heat up the iron again:
- Pick up the iron or move it slightly.
- The Red Auto-Off Pilot Light will go out.The Amber Pilot Light will

come on.

- When the Amber Pilot Light has gone out and comes on again, the

iron is ready for use.

S

Self-Cleaning

The self-clean function removes scale and impurities.
Use the self-clean function once every two weeks. If the water in your
area is very hard, the self-clean function should be used more
frequently.

1

Always unplug cord from electrical outlet and set the Steam

Control to position O.

2

Fill the removable water reservoir with water to the maximum

level.

Do not use vinegar or other descaling agents to self clean your iron.

3

Plug cord in electrical outlet.

3

4

Set the Temperature Control to MAX.

5

Allow iron to heat up for two minutes.

6

Turn Temperature Control to Min and unplug iron when the

Amber Pilot Light has gone out.

6

HI296/IRON.V1  1/13/00 2:12 PM  Page 10

Содержание HI296

Страница 1: ...iron removable water reservoir Ceralon soleplate HI296 HI296 IRON V1 1 13 00 2 12 PM Page 1 ...

Страница 2: ...f it is not working properly if it has been dropped or damaged or dropped into water To avoid the risk of electric shock do not disassemble the iron return the iron to the retail location where it was purchased for examination and repair Incorrect reassembly can cause a risk of electric shock when the iron is used 7 Do not allow cord to touch hot surfaces Let the iron cool completely before puttin...

Страница 3: ...he same circuit 2 If an extension cord is absolutely necessary a 10 ampere cord should be used Cords rated for less amperage may overheat Care should be taken to arrange the cord so that it cannot be pulled or tripped over SAVETHESE INSTRUCTIONS SPECIAL POLARIZED PLUG INSTRUCTIONS This Philips Iron has a polarized plug for an added safety feature Plug will fit into polarized outlet only one way If...

Страница 4: ... dry ironing for long periods of time 4 Preheat iron for approximately 2 minutes at proper temperature setting NOTE Iron must be on heel rest to preheat If left to preheat with soleplate in down position iron will automatically shut off after 30 seconds before reaching desired temperature 5 Begin ironing When finished stand iron in upright position on heel rest Remove cord from electrical outlet 6...

Страница 5: ...cal outlet If the tap water in your area is very hard we advise you to mix it with an equal portion of distilled water or to use distilled water only Do not use vinegar starch or chemically descaled water 6 Slide the removable water reservoir into the iron until you hear a click Setting the temperature 1 Put the iron on its heel 2 Plug cord in electrical outlet 3 3 Set theTemperature Control to th...

Страница 6: ...nd any other deposits off the soleplate with a damp cloth and a non abrasive liquid cleaner Keep the soleplate smooth avoid hard contact with metal objects 7 3 2 Press and hold the Extra Steam button for a maximum of 5 seconds 3 Release the button Wait at least 1 minute before using Extra Steam again to prevent water from dripping out of the soleplate Auto off An electronic safety device will auto...

Страница 7: ...o or Turn Steam Control to Position When ironing wool always use a press cloth and moisture Never press wool dry Turn Temperature Control to maximum setting Turn Steam Control to Position Lightly dampen fabric for thorough pressing Iron dark colored fabrics on the wrong side to avoid shining TEMP CONTROL SETTING Min Lo Med Med Max STEAM SETTING O Dry Iron Only O Dry Iron Only Pos 1 Pos 1 Pos 2 Pos...

Страница 8: ...l Rights Reserved HI296 For assistance For assistance call toll free 1 800 243 7884 or visit our website www philipsonline com 10 Possible cause s Not enough water in the removable water reservoir The steam control has been set to position O The iron is not hot enough The Extra Steam function has been used too often within a very short period The iron is not hot enough to steam The auto off functi...

Отзывы: