HD6596/50/G /51/G
4-18
Disassembly- and Reassembly advice
Make sure the appliances cordset is disconnected from the mains!
To open the appliance, remove all detachable parts: Water container, driptray and cover, pod holder and collector.
1.
To reach the brew chamber.
1.1.
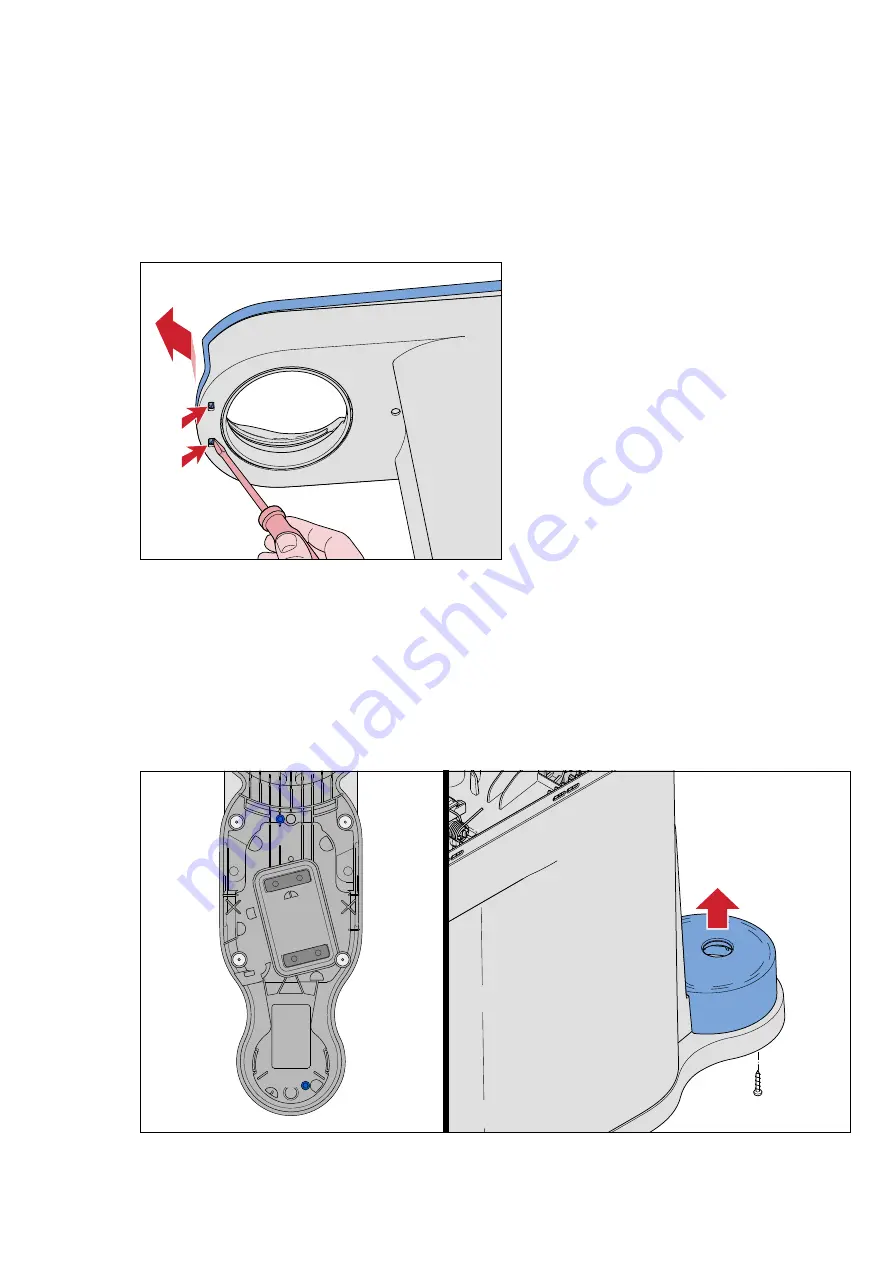
Open the top cover.
To open the top cover the brew chamber needs to be unlocked. Start at the back side of the top cover, using a
plastic tool, and trace along the parting line of the top cover, undoing all the snaps. There are two small snaps on
the front lower side of the brew chamber, undo them with a small fl athead screwdriver (No. 0)
The top cover needs to be tilted forward to be removed. The fl at cable
W
from the main PCBA to the UI PCBA is still
attached to the User Interface panel, and can easily be unplugged.
The brew chamber can now be removed by unscrewing the two screws (
C
, T15), and undoing the hose connection
(
g
) from the one way valve.
2.
To reach internal components like Boiler or Pump.
2.1.
Remove the screw (
A
, T15) from the bottom side of the appliance.
2.2.
Remove the screw (
B
, T15) from the bottom side of the appliance to remove the back plate and undo the hose
connection (
g
) from the one way valve (if not done so already).
The socked tube (
a
) is still connected to the water container socket, and can easily be pulled off .
B
B
A
Содержание HD6596/50/G
Страница 12: ...HD6596 50 G 51 G 12 18 110 120 3 4 5 210 220 1 2 Exploded view ...
Страница 13: ...HD6596 50 G 51 G 13 18 8 9 6 7 610 620 Exploded view ...
Страница 14: ...HD6596 50 G 51 G 14 18 1060 1050 1030 1020 1070 1040 10 1010 Exploded view ...
Страница 18: ...HD6596 50 G 51 G 18 18 Version history 18 02 Version 1 1 HD6596 50 G HD6596 51 G initial release ...


