background image

>

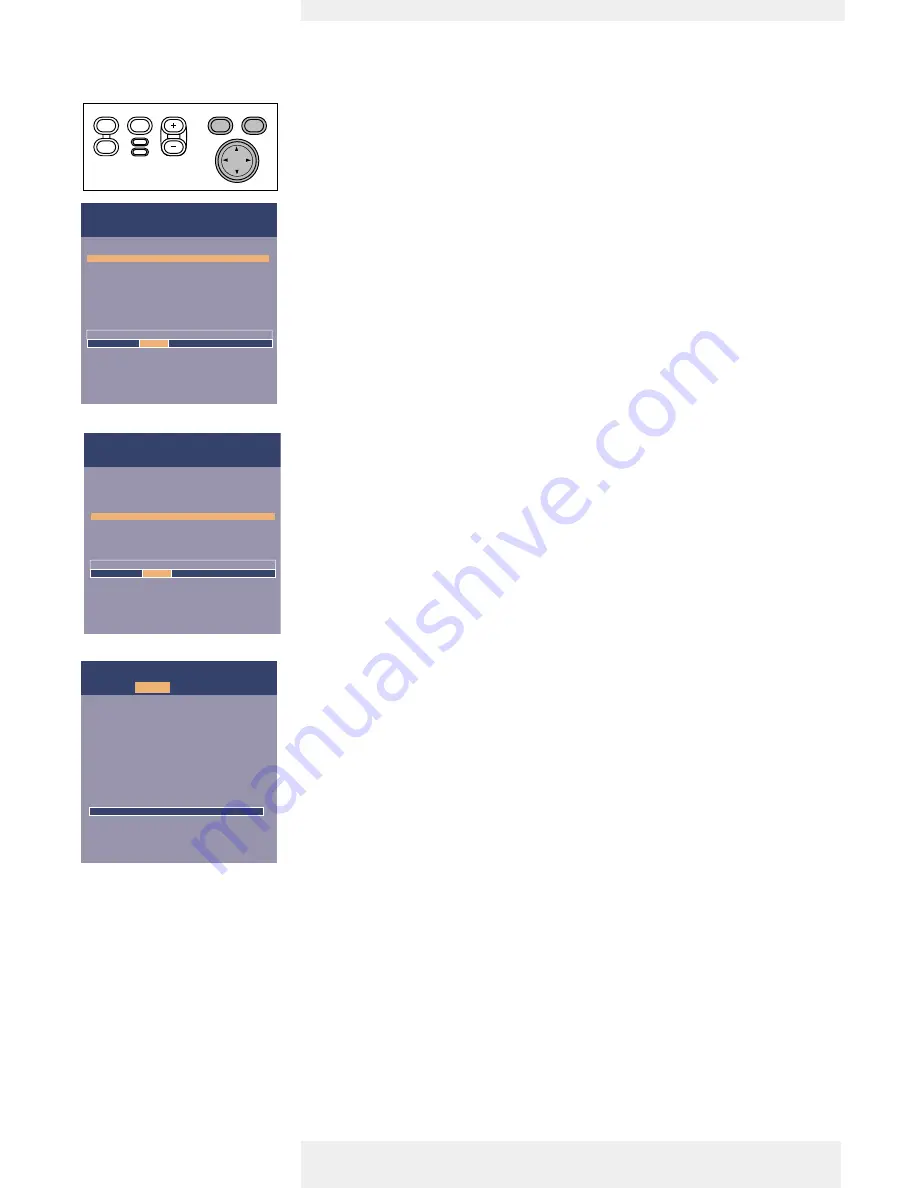
For Video/S-Video signal input, the following ‘Picture’ and ‘Display’ adjustments can be made:

Picture adjustments

Press Menu and select ‘Picture’ in the menu bar. The following ‘Picture’ adjustments can now
be made according to the instructions under ‘General explanation’.
For adjustment of ‘Picture Format’, see explanation under ‘Computer adjustments’.

– Brightness

adjusts brightness of the displayed picture;

– Contrast

adjusts the overall contrast intensity;

– 

Hue (only for NTSC)

adjusts the tint of the projected image;

– 

Saturation

adjusts the colour saturation of the projected image;

– Sharpness

controls the contour impression of the picture;

– Mirror

mirrors the picture for use of the projector in various positions with respect to the
user(s) and the projection screen;

– 

Picture Format

selects one of six picture format options (wide screen, super zoom 4:3, 4:3, movie expand
14:9, movie expand 16:9, 16:9 subtitles);

– Colour tracking

selects between ‘Vivid’ and ‘Natural’ representation of colours in the picture.
‘Vivid’ is automatically set when computer input is used;
‘Natural’ is automatically set when video input is used.

– Colour Temperature

adjusts the overall colour impression from warm to cool.
The various colours (red, green and blue) can also be adjusted individually.

Display adjustments

Press Menu and select ‘Display’ in the menu bar. The following ‘Display’ adjustments can now
be made according to the instructions under ‘General explanation’.
For adjustment of ‘Digital Zoom/Magnification’, see explanation under ‘Computer
adjustments’.

– Digital Freeze

captures a moving picture (still picture);

– Digital Zoom

enlarges a part of the picture;

– Magnification

adjusts the zoom factor.

Video/S-Video adjustments

Philips Home Cinema Projector

English 

User guide 

Garbo

21

5. Operation

Menu

OK

AV

Mute

Source

Stand

by

Lamp

Temp

Menu

OK

AV

Mute

Source

Stand

by

Lamp

Temp

Audio

Settings

Picture

Digital Freeze

Digital Zoom

;

Magnification

Auto Image

;

Horizontal size

;

Phase

;

Shift . . .

Display

Picture

Brightness

Contrast

Hue

Saturation

Sharpness

Mirror

(more)

min

Move pointer left or right to adjust the contrast level.

Display

Audio

Settings

max

Picture

(previous)

Picture format

Colour tracking

Colour temperature

;

Red

;

Green

;

Blue

min

Move pointer left or right to adjust the Red level.

Display

Audio

Settings

max

On Screen Display Menu

Содержание Garbo

Страница 1: ...Home Cinema Projector Garbo Philips User guide English ...

Страница 2: ...ng transporting the projector 10 Inserting the batteries in the remote control 10 11 16 General information 11 Video input 11 Computer input 11 Universal Serial Bus USB 11 External monitor connection 11 Connecting to video equipment 12 14 CVBS 12 S VHS 12 Scart connection 12 Component HDTV Pr Y Pb Cr Y Cb 13 Scart connection RGBS 14 Connecting to a computer 15 16 PC Macintosh 15 Connection to an e...

Страница 3: ...ustments 22 Display adjustments 22 Some examples 23 Picture Format 23 Vertical Shift 23 Digital Zoom Magnification 24 Auto image 24 Horizontal size 24 Shift 25 General adjustments 26 Audio adjustments 26 General settings 26 27 29 Cleaning 27 Cleaning the cabinet 27 Cleaning the lens 27 Cleaning the dust filter 27 Lamp 28 Lamp replacement 28 29 Resetting the lamplife time 29 30 33 5 Operation 6 Mai...

Страница 4: ... Europe 4822 321 11399 USA 4822 321 11294 UK 4822 321 11431 Printed User Guide Cd rom with Projection Assistant Quick set up Card and 3103 435 90030 Warranty card User Guide Safety Sheet Data sheet and more 3103 435 9000 3103 438 70060 Scart RCA Audio Video Scart RCA component adapter not for USA version Video adapter not for USA version 2422 033 00345 3122 438 71170 LCA 1120 00 Soft bag 8670 911 ...

Страница 5: ... error Flashes in case of fan error Lights up green when the lamp is on Lights up orange when lamp life has almost expired Lights up red when lamp life has expired Fast blinks red when lamp start has failed To receive the signals from the remote control When the menu is active the Cursor Control controls the menu cursor to navigate through the OSD menu The cursor control works with up down and lef...

Страница 6: ...nnect the projector to the mains To insert an optional locking device Kensington lock Height Level adjuster Dust filter Mains inlet socket Lock slit Lamp compartment Philips Home Cinema Projector English User guide Garbo 6 2 Functional overview Controls ...

Страница 7: ... manipulate the mouse cursor on the connected computer as long as the menu is not active When the menu is active the Cursor Control controls the menu cursor to navigate through the OSD menu The cursor control works with up down and left right button operation The Cursor Control can only function as a mouse cursor when projector and computer are connected via the USB or PS 2 connectors Windows 98 W...

Страница 8: ...e Data out terminal of a computer Input socket to connect to the Audio out terminal of a computer In Output socket to connect a PC or Apple Macintosh computer equipped with a USB downlink connection When USB connection is used the mouse cursor on the connected computer can be controlled via the projector remote control Make sure Windows 98 Windows ME Windows 2000 or Windows XP is installed on the ...

Страница 9: ...itch the projector back into the Power Standby mode The Standby Warning screen will appear for 20 seconds The Standby Warning screen can be removed by pressing the OK button 5 Press the Standby button again to confirm The projector will now go into Power Standby mode You can also press the Standby button twice in succession to switch the projector into Power Standby mode immediately 6 To switch of...

Страница 10: ...nation from harming or damaging the front of the projector lens when moving the projector Never place the projector on the side where the connections are located Moving transporting the projector The projector contains many glass and precision parts If you need to transport the projector please follow these packing instructions to pervent accidental damage to the projector When you are hand carryi...

Страница 11: ...ot plug and play presentation Mouse control By connecting USB the mouse function on the Remote Control automatically gets installed You can now manipulate the mouse cursor on the computer and on the screen using Cursor Control on the remote control The Mouse Left Right keys on the remote control function as Left and Right mouse keys of your pc Drag and drop facility Drag and drop via the remote co...

Страница 12: ...in L R sockets of the projector For this use audio video connection cable supplied 1b CVBS 1 Connect the Scart RCA Audio Video adapter supplied to the Scart connector of the VCR Laser Disc player video camera or TV 2 Plug the video audio connection cable supplied into both the adapter and the Video and Audio in L R sockets of the projector S VHS 3 Plug the S Video connection cable supplied into th...

Страница 13: ...quipment to the Audio in L R sockets of the projector For this use an optional audio connection cable 2 Audio information from the Component or HDTV video equipment will be played via the projector speaker Component HDTV Philips Home Cinema Projector English User guide Garbo 13 4 Installation PS 2 USB Audio L Audio R Video Y Pb Pr G B R S Video Computer Audio in Computer Component HDTV equipment C...

Страница 14: ...ssing the Source button Component appears on the screen 5 If required you can connect the Audio out L R sockets of the Component or HDTV video equipment to the Audio in L R sockets of the projector For this use an optional audio connection cable 4 Audio information from the Component or HDTV video equipment will be played via the projector speaker Scart connection Philips Home Cinema Projector Eng...

Страница 15: ...8 Windows ME Windows 2000 or Windows XP is installed on the computer The display settings of the computer will be changed to fit the capability of the projector 3 If required you can connect the Audio out socket of the computer to the Audio in Computer socket of the projector For this use an optional audio cable 4 Audio information from the Computer will then be played via the projector speaker Ph...

Страница 16: ...t Monitor out 10 Use Cursor Control to select On The projector will indicate the necessity to connect the Y cable 11 Switch on the external monitor The image projected is simultaneously shown on the monitor Philips Home Cinema Projector English User guide Garbo 16 4 Installation Computer Menu OK AV Mute Source Stand by Lamp Temp Menu OK AV Mute Source Stand by Lamp Temp Off On Picture Language Kes...

Страница 17: ...splay These messages cannot be suppressed Feedback messages Feedback messages are displayed in the top right corner of the screen They are displayed when a signal comes up or goes down when an input source is changed when Mute or A V Mute is activated when the Auto image function is set to On Some examples These messages will only be displayed when the menu option Feedback is set to On in the Sett...

Страница 18: ...ub menu Setting Picture Brightness min max Contrast min max Mirror Picture Format wide screen super zoom 4 3 4 3 movie expand 14 9 movie expand 16 9 16 9 subtitles Colour tracking vivid natural Colour temperature warm cool Red min max Green min max Blue min max Display Digital Freeze Off On Digital Zoom Off On Magnification min max Auto Image Off On Horizontal Size min max Phase min max Shift Curs...

Страница 19: ...tandby Off 15 30 45 60 120 Auto Source Off On Feedback Off On Menu tree Philips Home Cinema Projector English User guide Garbo 19 5 Operation Settings Picture Language Keystone correction Monitor out System information Factory reset Key lock more Display Audio Settings Picture Volume Bass Treble Mute Display Audio Settings Display Audio Off On The Start up screen can be shown or suppressed during ...

Страница 20: ...st Move the cursor down to go to the next list of items With previous you can go back to the first list 4 Adjust the selected item in the action window at the bottom of the screen using Cursor Control left and or right 5 Select the next item to be adjusted in the sub menu and adjust as described above 6 Press Menu to close the On Screen Menu Display General explanation Philips Home Cinema Projecto...

Страница 21: ...d Natural is automatically set when video input is used Colour Temperature adjusts the overall colour impression from warm to cool The various colours red green and blue can also be adjusted individually Display adjustments Press Menu and select Display in the menu bar The following Display adjustments can now be made according to the instructions under General explanation For adjustment of Digita...

Страница 22: ...nlarges a part of the picture Magnification adjusts the zoom factor Auto image automatically sizes and positions the image to fit optimally in the screen picture Horizontal size adjusts the computer image in a horizontal direction to make the image completely fill the screen Phase minimises picture imperfections When connecting the projector to your PC for the first time be sure to adjust the phas...

Страница 23: ...possible that a part of the actual image is missing at the top or the bottom of the screen When one of the picture formats super zoom 4 3 movie expand 14 9 movie expand 16 9 16 9 subtitles is selected and confirmed by pressing OK the Vertical Shift function is activated This allows you to correct the position of the projected image upwards or downwards 1 Use Cursor Control to move the projected im...

Страница 24: ...tton will show the Magnification slider pressing the D igital Zoom button twice will turn off Digital Zoom Auto image The Auto Image function automatically sizes and positions the image to fit optimally in the screen picture In addition it takes care for phase adjustment It does not affect the selected picture format When Auto Image is set to On the Horizontal size Shift and Phase options are grey...

Страница 25: ...on the computer image 6 Press OK to confirm and store the adjustment 7 If required select the next item to be adjusted or press Menu to exit Philips Home Cinema Projector English User guide Garbo 25 5 Operation On Screen Display Menu Picture Digital Freeze Digital Zoom Magnification Auto Image Horizontal size Phase Shift Shift is used to adjust the position of the image Press OK key to activate Sh...

Страница 26: ...o optimize its use and handling Press Menu and select Settings in the menu bar The following settings adjustments can now be made for both Computer Component and Video S video input according to the instructions under General explanation Language To select the required menu language Keystone correction To correct picture distortion of the vertical keystone type by internal scaling Monitor out Enab...

Страница 27: ... has stopped before disconnecting the projector 2 Turn the projector over Never place the projector on the side where the connections are located 3 Press tab A and remove filter holder B from the projector 4 Press clamp C open the holder and remove the filter 5 While firmly holding the filter gently remove any accumulated dust from the dusty side with a vacuum cleaner 6 Press clamp C put the filte...

Страница 28: ...ojector over Never place the projector on the side where the connections are located 3 Push tab A to the right and remove the lamp door When tab A is pressed the mains inlet socket will be partly closed The lamp door therefore cannot be removed if the mains lead is not disconnected from the projector 4 Read the caution and warning labels on the lamp holder Lamp Lamp Replacement Philips Home Cinema...

Страница 29: ...ector Mains inlet socket and the wall socket 12 Press the Standby button to switch on the projector 13 Reset the lamp life time see Resetting the lamplife time 14 Dispose of the old lamp in special chemical disposal bins 1 Press Menu The menu bar appears on the screen 2 Use cursor control to select Settings in the menu bar 3 Use cursor control to select Lamp counter in the sub menu 4 Press OK for ...

Страница 30: ...on Press Standby to switch on the projector A V Mute active Cancel A V Mute Shift and or Horizontal size are not adjusted correctly Adjust Shift or Horizontal size see Display adjustment under Operation On Screen Display Menu Activate the Auto image function via the On Screen Display menu In Component Video mode Auto Image has not selected the correct settings for Shift and or Horizontal Size Adju...

Страница 31: ... be selected automatically in case of RGBS connection Select Component input manually using the Source button on the projector or the remote control Adjust Brightness Contrast Saturation or Hue see Picture adjustment under Operation On Screen Display Menu Reset all projector settings in the Settings menu Factory reset Image is not focused Adjust focus ring Distance between projector and screen is ...

Страница 32: ... flashing press any button to activate the projector again Standby indicator text on Standby button ring around Standby button red standby mode green operation mode orange warming up slow blinking orange cooling down Do not switch the projector off it will restart the lamp automatically within a few seconds Monitor out has been enabled but the external monitor is not correctly connected the pictur...

Страница 33: ...nnect another USB device mouse scanner webcam etc and see if it works If it does not work there is a problem with the computer Also refer to the User Guide or support information of the computer Windows did not manage to install the driver correctly In this case the Device manager will contain a catagory Other devices Disconnect the projector Remove all items listed under Other devices in the Devi...

Отзывы: