background image

25

Recor

ding

Recording from TV


1.

    Refer to 

‘Recording: Step by Step’

 for the procedures 

of recording  on a disc from TV.

 Recording: Step by Step (p.24) 


 When the DVD recorder is switched on during record-

ing, you can only view the recorded channel on screen. 

If you would like to watch a different TV channel, you 

can do so by switching your TV’s input source to tuner 

device (e.g. antenna, cable box or satellite box). This 

will  not  affect  the  recording  already  in  progress.  For 

further information on how to change the input source, 

please check the instruction manual offered by your TV 

manufacturer.

Recording from External  

Devices

Before you start...

 •  Refer to

 ‘Recording: Step by Step’

 for the basic 

procedures of recording on a disc.

 Recording: Step by Step (p.24) 

 ..........................................................................................

Recording from VCR/V8 Cam-

corder/DVD Player


1.

    Press 

SOURCE

 repeatedly to select the correct signal 

source.  

Recording_02_03


2

.    Cue the external device and start playback at the 

beginning of the scene you wish to record.


3.

    Follow the gereral operation to start recording. 

 ..........................................................................................

Recording from DV (Digital 

Camcorder)

•   The DV-Link INPUT jack on this recorder is for use 

with DV-compatible camcorders only, and not to be used 

for connecting any other firewire devices.

•   Only DV signals can be input to the DV-Link jack on 

this DVD recorder.

•   Do not connect a MICRO MV format video camcorder 

to the DV-Link jack.

•   Despite the technology endeavour with which this DVD 

recorder is built, it is still likely that your DV may not 

be fully supported by the unit. If you still experience 

problem using the DV-Link for recording, please 

connect your DV via S-Video or composite cables to 

this DVD recorder.

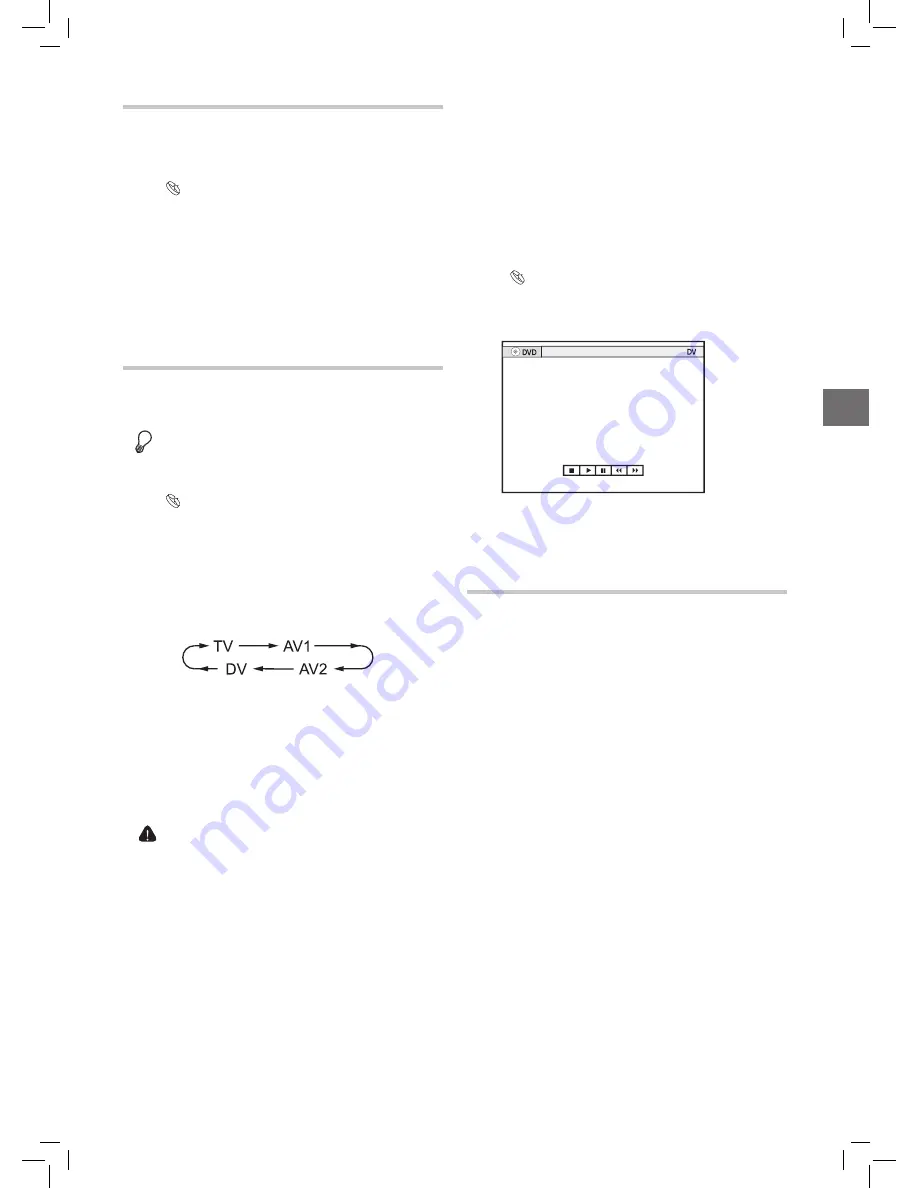
•   The DVD recorder is equipped with a camcorder control 

(Play, Stop, REW or FFW) feature via the DV-Link con-

nection. Simply move the screen cursor to the desired 

function on the DV input screen, then press 

OK

 on the 

remote control.

 ..........................................................................................


1.

   Press 

SETUP

 to display the Setup menu.

S

elect recording mode through 

Recording 


Record-

ing Mode.

 Recording Mode (p.42)


2.

    When completed, press 

SETUP

 to exit the Setup menu.


3.

    Press 

SOURCE

 repeatedly to select ‘DV’ as the signal 

source.

The DV Control panel will be displayed.


4.

    Cue the DV and start playback at the beginning of the 

scene you wish to record.


5.

    Follow the gereral operation to start recording. 

One-Touch Recording


1.

    When all recording settings are confirmed, press 

RECORD

 twice to instantly start a 30-minute 

recording session.


2.

    For longer recording hours, press 

RECORD

 repeat-

edly, which will offer you a length option of up to 6 

hours in 30-minute increments.


  ‘One-Touch Recording’ will start with the DVD 

recorder’s default settings, if you do not make any 

setting changes before activating this function.


  The overall recording time depends on the selected 

recording mode and the storage capacity available on 

the disc.


  Recording will stop automatically when there is no 

more space on the disc or after 6 hours of recording 

(whichever happens first).

Содержание G-CODE 7819901511

Страница 1: ...DVDR3395 ...

Страница 2: ... External Devices 25 One Touch Recording 25 Inserting Chapter Mark during Recording 26 Timer Recording Introducing Timer Record Menu 27 Setting Timer Program Date Time Mode 28 Setting Timer Program G Code Mode 29 Notice for Timer Recording 29 Playback Playback Step by Step 30 Programmed Playback for Audio CD 30 Playing Picture File 30 Introducing Navigation Menu 31 Digital Video Support MPEG 4 34 ...

Страница 3: ...rticularly at plugs convenience receptacles and the point where they exit from the product 11 ACCESSORIES ATTACHMENTS Use only acces sories attachments specified by the manufacturer 12 USAGE Unplug this product during lightning storms or when it is not used for long periods of time 13 CART Use only cart stand tripod bracket or table specified by the manufacturer or sold with the product When a cart ...

Страница 4: ...ROGRESSIVE SCAN PICTURE PROBLEMS IT IS RECOM MENDED THAT THE USER SWITCH THE CONNECTION TO THE STAN DARD DEFINITION OUTPUT IF THERE ARE QUESTIONS REGARDING OUR TV SET COMPATIBILITY WITH THIS MODEL 525P AND 625P DVD PLAYER PLEASE CONTACT OUR CUSTOMER SERVICE CENTER IMPORTANT FOR LASER PRODUCTS 1 CLASS 1 LASER PRODUCT 2 DANGER Visible and invisible laser radiation when open and interlock failed or d...

Страница 5: ...es recorded with CD sound VHS quality MPEG 1 compression technology Super Video CD SVCD CDs for video files recorded with CD sound SVHS quality MPEG 2 compression technology Audio CD CDs for music files recorded in digital signal featuring better audio quality less distortion and less deterioration of audio quality over time CD R RW Finalized CD R RW discs recorded in Audio CD or Video CD formats or...

Страница 6: ...n code not supported by the recorder DVD RAMs Data discs e g CD ROMs DVD ROMs without files supported by this DVD recorder Standard SACDs Hybrid type of SACDs can be played as normal Audio CDs Media Files Formats Supported Application Category Formats extention Playback Video MPEG 1 MPEG 2 VOB DAT MPG MPEG 4 AVI DIV DIVX Music MP3 Picture JPEG JPG If an MP3 file name includes two byte character the ...

Страница 7: ...ange indicator lights up when there are Timer Programs set for recording 4 OPEN CLOSE button Opens or closes the disc tray 5 Disc tray Holds discs securely during recording or playback Please do not put a disc on the tray and forcefully close the tray during power off mode This may cause malfunction of the DVD recorder 6 DV LINK IEEE 1394 jack Connects digital camcorder 7 LINE IN VIDEO AUDIO L R j...

Страница 8: ... VIDEO AUDIO L R jacks Connects the outputs of external equipment via composite video audio cables 4 COMP OUT COMPONENT jacks Connects the inputs of external equipment via component video cables 5 AV OUTPUT VIDEO AUDIO L R jacks Connects the inputs of external equipment via composite video audio cables 6 AC IN terminal Connects the power cord The actual appearance of the unit may be slightly diffe...

Страница 9: ...button Commercial Skip Press to fast forward playback by 30 seconds 11 PREV button Press to go to previous file pic ture track chapter 12 REW button Press to reverse playback 13 STOP button Press to stop playback or recording 14 POWER button Press to switch on or off the recorder 15 SOURCE button Press to select signal source 16 TV MODE button Press to switch to TV source 17 TOOLS button Press to d...

Страница 10: ... VIDEO OUT jack of the DVD recorder directly to the video input of your TV Connecting VIDEO OUT jack of this recorder to a TV via a VCR may cause a viewing problem when playing a copyright protected disc The same viewing problem may also occur when connecting the recorder to an integrated TV Video system Step 1 Connecting Antenna Satellite Cables Option 1 With Cable Box Wall Outlet Cable Box DVD R...

Страница 11: ...axial digital input on a stereo amplifier or a receiver IN OPTICAL COAXIAL COAXIAL Digital Out Optical DIGITAL AUDIO DEVICE Coaxial digital cable T V RF OUT RF IN Wall RF IN Step 2 Connecting the Video Cable Option 1 Using Composite Cable Use the video yellow end of a composite cable to connect the VIDEO OUT jack on the DVD recorder to the VIDEO IN jack on the television TV VIDEO R L R L VIDEO IN A...

Страница 12: ...der to the AV INPUT jack on this DVD recorder using a composite Audio Video cable When connecting via the rear panel INPUT jacks R VIDEO L Audio Video Cable VCR DVD Player Camcorder L R VIDEO OUT AUDIO OUT When connecting via the front panel INPUT jacks R VIDEO L L R VIDEO OUT AUDIO OUT Audio Video Cable VCR DVD Player Camcorder Connecting to DV Digital Camcorder Connects the DV link jack on the D...

Страница 13: ...Select Yes to apply the setting If you choose No or do not confirm in 5 seconds the change will be discarded In this section is used to indicate the movement between different levels of options For example the procedure for setting the language of subtitle is written as Go through Language Subtitle First Level Option Second Level Option Third Level Option Description Notice System Video Output Comp...

Страница 14: ...99 Seconds Display interval for each picture VCD PBC On Off For enabling disabling playback control function on VCD discs which adopt the VCD 2 0 standard DivX R VOD Registration Code For obtaining the registration code of this DVD recorder Recording Mode HQ SP SPP LP EP SLP Recording mode of different quality and length See Recording Mode p 42 Chapter Mark Off 5 Minutes 10 Minutes 15 Minutes 20 M...

Страница 15: ... Signal Antenna Cable TV signal source Country Multiple Countries For selecting the appropriate area where you are currently situated Utilities Scan Channel Edit Channel For setting resetting TV channels Exit Indicates more detailed descriptions are provided in the latter part of this chapter ...

Страница 16: ..._SystemSetup_07_03 4 If you connect the DVD recorder to a normal 4 3 TV select either 4 3 Letterbox or 4 3 PanScan How ever when playing back a DVD Video disc recorded in wide picture format the picture shown on screen is different 1 If you select 4 3 Letterbox Started_SystemSetup_07_05 The picture is shown with black bars at the top and bottom 2 If you select 4 3 PanScan Started_SystemSetup_07_04...

Страница 17: ...the second level of the menu without making any change If the password you enter is incorrect or unmatched a warning message will appear for about 5 seconds and then you will be asked to enter your password again Advanced System Setup Before you start Complete the basic system settings introduced in the previous section first Using Channel Editor Channel Editor offers an easy to manage interface to...

Страница 18: ...K Starteww wwwwwwwd_Advanced_02_06 9 3 Press or the number buttons to enter the channel number then press OK Started_Advanced_02_07 The channel will be swapped to the designated location 4 To swap other TV channels repeat steps 1 3 to complete the settings Renaming TV Channels 1 Press to select a channel from the list then press OK 2 Press to select Rename then press OK 3 The on screen input keypa...

Страница 19: ...ation such as date channel number and start end time which are all contained in G Code programming numbers You can complete the timer recording setup simply by inputting the G Code number which can be found in most newspapers TV listing magazines or online sources Setting up G Code System As channel numbers may vary depending on where you live it is suggested that you build up a matching channel l...

Страница 20: ...our TV If you are watching TV Image from your selected channel will be shown If you are watching DVD Video or VCD Image of the disc being played will be shown If you are listening to an audio CD The display window will be blank If you are browsing pictures A Picture icon will be shown Using Tools Play Playing Files 1 On the Tools menu press to select Play then press OK EasyAccess_EasyGuider_02_01 ...

Страница 21: ...to confirm your input before go to next setting 7 The Timer Program information will appear Press OK to exit the Timer Record setting EasyAccess_EasyGuider_04_03 Using Tools Record Before you start Choose a recordable disc with enough space Check the disc types supported by the DVD recorder you are using Discs Types Supported p 4 Complete the channel scanning process for your TV Setting TV Channels...

Страница 22: ... enter the channel number shown on your TV then press OK EasyAccess_EasyGuider_04_05 To make use of the G Code system for timer recording you need to match the GCNs guide channel numbers used by the G Code system with the channel numbers shown on your TV so that the relevant information can be correctly assigned to the programs you would like to record 6 Press to select a recording mode then press...

Страница 23: ...Yes DVD R Data file Not required N A DVD VR Required No DVD RW Data file Not required N A DVD VR Not required N A Quick preparation is a technology of formatting which saves much time compared to traditional Full Preparation method It creates a temporary area on the DVD RW disc to mark the end of the recording data When you apply editing functions or add new recording sessions this temporary area is...

Страница 24: ...haracters one by one in a backward direction Clear to delete all characters shown on the entry bar Cancel to discard changes and returning to the previous page Finish to saving the settings and exiting the screen Using On Screen Input Keypad Naming a New Title or File 1 When the keypad screen is displayed press and OK to select one of the input options 2 Press to select desired letters numbers or ...

Страница 25: ...tion then press OK Recording_01_03 Step 4 Start recording For Example to record from TV you need to select a channel first Press TV MODE to select TV as the signal source then press CH and CH to select a desired channel Recording_01_02 You can select a channel by pressing number buttons 0 9 and OK For Channel 6 press 6 then OK For Channel 55 press 5 5 and OK Press RECORD to start recording To pause...

Страница 26: ...e technology endeavour with which this DVD recorder is built it is still likely that your DV may not be fully supported by the unit If you still experience problem using the DV Link for recording please connect your DV via S Video or composite cables to this DVD recorder The DVD recorder is equipped with a camcorder control Play Stop REW or FFW feature via the DV Link con nection Simply move the s...

Страница 27: ...rt extra chapter marks in addition to those created by system default setting 1 Press SOURCE repeatedly to select the signal source 2 Press RECORD to start recording 3 During recording press EDIT to insert chapter mark at your desired point 4 To add more chapter marks repeat step 3 ...

Страница 28: ... TIMER to display the Timer Record menu If your model supports the G Code system you can press on a highlighted program to switch between the Date Time Setting mode and the G Code Setting mode Date Time Mode Timer_01_01 Storage capacity available on the destination disc for a particular recording mode Current system date Current system time The page you are viewing Error message bar Indicate funct...

Страница 29: ...rogram set previ ously go to Timer Record menu highlight the bin icon located in the first column of the entry you want to delete then press OK G Code Mode Timer_01_02 Storage capacity available on the destination disc for a particular recording mode Current system date Current system time The page you are viewing The G Code number of your desired TV program s Recording mode Indicate function of ca...

Страница 30: ...to confirm your selection 4 Follow step 6 8 in Setting Timer Program Date Time Mode to complete the setting If you want to return to the Date Time mode press to select Date Time Setting then press OK However please note that all the settings you have entered will be cleared once you exit the present setup screen If you would like to delete a timer program set previously go to Timer Record menu high...

Страница 31: ...les audio files and VCD SVCD disc press PREV or NEXT to select your desired track file For music and video files recorded on discs you can also press ALBUM or ALBUM to select a folder which contains the desired file For picture files recorded on discs see Playing Picture File Step 4 Stop playback For DVD Video VCD SVCD discs and video files Press STOP to stop playback at a marked stop Press PLAY to resu...

Страница 32: ...cture image and to pan through the enlarged image 1 Select Zoom Picture Control then press OK A control pad will appear Playback_08_03 Introducing Navigation Menu During playback press NAVI button on the remote control to display the Navigation menu The options shown on the Navigation menu vary depend ing on the media types e g DVD audio CD VCD etc as well as the supporting features offered by the...

Страница 33: ...sic files To perform the function when playing video files titles press to select Search then press OK to go to the sub menu To search by title chapter number 1 Select Title Chapter then press OK Playback_01_03 The bar for entering the title chapter number will appear 2 Enter the chapter title numbers then press OK If during the process you would like to revise the number you enter press to re edit ...

Страница 34: ...inning of your desired session press to select Point A then press OK Playback_02_01 3 When playback reaches the end of the desired session press to select Point B then press OK Repeat from point A to point B will start 4 To cancel the repeat mode press to select Cancel then press OK If you exit the function setting only point A the preset point A will still be valid when you enter the A B Repeat f...

Страница 35: ...but in format other than MicroDVD and SubRip are not supported by this DVD recorder Bitmap based subtitles such as idx sub are not supported by this DVD recorder Playing MPEG 4 Files 1 Follow Playback Step by Step to place the disc in the DVD recorder 2 A dialogue box offering the file type options will appear Press to select Video then press OK Playback_06_01 3 If the file is not supported by the D...

Страница 36: ...ecorder Playback_07_01 The code seen above serves as an example only 3 When completed press SETUP to exit the Setup menu 4 Go to the DivX website http www divx com and enter the recorder s registration code in your account When you finish filling in the required details you will then be directed to a film download link Follow the instructions given on the website and burn the short film to a disc 5 Fo...

Страница 37: ...e to edit and start the playing Then press EDIT to display the Edit menu Playback Step by Step p 30 Naming a Title 1 On the Edit menu select Rename then press OK The on screen input keypad will be displayed Editing_01_01 On Screen Input Keypad p 23 2 Select Clear first then press OK to delete the default title 3 Refer to the instruction in On Screen Input Keypad to enter a new title name If you dec...

Страница 38: ... disc menu Editing_01_03 Overwriting a Title This function is applicable to titles saved on rewritable DVD discs only When you apply the function to a title it will be deleted and overwritten when you record new title pro gram next time 1 On the Edit menu press to select Overwrite then press OK to switch on or off the Overwrite function 2 To exit the setting select Exit then press OK 3 If you swit...

Страница 39: ...nect the recorder to TV try connecting your recorder to the TV s S VIDEO output Image imported from an external device is distorted If the video signal from the external device is copyright protected you need to connect the device directly to your TV Recording Cannot record Make sure you have inserted a recordable disc with enough space Make sure the disc you insert has been formatted or prepared ...

Страница 40: ...aying the disc automatically DVD Video disc features an auto playback function No playback on DVD recorder Check whether there is any recording on the disc Check whether the disc inserted contains playable files Check whether an unplayable disc is inserted Check whether the way you insert the disc is correct Insert the disc with the label side up If there is no label on the disc please check with t...

Страница 41: ...Rear Panel RF Input Coaxial x 1 RF Output Coaxial x 1 Video Input Cinch yellow x 1 Video Output Cinch yellow x 1 Audio L R Input Cinch white red x 1 Audio L R Output Cinch white red x 1 Component Video Output Y Pb Pr green blue red x 1 Progressive Scan Output 480p output Digital Audio Output Coaxial x 1 Tuner TV Format NTSC Video Performance DA Converter 10 bit 27MHz Composite Video Output 1 Vpp 7...

Страница 42: ... Separation 1kHz 110dB Total Harmonic Distortion 1kHz 65dB Audio Recording Format DVD VR HQ SP SPP LP EP SLP mode Dolby Digital 2 channel Audio Format Supported Playback Playable Formats MP3 LPCM Dolby Digital 2 channel Dolby Digital 5 1 channel digital out only Disc Types Supported Playback DVD Video DVD R RW DVD R RW Video CD VCD Super Video CD SVCD Audio CD CD R RW JPEG MP3 MPEG 1 MPEG 2 MPEG 4...

Страница 43: ...Recording result Once To record program broadcast during specific time slot N A N A Daily To record program broadcast every day during specific time slot With restriction The preset program will be recorded every day during the designated period of time Without restriction The preset program will be recorded every day continuously Weekly To record program broadcast on certain day s every week during...

Страница 44: ...e as a DVD Video Contents can be recorded only once to a DVD R and will have the same format as a DVD Video DVD RW DVD RW is a recordable and rewritable disc that is the same size as a DVD Video DVD RW has two different modes VR mode and Video mode DVD created in video mode has the same format as a DVD Video while discs created in VR Video Recording mode allow the contents to be programmed or edit...

Страница 45: ...gressive Scan mode differs from the Interlaced Scan mode in how a video image is updated In Progressive Scan mode scan lines for an image are refreshed in every pass and by a sequential order In the Interlaced Scan mode image is updated by alternating sets of odd and even scan lines Progressive Scan Mode Line 1 Line 2 Line 3 Line 4 Line 5 Line 6 Line 7 etc Interlanced Scan Mode Line 1 Line 2 Line ...

Страница 46: ...DISC CR8 8 0x 31 Mitsubishi MCC 004 16 0x 32 TDK TDK 003 16 0x 33 RICOH RICOHJPN R03 16 0x 34 Philips PHILIPS C16 16 0x 35 MAXELL MAXELL 003 16 0x 36 CMC CMC MAG M01 16 0x No Brand Manufacturer ID Media Speed 37 RITEK RITEK R04 16 0x 38 MBI MBIPG101 R06 16 0x 39 OPTODISC OPTODISC R16 16 0x 40 PRODISC PRODISC R04 16 0x 41 PRODISC PRODISC R05 16 0x 42 NANYA NAN YA FLX 16 0x 43 NANYA NAN YA ALX 16 0x...

Страница 47: ...ME01 8 0x 18 TAROKO TAROKO MX8 8 0x 19 KINGPRO DKMZ01 8 0x 20 MJC MJC ME 8 0x 21 POSTECH POSG06 8 0x 22 Lead Data LEADDA S03 8 0x 23 DST Dvsn 8 8 0x 24 DAXON DAXON0 08S 8 0x 25 Gigastorage GSC004 8 0x 26 Gigastorage GSC003 8 0x 27 NANYA NAN YA A01 8 0x 28 BeALL BeALL G80001 8 0x 29 CMC CMC MAG AE1 8 0x 30 MAXELL MXL RG03 8 0x 31 SONY SONY08 D1 8 0x 32 TDK TTG02 8 0x 33 MITSUBISHI MCC02 RG20 8 0x 3...

Страница 48: ...170 CLASS 1 LASER PRODUCT Meet Philips at the Internet http www philips com http www philips com support DVDR3395 P N 7819901511 ...

Отзывы: