background image

30

English

System Menu Options

Basic operations

1

Press 

SYSTEM MENU

 to enter the Setup

Menu.

2

Press 

22

/

33


to select a page to be set.

3

Press 

5

/

to highlight an option.

4

Enter its submenu by pressing 

33


or 

OK

.

5

Move the cursor by pressing 

5

/

to highlight

the selected item.

In cases of value setting

, press 

5

/

to adjust

values.

6

Press 

OK

 to confirm.

To return to the upper-level menu

Press 

2

.

To exit from the menu

Press 

SYSTEM MENU

 again.

The settings will be stored in the player’s

memory even if the player is switched off.

Note:
– Some of the features in the System Menu
Options are described in “Preparations”.

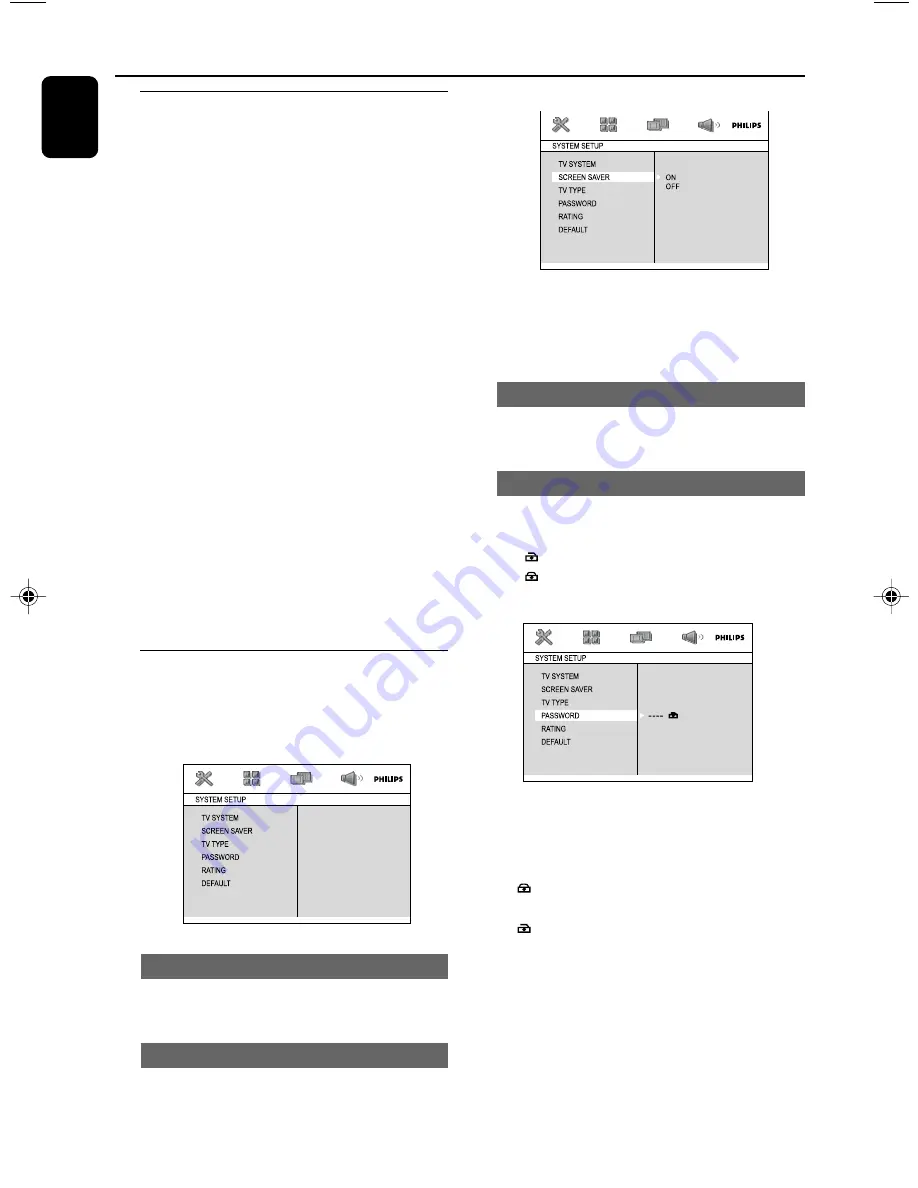
SYSTEM SETUP

The options included in SYSTEM SETUP page

are: “TV  SYSTEM”, “SCREEN  SAVER”, “TV TYPE”,
“PASSWORD”, “RATING”  and “DEFAULT”.


TV SYSTEM

See "Preparations-Step 3: Setting video

preference" for details.

SCREEN SAVER

This function is used to turn the screen saver on

or off.


ON

: In STOP or No DISC mode, if no

actions are performed about 3 minutes, the
screen saver will be activated.

OFF

: Screen saver is disabled.

TV TYPE

See "Preparations-Step 3: Setting video

preference" for details.

PASSWORD

You can enter your four-digit password to

activate or deactivate rating control.

 " 

 " is displayed if rating control is activated.

 " 

 " is displayed if rating control is

deactivated.

To change password

1

Move to "PASSWORD" and press 

33

 or 

OK

to enter its submenu.

2

If " 

 " is displayed, enter the default password

(0000) and press 

OK

 to unlock.

If " 

 " is displayed, directly proceed with Step 3

and 4.

3

Enter your new four-digit password using

Numeric Keypad (0-9)

 on the remote.

4

Press 

OK

 to confirm and the new password

takes effect.

Note:
– The default password (0000) is always active
even if the password has been changed.

pg 001-039_FWD831-55-Eng

2006.10.18, 15:40

30

Содержание FWD831

Страница 1: ...FWD831 DVD Mini HiFi System ...

Страница 2: ... Fernando La Herradura Huixquilucan Localidad y Tel Edo de México C P 52784 Tel 52 69 90 00 Exportador Philips Electronics HK Ltd País de Origen China Nº de Serie ______________________________ LEA CUIDADOSAMENTE ESTE INSTRUCTIVO ANTES DE USAR SU APARATO AVISO IMPORTANTE Philips Mexicana S A de C V no se hace responsable por daños o desperfectos causados por Maltrato descuido o mal uso presencia d...

Страница 3: ...3 9 2 3 4 0 1 8 6 5 7 6 31 ...

Страница 4: ... 4 7 2 5 8 0 3 6 9 ANGLE PROG GOTO E L T I T B U S O I D U A ZOOM VOL ECHO KEY SOUND DBB IS OK SYSTEM MENU MODE REPEAT A B SLEEP TIMER OSD DISPLAY MUTE AUX DISC MENU DISC 1 5 7 2 0 4 6 8 7 8 3 TUNER TUNER ...

Страница 5: ...in U S patents and other intellectual property rights owned by Macrovision Corporation and other rights owners Use of this copyright protection technology must be authorized by Macrovision Corporation and is intended for home and other limited viewing uses only unless otherwise authorized by Macrovision Corporation Reserve engineering or disassembly is prohibited Windows Media is a trademark of Mi...

Страница 6: ...7679 Latina 7665 Latvian 7686 Letzeburgesch 7666 Limburgan Limburger 7673 Lingala 7678 Lithuanian 7684 Luxembourgish 7666 Macedonian 7775 Malagasy 7771 Magyar 7285 Malayalam 7776 Maltese 7784 Manx 7186 Maori 7773 Marathi 7782 Marshallese 7772 Moldavian 7779 Mongolian 7778 Nauru 7865 Navaho Navajo 7886 Ndebele North 7868 Ndebele South 7882 Ndonga 7871 Nederlands 7876 Nepali 7869 Norsk 7879 Northern...

Страница 7: ...tep 3 Setting video preference 20 21 Step 4 Setting language preference 22 Basic Functions Switching the system on off 23 Power saving automatic standby 23 Sound control 23 Volume control 23 Microphone Mixing 23 Key Control 23 Plug and Play for tuner installation 24 Disc Operations Playing discs 25 Using the disc menu 25 Basic playback controls 25 27 Pausing playback Selecting a track chapter titl...

Страница 8: ... TV MODE BRIGHTNESS CONTRAST HUE SATURATION AUDIO SETUP 33 DIGITAL OUT DOWNMIX 3D PROCESSING LPCM NIGHT MODE Radio Reception Tuning to radio stations 34 Programming radio stations 34 Automatic programming Manual programming Tuning to preset radio stations 34 Clock Timer Clock setting 35 Timer setting 35 Sleep timer setting 35 Specifications 36 Troubleshooting 37 38 Glossary 39 ...

Страница 9: ...io WMA Supported MP3 CD format ISO 9660 UDF format Max title album name 10 characters Max title number plus album is 255 Max nested directory is 8 levels The max album number is 32 The max MP3 track number is 999 Supported sampling frequencies for MP3 disc 32 kHz 44 1 kHz 48 kHz Supported Bit rates of MP3 disc are 32 64 96 128 192 256 kbps The following formats can t be supported The files like VM...

Страница 10: ...moved from cold to warm surroundings making it impossible to play a disc Leave the player in the warm environment until the moisture evaporates Do not block the vents Do not operate the system in an enclosed cabinet and allow about 10 cm 4 inches of free space all around the player for adequate ventilation 10 cm 4 inches 10 cm 4 inches 10 cm 4 inches DVD Micro Hi Fi System The ventilation should n...

Страница 11: ...against this set your volume to a safe level before your hearing adapts and leave it there To establish a safe volume level Set your volume control at a low setting Slowly increase the sound until you can hear it comfortably and clearly without distortion Listen for reasonable periods of time Prolonged exposure to sound even at normally safe levels can also cause hearing loss Be sure to use your e...

Страница 12: ...esult in hazardous radiation of EMC or other unsafe operation To avoid overheating of the system a safety circuit has been built in Therefore your system may switch to Standby mode automatically under extreme conditions If this happens let the system cool down before reusing it not available for all versions Step 1 Placing speakers Front speaker left Front speaker right VIEWING AREA Place the fron...

Страница 13: ...ked wire to Fully insert the stripped portion of the speaker wire into the terminal as shown Notes Ensure that the speaker cables are correctly connected Improper connections may damage the system due to short circuit For optimal sound performance use the supplied speakers Do not connect more than one speaker to any one pair of speaker terminals Do not connect speakers with an impedance lower than...

Страница 14: ...O OUT jack to the video input jack or labelled as A V In Video In Composite or Baseband on theTV set 2 To hear the sound of this DVD Player through yourTV use the audio cables white red to connect LINE OUT L R jacks of the DVD Player to the corresponding AUDIO IN jacks on theTV Using S Video In jack 1 Use the S Video cable not supplied to connect the system s S VIDEO OUT jack to the S Video input ...

Страница 15: ...TV s RF jack Connections Step 5 Connecting the power cord IMPORTANT Never make or change any connection with the power switched on After everything is connected properly plug in the AC power cord to the power outlet Optional Connecting additional equipment IMPORTANT Some discs are copy protected You cannot record the disc through aVCR or digital recording device When making connections make sure t...

Страница 16: ...T jack to the AUDIO INPUT jack on an active subwoofer not supplied DIGITAL IN D AUDIO IN L R VIDEO IN C Using the VCR for recording DVDs C Connect one of the system s VIDEO OUT jacks to the correspondingVIDEO IN jack and LINE OUT R L jacks to the AUDIO IN jacks on theVCR This will allow you to make analogue stereo two channel right and left recordings Recording digital D Connect the system s DIGIT...

Страница 17: ...n the system only to set the clock function iR sensor infrared sensor for remote control n to connect headphones MIC 1 2 to connect microphone MICVOL to adjust the mixing level for Karaoke Controls on the remote control 1 y switches the system on off 2 Numeric Keypad 0 9 inputs a track title chapter number of the disc 3 PROG ANGLE DVD VCD CD MP3 CD enters the program menu Tuner programs preset rad...

Страница 18: ...reproduction DISPLAY OSD displays information onTV screen during playback SLEEP TIMER Standby mode sets a time for switching on the system automatically Power on mode sets the sleep timer function auto off REPEAT A B forVCD CD to repeat a specific section within the same track for DVD to repeat a specific section in a disc MODE to select various repeat modes or the shuffle play mode for a disc ZOO...

Страница 19: ...n the remote 3 Then select the desired function for example É Å or CAUTION Remove the battery if it is exhausted or if the Remote Control is not being used for a long time Batteries contain chemical substances so they should be disposed of properly Step 2 Setting the clock 1 Go to Standby mode 2 Press and hold CLOCK SET on the front panel SET CLOCK is displayed briefly Then the hour digits flash o...

Страница 20: ... set use this setting you must also set your widescreen TV to full size available on a disc then the disc s own preference will be used Step 3 Setting video preference IMPORTANT Make sure you have completed all the necessary connections See Connections ConnectingTV Turn on theTV set and set it to the correct Video In channel You may go to channel 1 on yourTV set then press the channel button repea...

Страница 21: ...nentVideo In jack Cr CbY 1 Turn on your TV 2 Turn off yourTV progressive scan mode or turn on interlaced mode refer to yourTV user manual 3 Press STANDBY ON B B on the remote to turn on the DVD player 4 Select the correctVideo Input channel The DVD background screen appears on the TV 5 Press SYSTEM MENU 6 Press 22 33 repeatedly to select VIDEO SETUP 7 Select TV MODE to P SCAN then OK to confirm Th...

Страница 22: ...selected is not available on the disc the original language designated by each disc will be selected 3 Press 5 4 to select a language and press OK 4 Repeat steps 2 3 for other settings To exit the menu Press SYSTEM MENU again Step 4 Setting language preference You can select your preferred language settings so that this DVD Mini System will automatically switch to the language for you whenever you...

Страница 23: ... VOLUME XX is displayed on the display panel XX denotes the volume level To listen through the headphone Connect the headphone plug to the n socket on front panel of the DVD player The speakers will be muted To switch off the volume temporarily Press MUTE on the remote Playback will continue without sound and the mute icon turns on To activate sound reproduction you can press MUTE again adjust the...

Страница 24: ...d then the MW band All available radio stations with strong signal strength will be stored automatically The system will stop searching when all available radio stations are stored or when the memory for 40 preset radio stations is full Reinstalling plug and play 1 In Standby press and hold 38 on the system until AUTO INSTALL PRESS PLAY is displayed 2 Press 2 to start installation All previously s...

Страница 25: ...back will start automatically depending on the disc type If a disc menu appears on theTV see Using the Disc Menu If the disc is locked by parental control you must enter your four digit password See SYSTEM SETUP PASSWORD 6 At any time simply press STOP 9 to stop playback Disc Operations Using the disc menu For disc with Table Of Contents a menu may appear on theTV screen once you load the disc To ...

Страница 26: ...isc REPEAT ALL SHUFFLE to repeat playback of the whole disc in random order REPEAT ALL SHUFFLE OFF switches off the repeat mode Repeat A B DVD VCD CD MP3 WMA 1 Press REPEAT A B at your chosen starting point 2 Press REPEAT A B again at your chosen end point The section A and B can be set only within the same chapter track The section will now repeat continuously 3 To exit the sequence press REPEAT ...

Страница 27: ...creen For DVD VCD CD Elapsed playback time of the current track chapter Remaining playback time of the current track title Elapsed playback time of the whole disc Remaining playback time of the whole disc Display off For MP3 CD Elapsed playback time of the current track Remaining playback time of the current track Special disc features Playing aTitle DVD 1 Press DISC MENU The disc title menu appea...

Страница 28: ...mber of songs compiled onto the disc Playback selection During playback you can Press PRESET í ë to select another track in the current album Press PLAY PAUSE 2 repeatedly to pause resume playback Playing JPEG Picture CD General operation 1 Load a JPEG Picture CD A data disc menu appears on theTV screen and playback starts automatically from the first file 2 Press 22 to move to the folder column o...

Страница 29: ... scales X2 X3 X4 X1 2 X1 3 and X1 4 Use 22 33 5 4 to view the enlarged picture Playback with multi angles JPEG During playback press 22 33 5 4 to rotate the picture on theTV screen 5 flip the picture vertically 4 flip the picture horizontally 22 rotate the picture anti clockwise 33 rotate the picture clockwise Disc Operations ...

Страница 30: ... See Preparations Step 3 Setting video preference for details SCREEN SAVER This function is used to turn the screen saver on or off ON In STOP or No DISC mode if no actions are performed about 3 minutes the screen saver will be activated OFF Screen saver is disabled TV TYPE See Preparations Step 3 Setting video preference for details PASSWORD You can enter your four digit password to activate or d...

Страница 31: ...ugh the movie rating may be printed on the Disc cover The rating level feature does not work for such Discs Rating explanations 1 KID SAFE Suitable for children 2 G General Audience recommended as acceptable for viewers of all ages 3 PG Parental Guidance suggested 4 PG 13 Material is unsuitable for children under age 13 Parental Guidance suggested 5 6 PG R R Parental Guidance Restricted recommende...

Страница 32: ... only works when you have connected the DVD player sY Pb Pr jacks to yourTV that supports the progressive video input Otherwise a distorted picture will appear on theTV For proper progressive scan set up see Preparations Setting up Progressive Scan feature BRIGHTNESS Adjusts the brightness level Range 0 12 CONTRAST Adjusts the contrast level Range 0 12 HUE Adjusts the hue level Range 6 6 SATURATIO...

Страница 33: ...igher the sampling rate the better the sound quality 48kHz Playback a disc recorded at the sampling rate of 48kHz 96kHz Playback a disc recorded at the sampling rate of 96kHz 192kHz Playback a disc recorded at the sampling rate of 192kHz NIGHT MODE OFF Select this when you want to enjoy the surround sound with its full dynamic range ON Select this to level out the volume High volume outputs will b...

Страница 34: ...vailable stations are programmed in order of waveband Manual programming 1 Tune to your desired station refer to Tuning to radio stations 2 Press PROG ANGLE to activate programming PROG flashes on the display and PX appears in which X stands for the programme number 3 Press PRESET í ë to allocate a number from 1 to 20 for this station 4 Press PROG ANGLE again to confirm the setting The frequency o...

Страница 35: ...ER to complete the setting The timer is now set and activated Activating and deactivating timer In standby or during playback press SLEEP TIMER on the remote once Display shows if activated and disappears if deactivated Sleep timer setting The sleep timer enables the system to switch off by itself after a set period of time 1 Press SLEEP TIMER on the remote control repeatedly to select a preset ti...

Страница 36: ...e Coaxial Number of programmable tracks 16 Signal to noise ratio 65 dBA Channel separation 40 dB 1 kHz Total harmonic distortion 0 1 1 kHz TUNER FM wave range 87 5 108 MHz MW wave range 9 kHz 531 1602 kHz MW wave range 10 kHz 530 1700 kHz Tuning grid 9 10 kHz Sensitivity at 75 Ω mono 26 dB signal to noise ratio 2 8 µV stereo 46 dB signal to noise ratio 61 4 µV Selectivity 28 dB Total harmonic dist...

Страница 37: ...ntil the moisture condensed at the lens has cleared Replace or clean the disc see Maintenance Use a readable disc or correctly recorded format MP3 CD Select the appropriate video input mode on the TV set Check if theTV set is switched on Check the video connection Check if the system is securely connected Sometimes a slight picture distortion may appear This is not a malfunction Clean the disc Con...

Страница 38: ...ped speaker wire is clamped If the system is in pause slow motion or fast forward reverse mode press PLAY PAUSE 2 to resume the normal play mode Make sure the MP3 CD was recorded within 32 256 kbps bit rate with sampling frequencies at 48 kHz 44 1 kHz or 32 kHz Ensure that the DTS disc also supports Dolby Digital output If the signal is too weak adjust the antenna or connect an external antenna fo...

Страница 39: ...ugh the MP3 format one CD R or CD RW can contain about 10 times as much data volume as a regular CD can Multichannel DVD is specified to have all sound tracks constitute one sound field Multichannel refers to a structure of sound tracks having three or more channels Parental control A function of the DVD to limit playback of the disc by the age of the users according to the limitation level in eac...

Страница 40: ...mpra ESTA POLIZA NO SE HARA EFECTIVA EN LOS SIGUIENTES CASOS Cuando el aparato sea utilizado en condiciones distintas a las normales Cuando el aparato no haya sido operado de acuerdo con el instructivo de uso que se le acompaña Cuando la causa de la falla o mal funcionamiento sea consecuencia de una reparación inadecuada o alteración producida por personas no autorizadas por PHILIPS MEXICANA S A d...

Страница 41: ...de DIA_____________ MES ____________ AÑO____________ Producto importado por Philips Mexicana S A de C V Av La Palma No 6 Col San Fernando La Herradura Huixquilucan Edo de México C P 52784 Tel 52 69 90 00 Centro de Informacion al Cliente Información General LADA SIN COSTO PARATODA LA REPUBLICA CORREO ELECTRONICO 01 800 504 62 00 philips merkafon com ...

Страница 42: ...108 ...

Страница 43: ...109 ...

Страница 44: ...110 ...

Страница 45: ...English Español Português Português Deutsch Nederlands Italiano Svenska Dansk Suomi Polski Printed in China CLASS 1 LASER PRODUCT FWD831 PDCC JS JW 0639 Meet Philips at the Internet http www philips com ...

Отзывы: