background image

41

English

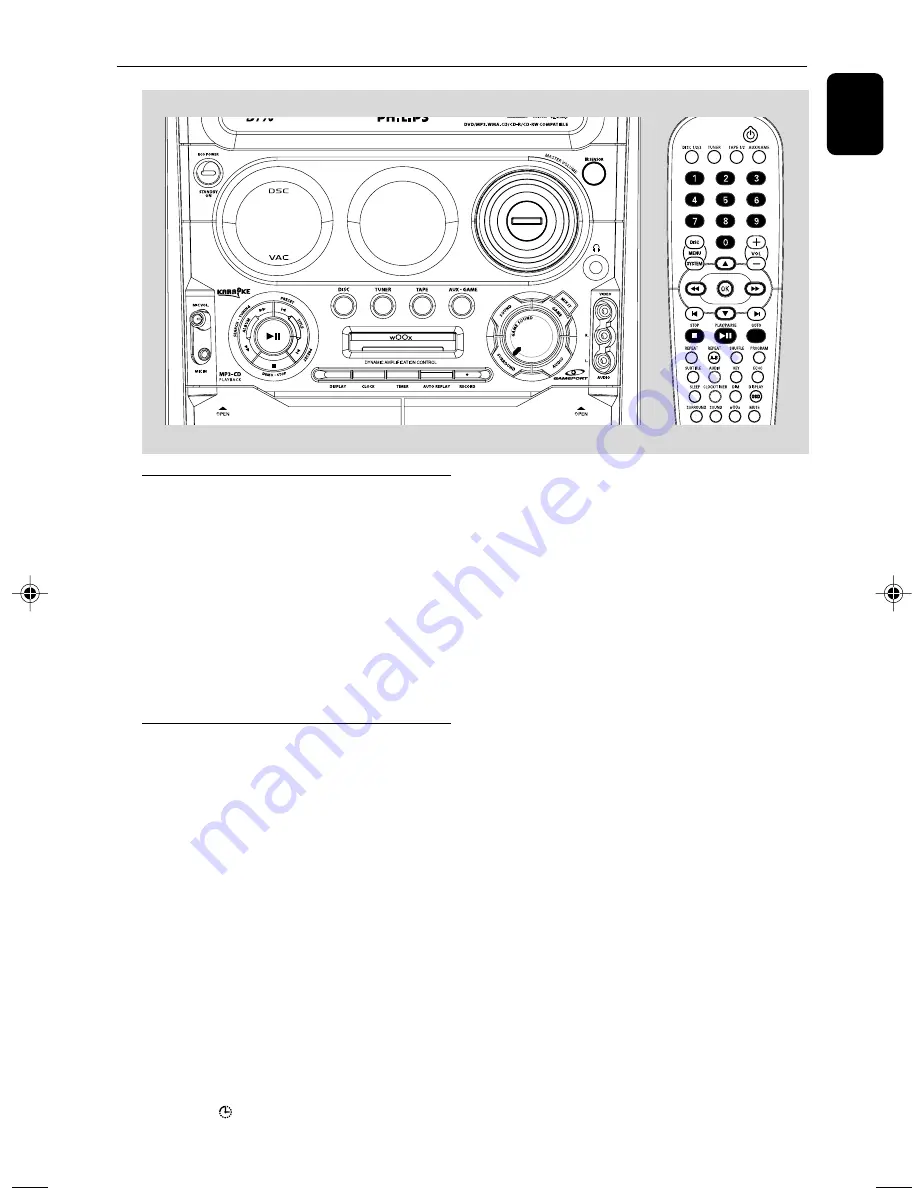
Clock/Timer Operations

Viewing the clock

The clock (if it is set) will be shown in Standby
mode.  Press 

CLOCK

 on the system to view

clock in any source mode  (or press 

CLOCK/

TIMER

 on the remote control).

Press 

DISPLAY

 on the system to select 12-

hour or 24-hour mode.

If the clock has not been set, “--:--“ will blink

until you set the clock.

Setting the clock - see page 19.

Setting the timer

The system can switch to DISC, TUNER,  TAPE
mode automatically at a preset time, serving as
an alarm to wake you up.

IMPORTANT !
– Before setting the timer, ensure that
the clock is set correctly.
– The timer will always be switched on
once set.
– The timer will not start if a recording
is in progress.
– The volume of the timer will increase
gradually from the minimum level to the
last tuned volume level.
– The time can be set in 24-hour mode.

1

Press and hold 

TIMER 

or

 CLOCK/TIMER

 for

more than 3 seconds,

TIMER

   will start to flash.

The selected source will be displayed.

2

Press 

DISC, TUNER or TAPE (1/2)

 to select

timer mode. The corresponding source will
appear on the display.

DISC 

- load the disc.

TUNER

 - Tune to the desired radio station.

TAPE 1

 - Load the prerecorded tape into tape

deck 1.

3

Press 

O

 or 

P

 on the system or remote control

to set hours .

4

Press 

or 

¡

 on the system or remote

control to set the minutes.

5

Press 

TIMER

 or 

CLOCK/TIMER

 to store the

setting.

TIMER ON

” will be displayed for 3 seconds.

The timer will start to work.

The timer will always be switched on once it

has been set.

Содержание FWD796

Страница 1: ...FWD796 DVD Mini HiFi System ...

Страница 2: ...e Serie ______________________________ LEA CUIDADOSAMENTE ESTE INSTRUCTIVO ANTES DE USAR SU APARATO CAUTION Use of controls or adjustments or performance of procedures other than herein may result in hazardous radiation exposure or other unsafe operation AVISO IMPORTANTE Philips Mexicana S A de C V no se hace responsable por daños o desperfectos causados por Maltrato descuido o mal uso presencia d...

Страница 3: ... 1 2 3 4 5 6 7 8 9 0 ...

Страница 4: ...4 PLUG PLAY for tuner installation ...

Страница 5: ...This product incorporates copyright protection technology that is protected by method claims of certain U S patents and other intellectual property rights owned by Macrovision Corporation and other rights owners Use of this copyright protection technology must be authorized by Macrovision Corporation and is intended for home and other limited viewing uses only unless otherwise authorized by Macrov...

Страница 6: ...ore use 22 Starting Operation 22 Disc Operations Playing discs 23 Using the disc menu 23 Basic playback controls 24 Skipping to another title track chapter Fast search Continuing playback from the last stop point Selecting various mode functions 24 25 Repeat play mode Shuffle play mode Repeating a section within a chapter track Programing favorite tracks 25 Changing discs during playback 26 Specia...

Страница 7: ...ewing clock 41 Setting the timer 41 42 Viewing timer 42 Setting the sleep timer 42 Sound andVolume Controls Sound control 43 Selecting surround sound wOOx Selecting sound effect Volume control 43 Changing the volume level Switching off the volume temporarily Listening through headphones Other Functions Switching on off 44 Switching the system on Switching the system to standby mode Switching to ec...

Страница 8: ...ture Kodak JPEG files on CDR W DivX R disc on CD R W DivX 3 11 4 x and 5 x WMA Supported MP3 CD format ISO 9660 UDF format Max title album name 12 characters Max title number plus album is 255 Max nested directory is 8 levels The max album number is 32 The max MP3 track number is 999 Supported sampling frequencies for MP3 disc 32 kHz 44 1 kHz 48 kHz Supported Bit rates of MP3 disc are 32 64 96 128...

Страница 9: ... 10 cm 4 inches of free space all around the player for adequate ventilation 10 cm 4 inches 10 cm 4 inches 10 cm 4 inches DVD Mini Hi Fi System The ventilation should not be impeded by covering the ventilation openings with items such as newspapers table cloths curtains etc Cleaning the cabinet Use soft cloth slightly moistened with a mild detergent solution Do not use a solution containing alcoho...

Страница 10: ...rs Front Left L Front Right R Center Surround Rear Left L Surround Rear Right R Step 1 Placing speakers and subwoofer For best possible surround sound all speakers except subwoofer should be placed at the same distance from the listening position Place the front left and right speakers at equal distances from theTV set and at an angle of approximately 45 degrees from the listening position place t...

Страница 11: ...VIDEO jack to the video input jack or labeled as A V In Video In Composite or Baseband on the TV set To listen toTV channels through this system use the audio cables white red to connect AUX IN L R jacks to the corresponding AUDIO OUT jacks on theTV set Using componentVideo In jack Pr PbY Use the component video cables red blue green to connect the system s Pr PbY jacks to the corresponding Compon...

Страница 12: ...or Use the composite cable yellow to connect the system s VIDEO jack to the video input jack on the RF modulator Use the RF coaxial cable not supplied to connect the RF modulator to yourTV s RF jack Using S Video In jack Use the S Video cable not supplied to connect the system s S VIDEO OUT jack to the S Video input jack or labeled asY C or S VHS on the TV set To listen toTV channels through this ...

Страница 13: ...o prevent unwanted interference Step 5 Connecting the power cord After everything is connected properly plug in the AC power cord to the power outlet Never make or change any connection with the power switched on On the DVD Mini Hi Fi System AUTO INSTALL PRESS PLAY may appear on the display panel Press 2 on the front panel to search and store all available radio stations or press 9 to exit See pag...

Страница 14: ...ideo connection Step 7 Connecting digital audio equipment Recording digital Connect the system s DIGITAL OUT jack to the DIGITAL IN jack on a digital recording device DTS DigitalTheater System compatible with a Dolby Digital decoder for example Before operation set the DIGITAL OUTPUT according to the audio connection See Using the Setup Menu Setting the digital output Step 8 Connecting to game con...

Страница 15: ...back for PLUG PLAY on the system only to initiate plug play mode 8 DEMO STOP 7 for DISC to stop playback or to clear a programme for DEMO in Standby or ECO power mode to activate deactivate demonstration for PLUG PLAY on the system only to exit plug play mode 9 wOOx Selects different type of enhanced wOOx sound settings wOOx 1 wOOx 2 wOOx 3 or wOOx OFF 0 DISPLAY to display disc information during ...

Страница 16: ...o change disc s Functional Overview Remote control Notes First select the source you wish to control by pressing one of the source select keys on the remote control DISC orTUNER for example Then select the desired function O or P for example 1 SOURCE to select the relevant active mode DISC1 2 3 TUNER TAPE1 2 or AUX GAME TUNER toggles between FM and MW band AUX GAME toggles between AUX and GAMEPORT...

Страница 17: ...e number of the disc to enter a number of preset radio stations VOL adjust the volume level adjust key control ECHO level in karaoke mode adjust speakers level in speaker setting mode OK to exit or confirm the selection GOTO to go direct to desired title chapter or time PROGRAM in disc mode to program favorite tracks in tuner mode to program favorite stations SHUFFLE to playback in random mode ECH...

Страница 18: ... PLAY is displayed 2 Press 38 again to start installation All previously stored radio stations will be replaced To exit without storing the plug and play Press 7 on the system Notes When the power is turned on the disc tray may open and close to initialise the system If Plug and Play installation is not completed it will be reinitiated the next time you power on the system If there is no antenna c...

Страница 19: ...o to TUNER TAPE or AUX GAME mode when you press the corresponding source button Viewing the clock in any source mode When you have set the clock press CLOCK on the system to view clock or press CLOCK TIMER on the remote control Press DISPLAY on the system to toggle between 12 hour and 24 hour modes The time will be displayed for 5 seconds and then go back to it s previous status IMPORTANT Make sur...

Страница 20: ...lator Selecting the color system that matches yourTV set This DVD Mini Hi Fi System is compatible with both NTSC and PAL For the playback of a DVD disc on this DVD Mini Hi Fi System the color systems of the DVD TV set and DVD Mini Hi Fi System should match 1 In disc mode stop playback and press SYSTEM MENU 2 Select icon and press 4 3 Press 1 5 4 keys on the remote control to toggle through the fun...

Страница 21: ...the surround speakers are closer to the listener than the front speakers 5 Press OK to confirm To remove the menu Press SYSTEM MENU Step 5 Setting language preference You can select your preferred language settings so that this DVD Mini Hi Fi System will automatically switch to the language for you whenever you load a disc If the language selected is not available on the disc the language set by d...

Страница 22: ...odes See yourTV manual for details 2 Press AUX GAME until GAMEPORT is displayed 3 Press GAME on the system to select the type of sound setting that best suits the game SPEED PUNCH BLAST or OFF 4 If you like to mix your game sound to your favorite music press MIX IT to select the desired music source DISC TUNER TAPE AUX or OFF DISC MIX DISC TUNER MIX TU TAPE MIX TAPE AUX MIX AUX OFF MIX OFF Notes T...

Страница 23: ...lose the disc tray READING DISC will be displayed In the stop mode press DISC 1 2 3 on the remote control repeatedly to select DISC 1 DISC 2 or DISC 3 cyclically Some discs can play automatically For discs with Table Of Contents a menu may appear on the TV screen When the menu is displayed press 1 5 4 keys to highlight your selection and press OK to confirm To select a play option press numeric ke...

Страница 24: ...erse or forward the disc 2 To resume normal play press 38 Continuing playback from the last stop point In stop mode and before the disc is removed press 38 to resume playback from where you have stopped To cancel the resume mode Press 7 again or go into STANDBY ECO POWER POWER OFF or press OPEN CLOSE key Notes Resume information will be erased if you have changed the disc opened the disc tray chan...

Страница 25: ...huffle function will be cancelled automatically In the Shuffle playback mode the system only supports the same disc format This function is only available for CD orVCD PBC OFF Repeating a section within a chapter track You can play a specific section in a chapter track repeatedly 1 Press REPEAT A B at your chosen start point 2 Press REPEAT A B again at your chosen end point The passage will now re...

Страница 26: ... disc you cannot select the language via this function Searching for a particular passage 1 Press 1 or on the system or on the remote control to select fast reverse search or fast forward search respectively 2 Press 1 or on the system or on the remote control repeatedly to select the required search speed For DVD or MP3 WMA reverse FR X2 p FR X4 p FR X6 p FR X8 p PLAY forward FF X2 p FF X4 p FF X6...

Страница 27: ...be displayed across the top of theTV screen 2 Press 1 or to select SETUP MENU p SLOW p ZOOM p ANGLE p STEP p PBC p SPEAKER SETTING 3 Press 4 to select the highlighted icon and press 5 4 to select your preferred option 4 Press OK to confirm a highlighted selection 5 To exit press SYSTEM MENU IMPORTANT Some operations may be different or restricted according to the disc format Refer to the jacket or...

Страница 28: ...EAKER SETTING 1 Select from the menu bar and press 4 to select subwoofer level rear level center level or OFF 2 Press VOL keys to adjust the speakers levels from 7dB to 8dB Checking the contents of DVD 1 Press DISC MENU on the remote control If the current title has a menu the menu will appear on the screen Otherwise the disc menu will be displayed 2 Press 1 5 4 to select the desired title or chap...

Страница 29: ... O or P to select the previous next title The title number will appear Note No album search function in menu off mode 7 During JPEG or Kodak Picture disc playback press KEY repeatedly to select different slideshow view options There are 12 options for selection The selected option will be displayed on theTV screen Kodak Picture disc 1 Load a Kodak Picture disc The disc reading time may exceed 30 s...

Страница 30: ...mote control to select an external subtitle option 5 Press SUBTITLE to select subtitle file DivX SUBTITLE SELECTED appears on the TV screen 6 Press 5 4 to highlight the movie file and press OK to confirm The playback will start accordingly 7 During playback you can zoom the picture by selecting zoom icon from the menu bar and press 4 to select ZOOMX2 or ZOOM OFF Notes During playback press SUBTITL...

Страница 31: ...ying x Slow Motion The slow motion speed will display Press 4 repeatedly to select a reverse or forward slow motion speed To cancel the slow function press 2 ZOOM Press 4 repeatedly to select an enlarged pic ture ratio 1 5 2 or 4 You can press 1 3 4 to move within the enlarged picture on theTV set To resume normal playback repeat the above step to select ZOOM OFF ANGLE Press 4 to view the same sce...

Страница 32: ...emoving the menu Press SYSTEM MENU or OK Note Some features of the Setup Menu are described in Preparations Setting theTV shape Make sure the format you need is available on the disc If not your setting will be invalid PBC 4 3 PS Pan and Scan mode Select this if you have a conventionalTV set and your DVD is not formatted for wide screen viewing A wide picture will display on the whole TV screen wi...

Страница 33: ...ut Setting the PCM output PBC PCM 96K Select this if the optional audio equipment is capable of processing digital signal input with sampling rate of 96 kHz However if the sound output is distorted or there is no sound select 48 kHz PCM 48K Select this if the optional audio equipment is incapable of processing 96 kHz digital signal input then convert to standard signal with sampling rate of 48 kHz...

Страница 34: ...ration code will appear 4 Use the registration code to purchase or rent the videos from DivX R VOD service www divx com vod Follow the instruction and download the video onto a CD R for playback on this system Helpful Hint All the download videos DivX R VOD can only be played back on this system TestTone AUTO AUTO The system will start testing the speaker from left center right right surround left...

Страница 35: ...e in the menu Move to icon and press Move to PASSWORD and press PBC 4 Use the numeric keys 0 9 to enter your four digit code The password supplied by default is 1234 If you forget the four digit code press 9 four times the system will change back to the default password Go to Password and enter your new code Then enter the same code again to confirm CONFIRM NEW PASSWORD PBC 5 Press SYSTEM MENU aga...

Страница 36: ...w them to view only when supervised by a parent or adult guardian 4 PG 13 Material is unsuitable for children under age 13 3 PG Parental Guidance suggested 1 G General Audience recommended as acceptable for viewers of all ages Menu language To set the screen display language The default setting is English Default If RESET is selected all the items in the setup menu will be reset to default setting...

Страница 37: ...cted preset number 1 Press TUNER BAND to selectTUNER mode The current radio frequency will appear on the display To begin automatic preset from a desired preset number Press O P or numeric keys 0 9 to select the desired preset number 2 Press and hold PROGRAM for 3 seconds AUTO SEARCHING appears on the display PROG will start to flash The system will start to search all radio stations on the FM ban...

Страница 38: ... or use the numeric keys 0 9 to select the desired preset number The preset number radio frequency and waveband are displayed Deleting a preset radio station 1 Press O or P to select the preset radio station to be erased 2 Press 7 on the system PRESET DELETED appears on the display The preset numbers of all other preset radio stations in the band with higher numbers are also decreased by one Repea...

Страница 39: ...y at the end of playback and replay It will replay up to max 10 times or until you press 9 PLAY the selected side will be played once Rewinding or forwarding fast when playback is stopped 1 Press 1 or on the front panel or on the remote control 2 Press 7 when you reach the desired passage Resetting tape counter number In stop mode press 7 General information on recording If you don t intend to rec...

Страница 40: ...ll spool to the left AUX GAME connect external equipment When recording is in progress 1 Press DISC TAPE TUNER or AUX GAME to select the source 2 Start to play the selected source 3 Press REC to start recording To stop recording Press 9 on the system Disc synchro recording 1 Press DISC to select the disc You can record programmed tracks in the order you want 2 Press REC to start recording REC will...

Страница 41: ...r will not start if a recording is in progress The volume of the timer will increase gradually from the minimum level to the last tuned volume level The time can be set in 24 hour mode 1 Press and hold TIMER or CLOCK TIMER for more than 3 seconds TIMER will start to flash The selected source will be displayed 2 Press DISC TUNER orTAPE 1 2 to select timer mode The corresponding source will appear o...

Страница 42: ...or if a power failure occurs Timer Operations Viewing the timer 1 Press TIMER on the system or press CLOCK TIMER on the remote control twice to view timer in any source mode Timer will be shown on the display for 5 seconds and then go back to it s previous status 2 If timer have not been set NO TIMER will be displayed for 5 seconds Setting the sleep timer The sleep timer enables the system to swit...

Страница 43: ...vorite music Press SOUND repeatedly to select the available sound effect Playing a DVD VCD You can selectVirtual Ambience Control as follows CONCERT DRAMA ACTION SCI FI Playing a CD MP3 WMA Divx or in TUNER TAPE or AUX mode You can select Digital Sound Control DIGITAL CLASSIC JAZZ ROCK Volume control Changing the volume level Rotate VOLUME clockwise anti clockwise or press VOL to increase or decre...

Страница 44: ...ss ECO POWER STANDBY ON to ECO POWER mode ECO POWER will be shown for 3 seconds and scroll from left to right on the display The system will go to standby mode and then to ECO Power mode in 5 seconds Power saving automatic standby As a power saving feature the system will automatically switch to Standby mode if you don t press any button within 30 minutes in the stop mode Dimming the display Press...

Страница 45: ...r TV screen if you have not connected the microphone to the system in ECHO CONTROL ON mode Karaoke Connect a microphone not supplied to the system to sing along with the music source 1 Connect a microphone to the MIC jack MIC will appear on the display MICROPHONE PLUG IN will displayed on yourTV screen Before connecting the microphone set the microphone LEVEL to the minimum level to prevent howlin...

Страница 46: ...2 MPEG 1 Video DAC 10 Bits Signal System PAL NTSC Video Format 4 3 16 9 Video S N 56 dB minimum Composite Video Output 1 0Vp p 75 Ω S Video Output Y 1 0Vp p 75 Ω C 0 286Vp p 75 Ω Audio DAC 24 Bits 96 kHz Frequency Response 4 Hz 20 kHz 44 1kHz 4 Hz 22 kHz 48kHz 4 Hz 44 kHz 96kHz Digital Output SPDIF Sony Philips digital interface Coaxial PCM IEC 60958 Dolby Digital DTS IEC 60958 IEC 61937 MAIN UNIT...

Страница 47: ...ntil the moisture condensed at the lens has cleared Replace or clean the disc see Maintenance Use a readable disc or correctly recorded format MP3 CD Select the appropriate video input mode on the TV set Check if theTV set is switched on Check the video connection Check if the system is securely connected Sometimes a slight picture distortion may appear This is not a malfunction Clean the disc Con...

Страница 48: ...speaker wire is clamped If the system is in pause slow motion or fast forward reverse mode press 2 to resume the normal play mode Make sure the MP3 CD was recorded within 32 256 kbps bit rate with sampling frequencies at 48 kHz 44 1 kHz or 32 kHz If the signal is too weak adjust the antenna or connect an external antenna for better reception Increase the distance between the System and yourTV set ...

Страница 49: ... ratio MP3 A file format with a sound data compression system MPE is the abbreviation of Motion Picture Experts Group 1 or MPEG 1 Audio Layer 3 Through the MP3 format one CD R or CD RW can contain about 10 times as much data volume as a regular CD can Multichannel DVD is specified to have all sound tracks constitute one sound field Multichannel refers to a structure of sound tracks having three or...

Отзывы: