background image

English

29

DVD Setup Menu Options

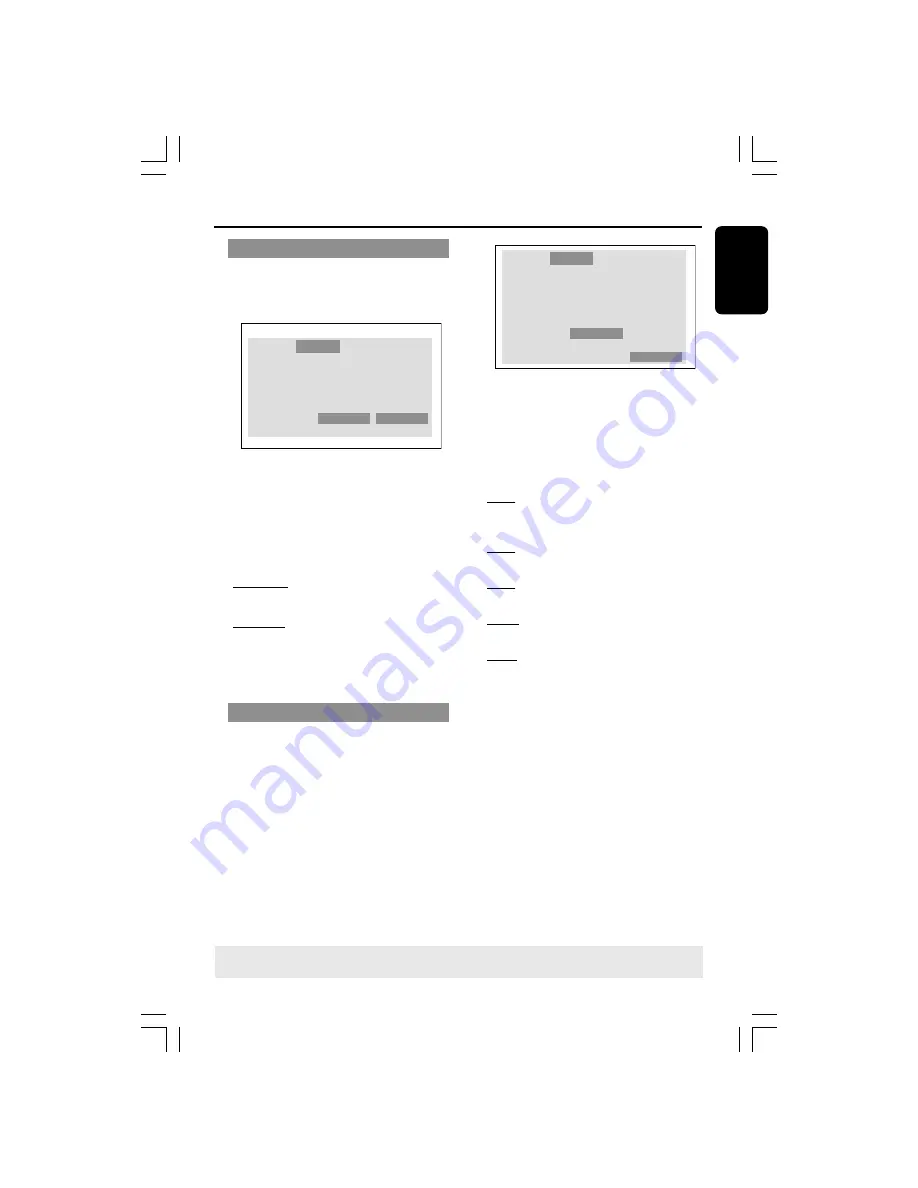
HD JPEG Mode

You can enjoy unsurppressed pictures at
its native resolution via your HDMI
connection or progressive scan mode.

TV Display

TV Type

Video Output

Progressive

HD JPEG Mode

HDMI Output

Language

Audio Track

Rating

Video

4:3 LETTERBOX

MULTI

YPbPr

Off

HD JPEG

Auto

HD JPEG

SD  JPEG

1

In ‘Video’, press 

OK 

to enter the

submenu.

2

Press 

3


4

 to highlight {HD JPEG Mode},

then press 

OK

.

3

Press 

3


4

 to highlight one of the options

below:

HD JPEG 

(High Definition JPEG)

Displays picture at the actual resolution.

SD JPEG 

(Standard Definition JPEG)

Displays picture at suppressed resolution.

4

Press 

3


4

 to select a setting, then press

OK

 to confirm your selection.

HDMI Output

For HDMI connection, you are able to
select the video output resolution
selection. The available options will be
displayed once you have connected the
HDMI connection 

(see page 12)

.

It may take a while for the DVD
player and input device to
communicate and initialise.

TIPS:

To return to the previous menu, press 

OK

.

To remove the menu, press 

SYSTEM MENU

.

TV Display
TV Type
Video Output
Progressive
HD JPEG Mode
HDMI Output

Language

Audio Track

Rating

Video

4:3 LETTERBOX

MULTI
YPbPr

Off

HD JPEG

Auto

480p/576p

720p

1080i

Auto

1

In ‘Video’, press 

OK 

to enter the

submenu.

2

Press 

3


4

 to highlight {HDMI Output},

then press 

OK

.

3

Press 

3


4

 to highlight one of the options

below:

480p

Progressive output in 480 lines for NTSC
TV.

576p

Progressive output in 576 lines for PAL TV.

720p

Progressive output upscale to 720 lines.

1080i

Interlaced output upscale to 1080 lines.

Auto 

(default setting)

Output automatically based on your
display’s supported resolution.

4

Press 

3


4

 to select a setting, then press

OK

 to confirm your selection.

Helpful hints:
– If no display appears on the TV screen due
to unsupported resolution, reconnect any
available interlace video output to your
display and re-adjust the resolution settings
to 480p/576p.
– Select AUTO to automatically display the
best resolutions settings.

01-37-DVP5900_AP9

31/08/05, 5:41 PM

29

Содержание DVP5900

Страница 1: ...s Need help fast Read your User s Manual first for quick tips that make using your Philips product more enjoyable If you have read your instructions and still need assistance you may access our online help at www philips com support 01 37 DVP5900_AP9 31 08 05 5 39 PM 1 ...

Страница 2: ...______________ DivX DivX Certified and associated logos are trademarks of DivXNetworks Inc and are used under license Important Note Due to the numerous versions of new CD Audio copy protection or enhanced CD Audio protection recently available on certain discs Should you have difficulty playing any such CD Audio discs kindly refer them to your CD Audio disc retailer 01 37 DVP5900_AP9 31 08 05 5 3...

Страница 3: ...HIS MODEL 525p AND 625p DVD PLAYER PLEASE CONTACT OUR CUSTOMER SERVICE CENTER Manufactured under license from Dolby Laboratories Dolby Pro Logic and the double D symbol are trademarks of Dolby Laboratories Manufactured under license from Digital Theater Systems Inc U S Pat Nois 5 451 942 5 956 674 5 974 380 5 978 762 6 226 616 6 487 535 and other U S and world wide patents issued and pending DTS a...

Страница 4: ...S LASER Type Semiconductor laser GaAlAs Wave length 650 nm DVD 780 nm VCD CD Output Power 7 mW DVD 10 mW VCD CD Beam divergence 60 degree Environmental Information All unnecessary packaging has been omitted The packaging has been made easy to separate into three materials cardboard box polystyrene foam buffer and polyethylene bags protective foam sheet Your DVD player consists of materials which c...

Страница 5: ...5 Index English 4 38 70 Bahasa Melayu 102 E n g l i s h Bahasa Melayu 01 37 DVP5900_AP9 31 08 05 5 39 PM 5 ...

Страница 6: ...Using the Remote Control to operate the Player 16 Step 2 Setting up the TV 16 18 Setting up Progressive Scan feature for Progressive Scan TV only 17 Selecting the colour system that corresponds to your TV 18 Step 3 Setting language preference 19 Setting the OSD Language 19 Setting the Audio Subtitle and DVD menu language 19 Disc Operations Playable Discs 20 Region Codes 20 Playing discs 21 Using D...

Страница 7: ...27 TV Type 27 Progressive turning on off 28 HD JPEG Mode 29 HDMI Output 29 Audio Setup 30 31 Digital Output 30 LPCM Output 31 Night Mode turning on off 31 Rating 32 33 Changing the Password 32 Setting the Rating 32 33 Restoring to original settings 33 DivX registration 33 Troubleshooting 34 35 Specifications 36 Glossary 37 01 37 DVP5900_AP9 31 08 05 5 39 PM 7 ...

Страница 8: ...op of other equipment that might heat it up e g receiver or amplifier Do not put anything under the set e g CDs magazines Install this system near the AC outlet and where the AC power plug can be reached easily Space for ventilation Place the apparatus in a location with adequate ventilation to prevent internal heat build up Allow at least 10 cm 4 5 clearance from the rear and the top of the set a...

Страница 9: ...to the video input jack or labeled as A V In Video In Composite or Baseband on the TV cable supplied 2 To hear the sound of this DVD Player through your TV use the audio cables white red to connect AUDIO OUT L R jacks of the DVD Player to the corresponding AUDIO IN jacks on the TV cable supplied IMPORTANT The progressive scan video quality is only possible when usingY Pb Pr and a progressive scanT...

Страница 10: ... Using an accessory RF modulator 1 Use the composite video cable yellow to connect the DVD Player s CVBS jack to the video input jack on the RF modulator 2 Use the RF coaxial cable not supplied to connect the RF modulator to your TV s RF jack DIGITAL COAXIAL OUT CVBS VIDEO OUT Y Cr Pr Cb Pb HDMI AUDIO OUT AUDIO IN R L VIDEO IN TO TV INT IN CH3 CH4 2 1 RF coaxial cable toTV Back of RF Modulator exa...

Страница 11: ...ons with the power switched on When no disc is loaded press STANDBY ON on the DVD Player front panel NO DISC may appear on the display panel IR Connecting the power cord NO DISC DIGITAL COAXIAL OUT CVBS VIDEO OUT Cr Pr C HDMI AUDIO OUT AC MAINS AUDIO OUT V Pr Cr U Pb Cb Y S VIDEO IN VIDEO IN COMPONENT VIDEO IN 01 37 DVP5900_AP9 31 08 05 5 40 PM 11 ...

Страница 12: ...s only Optional Connecting to a HDMI compatible device Connections HDMI compatible device To enjoy optimum multi channel surround sound DIGITAL COAXIAL OUT CVBS VIDEO OUT Y Cr Pr Cb Pb HDMI AUDIO OUT VIDEO AUDIO OUT IN HDMI VIDEO AUDIO HDMI IN To enjoy optimum multi channel surround sound without HDMI compatible television DIGITAL COAXIAL OUT CVBS VIDEO OUT Y Cr Pr Cb Pb HDMI AUDIO OUT VIDEO AUDIO...

Страница 13: ...ions CVBSVIDEO IN SCART or COMPONENTVIDEO IN depending on the options available on your TV 2 Connect the COAXIAL jack of the DVD Player to the corresponding Digital Audio In jack on your Receiver cable not supplied 3 Set the DVD Player s Digital Output to PCM or ALL depending on the capabilities of your Receiver see page 30 Digital Output Helpful Hint If the audio format of the Digital Output does...

Страница 14: ... Player to Standby mode or ON Disc tray OPEN CLOSE Open Close the disc tray Display Shows the current status of the DVD Player IR Sensor Point the remote control towards this sensor YPbPr Connect toYPbPr input of aTV CVBS VIDEO Out Connect to CVBSVideo input of aTV HDMI Connect to an HDMI compatible device example LCD Projector Plasma ProjectionTV HDTV or receiver DIGITAL COAXIAL OUT CVBS VIDEO OU...

Страница 15: ...rily frame by frame playback REPEAT Selects various repeat modes REPEAT A B Repeats playback a specific section on a disc PREVIEW To preview the content of a track or whole disc MUTE Disables or enables sound output POWER B To switch the DVD player to standby mode or ON 0 9 numerical key pad Selects numbered items in a menu DISPLAY Displays information onTV screen during playback SYSTEM MENU Acces...

Страница 16: ...properly Step 2 Setting up theTV IMPORTANT Make sure you have completed all the necessary connections See page 9 10 ConnectingTV 1 Turn on the TV and set to the correct video in channel You should see the DVD background screen on the TV 2 Usually these channels are between the lowest and highest channels and may be called FRONT A V IN orVIDEO See yourTV manual for more details Or you may go to cha...

Страница 17: ...TV 1 ENSURE YOUR TV HAS PROGRESSIVE SCAN 2 CONNECT USING YPBPR GBR VIDEO CABLE 3 IF THERE IS DISTORTED PICTURE Cancel OK ACTIVATING PROGRESSIVE SCAN WAIT 15 SECONDS FOR AUTO RECOVERY 9 Press 1 to highlight OK in the menu and press OK to confirm There will be a distorted picture on yourTV at this state until you turn on the progressive scan mode on yourTV 0 Turn on your TV progressive scan mode ref...

Страница 18: ...ormat MULTI Select this if the connected TV is compatible with both NTSC and PAL multi system The output format will be in accordance with the video signal of the disc Getting Started TIPS To return to the previous menu press OK To remove the menu press SYSTEM MENU 6 Select an item and press OK Follow the instructions show on the TV to confirm the selection if any Helpful Hints Before changing the...

Страница 19: ... OK Getting Started Setting the Audio Subtitle and DVD menu language You can choose your own preferred language or soundtrack from audio subtitles and DVD menu languages If the language selected is not available on the disc the disc s default language will be used instead Language Audio Track Rating Video English English English English Cent Eur OSD Language DVD Subtitle Audio Track DVD Menu DivX ...

Страница 20: ...folders per disc Maximum files displayed 1 500 Maximum folders 150 TIPS The operating features described here might not be possible for certain discs Always refer to the instructions supplied with the discs Region Codes This DVD Player is designed to support the Region Management System Check the regional code number on the disc package If the number does not match the Player s region number see t...

Страница 21: ...tomatically If not press PLAY B If a disc menu appears on the TV see Using the Disc Menu If the disc is locked by parental control you must enter your four digit password See page 32 33 6 At any time simply press STOP to stop playback Disc Operations Using the Disc Menu Depending on the disc a menu may appear on the TV screen once you load the disc To select a playback feature or item Use the 1 2 ...

Страница 22: ... once to activate the auto resume mode Press PLAY B and the disc will play from the last point Press STOP 9 to cancel the resume mode Repeat DVD VCD Press REPEAT continuously to choose a Repeat mode during playback REPEAT CHAPTER DVD to repeat playback of the current chapter REPEAT TITLE DVD to repeat playback of the current title REPEAT SINGLE VCD to repeat playback of the current track REPEAT AL...

Страница 23: ...ck to select the required speed 1 2 1 4 or 1 8 backward or forward Sound will be muted 2 To return to normal speed press PLAY B Preview DVD VCD The Time Search function allows you to start playing at any chosen time on the disc 1 Press PREVIEW 2 Use 1 2 keys to select an option 3 Enter hours minutes and seconds from left to right in the time edit box using remote control numerical key pad e g 0 34...

Страница 24: ...the DivX disc pressing SUBTITLE will change the subtitle language during playback Helpful Hint For external subtitles the system will display a list of available subtitles select one of the DivX movies subtitle and press PLAY Special DVD Features Playing aTitle 1 Press DISC MENU The disc title menu appears on the TV screen 2 Use 3 4 1 2 keys or numeric keypad 0 9 to select a play option 3 Press OK...

Страница 25: ...ck 4 Press PREVIEW to return to the disc menu Playback selection During playback you can Press S T to select another file in the current folder Press ANGLE on the remote to rotate the picture files Press B repeatedly to pause resume playback Playing MP3 JPEG Picture CD This player can playback MP3 JPEG or Picture CD files on a personally recorded CD R RW disc or commercial CD IMPORTANT You have to...

Страница 26: ... type that supports the recorded DivX subtitle Language Audio Track Rating Video English English English English Cent Eur OSD Language DVD Subtitle Audio Track DVD Menu DivX Subtitle Standard Cent Eur Cyrillic 1 In Language press OK to enter the submenu 2 Press 3 4 to highlight DivX Subtitle then press OK 3 Press 3 4 to highlight one of the options below Standard Albanian Danish Dutch English Finn...

Страница 27: ...icture during playback Language Audio Track Rating Video 4 3 LETTERBOX MULTI YPbPr Off HD JPEG Auto 4 3 PANSCAN 4 3 LETTERBOX 16 9 TV Display TV Type Video Output Progressive HD JPEG Mode HDMI Output 1 In Video press OK to enter the submenu 2 Press 3 4 to highlight TV Display then press OK 3 Press 3 4 to highlight one of the options below 4 3 PANSCAN Select this if you have a normal TV and want bo...

Страница 28: ...ss OK to enter the submenu 2 Press 3 4 to highlight Progressive then press OK 3 Press 3 4 to highlight one of the options below Off To disable Progressive Scan function On To enable Progressive Scan function TIPS To return to the previous menu press OK To remove the menu press SYSTEM MENU 4 Press 3 4 to select a setting then press OK to confirm your selection Follow the instructions shown on the T...

Страница 29: ...he DVD player and input device to communicate and initialise TIPS To return to the previous menu press OK To remove the menu press SYSTEM MENU TV Display TV Type Video Output Progressive HD JPEG Mode HDMI Output Language Audio Track Rating Video 4 3 LETTERBOX MULTI YPbPr Off HD JPEG Auto 480p 576p 720p 1080i Auto 1 In Video press OK to enter the submenu 2 Press 3 4 to highlight HDMI Output then pr...

Страница 30: ...o your optional audio equipment connection Language Digital Output LPCM Output Night Mode Audio Track Rating Video PCM All Off PCM 96K Off 1 In Audio Track press OK to enter the submenu 2 Press 3 4 to highlight Digital Output then press OK 3 Press 3 4 to highlight one of the options below Off Turn off the digital output All If you have connected your DIGITAL AUDIO OUT to a multi channel decoder re...

Страница 31: ... mode 4 Select an item and press OK Helpful Hint LPCM Output can be selected only when PCM is activated TIPS To return to the previous menu press OK To remove the menu press SYSTEM MENU Night Mode turning on off In this mode the high volume outputs are softened and low volume outputs are brought upward to an audible level It is useful for watching your favourite action movie without disturbing oth...

Страница 32: ...word Confirm Password Done 6 Press OK to confirm Setting the Rating Some DVDs may have a parental level assigned to the complete disc or to certain scenes on the disc This feature lets you set a playback limitation level The rating levels are from 1 to 8 and are country dependent You can prohibit the playing of certain discs that are not suitable for your children or have certain discs played with...

Страница 33: ...factory defaults and all your personal settings will be erased 1 In Rating press OK to enter the submenu 2 Press 3 4 to highlight Factory Defaults then select Reset 3 Press OK to confirm All settings will now reset to factory defaults DivX registration This DVD Player provides you the DivX VOD Video On Demand registration code that allows you to rent and purchase videos using the DivX VOD service ...

Страница 34: ...tem to open the disc tray 2 Press 2 followed by AUDIO the remote control Distorted picture Sometimes a small amount of picture distortion may appear depending on the disc being played back This is not a malfunction Completely distorted picture or Connect DVD Player directly to theTV black white picture with DVD Make sure the disc is compatible with the DVD Player Ensure that the DVD Player sTVType...

Страница 35: ...operating commands during playback Refer to the instructions of the disc jacket DVD Player cannot read Use a commonly available cleaning CD DVD to CDs DVDs clean the lens before sending the DVD Player for repair Menu items cannot be selected Press STOP twice before selecting System Menu Depending on the disc availability some menu items cannot be selected Unable to play DivX movies Check that the ...

Страница 36: ...nd Stereo Dolby Surround compatible downmix from Dolby Digital multi channel sound Specifications AUDIO PERFORMANCE DA Converter 24 bit 192 kHz DVD fs 96 kHz 4Hz 44kHz fs 48 kHz 4Hz 22kHz CD VCD fs 44 1kHz 4Hz 20kHz Signal Noise 1kHz 90 dB Dynamic range 1kHz 85 dB Crosstalk 1kHz 90 dB Distortion noise 1kHz 80 dB MPEG MP3 MPEG Audio L3 CONNECTIONS YPbPr Output Cinch 3x Video Output Cinch yellow Aud...

Страница 37: ... digital audio front left and right surround left and right center and subwoofer JPEG A very common digital still picture format A still picture data compression system proposed by the Joint Photographic Expert Group which features small decrease in image quality in spite of its high compression ratio MP3 A file format with a sound data compression system MP3 is the abbreviation of Motion Picture ...

Отзывы: