background image

A-B Repeat Playback  29

•  A-B Repeat playback is not available

with some DVDs.

•  With DVDs, the entire A-B repeat

section must be within a single Title.
The DVD Player will automatically
set the end point (B) at the end of
the Title.

•  With Audio CDs, the A-B repeat

section must be within a single
Track. The DVD Player will auto-
matically set the end point (B) at
the end of the Track. 

•  Point B must be later on the Disc

than Point A.

• Pressing the Stop 

C

button will can-

cel A-B Repeat Playback.

Helpful Hints

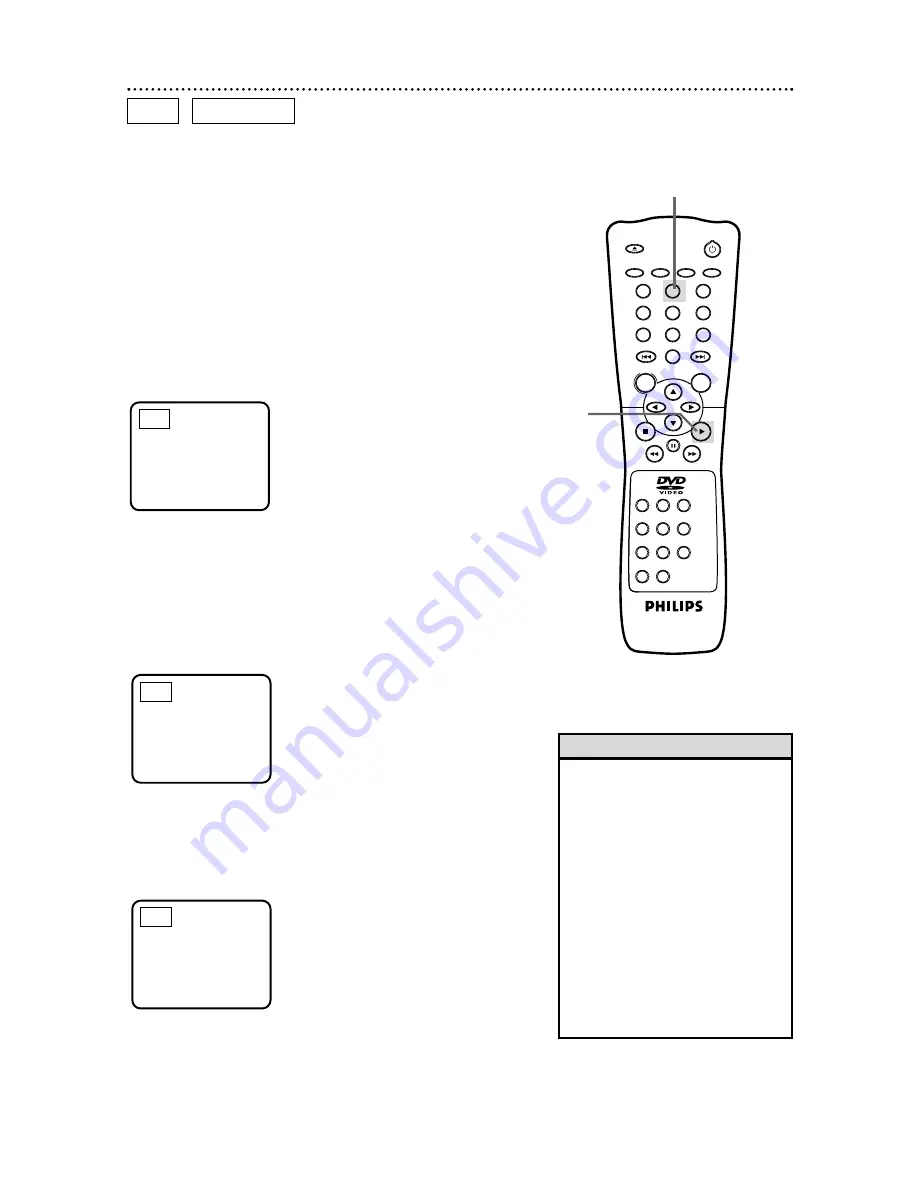
You can play a section of an Audio CD or DVD repeatedly.
Follow these steps to set up the section that you want to play
over and over.

1

Play the Disc to the point at which you want repeated
playback to begin.

Repeat

[A – ]

2

Press the A-B REPEAT button to set the starting point
(A). 
Repeat A will appear on the DVD Player’s display panel. 

3

Play the Disc to the point at which you want repeated
playback to end, then press the A-B REPEAT button
again. 
Within a few seconds, the section will begin to play. The segment
will play over and over until you cancel the A-B Repeat feature.
REPEAT A-B will appear on the DVD Player’s display panel. 

Repeat

[A–B]

4

To cancel A-B Repeat Playback, press the A-B REPEAT
button so that Repeat [Off] appears on the TV screen.
Regular Disc playback will resume.

Repeat

[Off]

DVD

AUDIO CD

OPEN/

CLOSE

OK

CLEAR

A-B

RETURN DISPLAY

TITLE

SEARCH MODE

MODE

ZOOM

REPEAT

REPEAT

MARKER

SETUP

AUDIO

SUBTITLE

ANGLE

POWER

DISC

3

2

1

6

5

4

9

8

7

0

+10

MENU

2-4

1

Содержание DVD619

Страница 1: ...ve any problems our Representatives can help you get the most from your new product by explaining Hookups First Time Setup and Feature Operation Do not attempt to return this product to the store For fast help call us first 1 800 531 0039 Thank you for making us a part of your home DVD619 Important Return your Warranty Registration Card within 10 days See why inside ...

Страница 2: ...er to get the most from your PHILIPS product you must return your Warranty Registration Card within 10 days So please mail it to us right now Know these safetysymbols This bolt of lightning indi cates uninsulated material within your unit may cause an electrical shock For the safety of everyone in your household please do not remove product covering The exclamation point calls attention to feature...

Страница 3: ...is equipment does cause harmful interference to radio or television recep tion which can be determined by turning the equipment off and on the user is encour aged to try to correct the interference by one or more of the following measures 1 Reorient or relocate the receiving antenna 2 Increase the separation between the equipment and the receiver 3 Connect the equipment into an outlet on a circuit...

Страница 4: ...om Playback 24 Track Playback 25 Title Chapter Playback 26 Specific Time Playback 27 Repeat Playback 28 A B Repeat Playback 29 Programmed Playback 30 Random Playback 31 Audio Language 32 Subtitle Language 33 Camera Angles 34 Parental Lock Password 35 Parental Lock Levels 36 DVD Player Setup and Features Display Screen DVD 37 Display Screen Audio CD 38 Marker Setup Screen 39 Audio Settings 40 41 Di...

Страница 5: ...a menu you can access the Disc Menu by pressing the DISC MENU button on the remote control Details are on page 19 DVD Player Menus Some instructions explain how to use the DVD Player s menu to set up features of the DVD Player or the Disc You get to the DVD Player Menu by pressing the SETUP button on the remote control when Disc playback is stopped Even if a feature is set up in the DVD Player s m...

Страница 6: ... Look for the symbols below on your DVDs If these region symbols do not appear on your DVD you cannot play the DVD in this DVD Player The number inside the globe refers to a region of the world Region 1 represents the United States Canada upper regions of North America Bermuda the U S Virgin Islands and small regions near Australia A Disc encoded in a specific region format can only be played on D...

Страница 7: ...uct and its packaging contain materials that can be recycled and reused Specialized companies can recycle your prod uct to increase the amount that needs to be properly disposed Your product uses batteries that should not be thrown away when depleted but should be disposed of as small chemical waste Please find out about the local regulations on disposal of your old prod uct batteries and packagin...

Страница 8: ...es 11 and 40 41 Playing a DVD when the settings are wrong will dis tort the sound or damage the speakers 1 Connect the supplied red and white audio cables to the red and white AUDIO OUT jacks on the DVD Player and to the red and white AUDIO IN jacks on the TV matching the cable colors to the jack colors 2 Connect the supplied yellow video cable to the VIDEO OUT jack on the DVD Player and to the VI...

Страница 9: ...white AUDIO IN jacks on the TV matching the cable colors to the jack colors 2 Connect an S Video cable not supplied to the S VIDEO OUT jack on the DVD Player and to the S VIDEO IN jack on the TV 3 Connect the TV s power cord to a power outlet Turn on the TV and set it to the S VIDEO IN channel This channel usually is located near channel 00 See your TV owner s manual for details 4 Connect the DVD ...

Страница 10: ... the Stereo s Auxiliary IN station During Disc playback you will adjust the volume at your Stereo See your Stereo owner s manual for details 4 Plug in the TV s power cord Turn on the TV and set it to the Video In channel or S Video In channel which usually is located near channel 00 During Audio CD playback you may check the status of Audio CDs on your TV screen During DVD playback you will watch ...

Страница 11: ...t the supplied yellow video cable to the yellow VIDEO OUT jack on the DVD Player and to the VIDEO IN jack on the TV Or you may connect an optional S Video cable to the S VIDEO OUT jack on the DVD Player and to the S VIDEO IN jack on the TV Only one video connection is needed 3 Plug in the Decoder s power cord Turn on the Decoder and select the Auxiliary IN station During Disc playback you will adj...

Страница 12: ...ug in the Amplifier s power cord Turn on the Amplifier and select the Auxiliary IN station During Disc playback you will adjust the volume at the Amplifier See your Amplifier owner s manual for details 4 Plug in the TV s power cord Turn on the TV and set it to the correct Video In channel During Audio CD playback you may check the status of the Disc on your TV screen During DVD playback you will w...

Страница 13: ... 28 29 A B Appears during A B Repeat Playback Details are on page 29 B Appears during Disc playback F Appears when play is paused DVD Lights when a DVD is in the tray and ready for playback CD Lights when an Audio CD is in the tray and ready for playback Displays the elapsed playing time of the current Title or Track Briefly displays Title Chapter or Track numbers Power is turning on Appears after...

Страница 14: ...top Disc playback Details are on page 18 PAUSE Button Press to pause Disc playback Details are on page 20 STANDBY ON Button Press to turn the power on and off Details are on page 18 Remote Sensor Receives a signal from your remote control so you can operate your DVD Player from a distance PREV ious NEXT Press to go to previous or subsequent Tracks or Chapters Press and hold for about three seconds...

Страница 15: ... Video cable here and to the S Video In jack of a televi sion Details are on pages 9 12 VIDEO OUT Jack Connect the yellow video cable supplied here and to the TV s Video In jack Details are on pages 8 and 10 12 AUDIO OUT Jacks Connect the supplied red and white audio cables here and to the Audio In jacks of a television or stereo Details are on pages 8 10 You only need one audio connection and one...

Страница 16: ...Press to repeat playback of the current Disc or Track Audio CD or a Title or Chapter DVD Details are on page 28 OK Button Press to confirm a setting in the Player menu or to select a feature in the Disc menu SEARCH MODE Button Press to access or remove the Search display which allows you to go directly to a specific Title Chapter Track Time Details are on pages 25 27 Arrow Buttons Press to select ...

Страница 17: ...t status of the Disc during playback Press again to remove the status display Details are on pages 37 38 CLEAR Button Press to erase incorrect information when setting up features MARKER Button Press to set a Marker which will give you quick access to points on a Disc that you select Details are on page 39 Pause F Button Press to pause Disc playback Details are on page 20 Press repeat edly to adva...

Страница 18: ...ay Disc playback may start automatically Or if the DVD has a menu the menu may appear on the screen instead Details are on page 19 With some Audio CDs playback will not begin until you press the Play B button To search forward or backward during playback see page 22 5 Press the Stop C button to stop playback 2 4 1 5 DVD AUDIO CD Insert a Disc 3 Remember this DVD Player will play only certain Discs...

Страница 19: ... ops B to select an item then press the OK button Continue this process to set up all the features you wish to see on the Disc Using the DVD Menus Some DVDs contain menus that describe the contents of the Disc or allow you to customize Disc playback For example the menu may offer choices for subtitle languages director s commentary or soundtrack playback To use the DVD menu and select playback fea...

Страница 20: ...p right corner of the TV screen Press the Play B button to start play ing the DVD Helpful Hint Pause k Play B Resume On Resuming playback from the point at which playback stopped 1 Press the Stop C button during playback In a few seconds the following Resume message will appear on the TV screen Press PLAY to play from here To play beginning press STOP first and the PLAY 2 Press the Play B button I...

Страница 21: ...screen 2 Press the Pause F button repeatedly to see the picture advance one frame or step at a time The sound will remain muted Pause F will appear briefly on the screen each time you press the Pause F button Pause k Pause k Play B DVD 3 1 2 OPEN CLOSE OK CLEAR A B RETURN DISPLAY TITLE SEARCH MODE MODE ZOOM REPEAT REPEAT MARKER SETUP AUDIO SUBTITLE ANGLE POWER DISC 3 2 1 6 5 4 9 8 7 0 10 MENU ...

Страница 22: ...rward search Press the Reverse h button for a reverse search D Press the Fast Forward button D Press the Fast Forward button again D Press the Fast Forward button again D Press the Fast Forward button again EX2 E Press the Reverse button E Press the Reverse button again E Press the Reverse button again E Press the Reverse button again EX8 EX32 DX2 DX8 DX32 DX16 D Press the Fast Forward button duri...

Страница 23: ...button during playback The sound will be muted when play back is paused and during slow motion playback You can not play the DVD in reverse slow motion Helpful Hints DVD Slow Motion 23 1 2 3 OPEN CLOSE OK CLEAR A B RETURN DISPLAY TITLE SEARCH MODE MODE ZOOM REPEAT REPEAT MARKER SETUP AUDIO SUBTITLE ANGLE POWER DISC 3 2 1 6 5 4 9 8 7 0 10 MENU Pause k Play B D Press the Fast Forward button D Press ...

Страница 24: ...the ZOOM button during playback The enlarged pic ture will continue to play 2 Press the Arrow buttons ops B to move the zoomed image left right up and down 3 To return the picture to its normal size press the ZOOM button again Zoom On 24 Zoom Playback Zoom Off OPEN CLOSE OK CLEAR A B RETURN DISPLAY TITLE SEARCH MODE MODE ZOOM REPEAT REPEAT MARKER SETUP AUDIO SUBTITLE ANGLE POWER DISC 3 2 1 6 5 4 9...

Страница 25: ...xam ple to play Track three press the Number 3 button For Tracks 10 and above press the 10 button so that the Search dis play appears on the TV screen Then press the Number button of the first digit then press the Number button of the second digit For example to play Track 26 press the 10 button then press the Number 2 button then press the Number 6 button If you enter a Track number that is not a...

Страница 26: ... number The bar will move to Chapter automatically For a single digit 1 9 press 0 first For example to select Title 4 press 0 4 Starting Playback at a Specific Title Chapter 3 To select the Chapter press the Number buttons to enter the Chapter number The DVD Player will begin playback at the selected Chapter Title Chapter playback is not avail able with some DVDs Helpful Hint OPEN CLOSE OK CLEAR A...

Страница 27: ... the Disc time at which you want playback to begin Within a few seconds playback will start at the specified time Example 1 hour 23 minutes and 30 seconds 1 2 3 3 0 Make sure the time you enter is within the total time of the Title or Track If it is not X will appear on the screen Playback will continue at its current point If you make a mistake press the CLEAR button Then enter the correct inform...

Страница 28: ...at playback Repeat All Repeat Track Repeat Off DVD Press the REPEAT button to select Repeat All The entire Audio CD plays over and over REPEAT will appear on the DVD Player Display Press the REPEAT button to select Repeat Title The entire current Title plays over and over REPEAT and TITLE will appear on the DVD Player Display Press the REPEAT button again to select Repeat Track The current Track p...

Страница 29: ... 1 Play the Disc to the point at which you want repeated playback to begin Repeat A 2 Press the A B REPEAT button to set the starting point A Repeat A will appear on the DVD Player s display panel 3 Play the Disc to the point at which you want repeated playback to end then press the A B REPEAT button again Within a few seconds the section will begin to play The segment will play over and over unti...

Страница 30: ...it then the Number button for the second digit For example to play Track 26 press the 10 button then press the Number 2 button then press the Number 6 button 3 Repeat step 2 until you have selected all the Tracks you wish to play in the Program Make sure the Track numbers you enter are available on the Audio CD AudioCD Program Total Track 12 Time 0 47 29 02 05 07 14 01 09 13 10 03 11 08 03 Track 0...

Страница 31: ...Audio CD in Random order instead of the order in which they are recorded 1 2 3 To set up Random Playback follow these steps 1 While playback is stopped press the MODE button twice so that the RANDOM screen appears AudioCD Random Start PLAY Exit MODE 2 While the RANDOM screen appears press the Play B button The Tracks will play in random order After each Track plays once playback will stop 1 2 AUDI...

Страница 32: ...playback so that the audio display appears in the top left corner of the TV screen Press the AUDIO button repeatedly until you select your desired language Audio 1 English 8 Audio 2 French 8 Audio 3 Japanese 8 HELLO BONJOUR AUDIO 1 AUDIO 2 DVD Press the AUDIO button Press the AUDIO button again Press the AUDIO button repeatedly to see and hear all the available languages The num ber of available l...

Страница 33: ...le for the current scene Helpful Hints The DVD Player allows you to select a language for subtitles dur ing playback You may select only the languages that are available on the Disc 1 Press the SUBTITLE button during playback so that the subtitle display appears on the TV screen 2 Within 5 seconds press the SUBTITLE button repeatedly to select a subtitle language The number of available lan guages...

Страница 34: ... select another angle Angle 2 Press the ANGLE button again Angle 8 2 Within 5 seconds press the ANGLE button repeatedly to select a different angle The number of available angles appears at the right of the Angle display In this example eight angles are available 8 1 2 DVD If the Disc contains sequences recorded from different camera angles the angle symbol will appear at the top right corner of t...

Страница 35: ...nter the 4 digit password The Parental Controls screen will appear When doing this for the first time enter any 4 digits That number will be the password until you change it Language Display Audio Parental Select Set OK Cancel Exit SETUP Password Enter current password Language Display Audio Parental Select Set ENTER Cancel Exit SETUP Parental Controls Parental Level 7 NC 17 Change Select Set OK C...

Страница 36: ...ed press the SETUP button The setup screen will appear Follow these steps to set the rating level for your DVD Player Discs whose ratings exceed the level you set will not play See Helpful Hints below 2 Press the Arrow o op p buttons to select Parental Then press the OK button The Setup Parental Password screen will appear 3 Press the Number buttons to enter your 4 digit password Language Display ...

Страница 37: ...m then press the OK button DVD Play Repeat Chapter Title 1 Chapter 18 Time 0 17 52 1 38 46 Bit Rate Chapter 18 30 Title 1 5 Time 1 56 38 Audio 1 English 4 1 5 2 4 This unit employs TruSurround system of SRS Labs Inc as virtual technology TruSurround and the symbol are trademarks of SRS Labs Inc TruSurround technology is incorporated under license from SRS Labs Inc Current type of disc Playback sta...

Страница 38: ...ss the RETURN button to return to the Display Screen Marker details are on page 39 Time Display Press the OK button repeatedly to choose All or Track This determines whether the times shown in the left box of the Display Screen are for the current Track Track or the entire Disc All Audio CD Play Repeat Off Track 5 Play Mode Normal Time All 0 27 56 0 38 46 Track 05 20 Time 0 04 19 Marker Time Displ...

Страница 39: ...nt will appear beside the Marker you selected 5 Press the DISPLAY button to remove the Display Screen 6 To later return to the point at which you set the Marker press the MARKER button during playback Press the Arrow op buttons to select the Marker you want then press the OK button Playback will resume at the point you set OPEN CLOSE OK CLEAR A B RETURN DISPLAY TITLE SEARCH MODE MODE ZOOM REPEAT R...

Страница 40: ...d Choose Dolby Surround if the DVD Player is connected to audio equipment that is Dolby Surround Pro Logic compatible Choose Stereo if the Player is connected to normal audio equipment Down Sampling Press the OK button repeatedly to select 48 kHz or 96 kHz Select 96 kHz if the Disc was recorded in PCM 96 kHz Otherwise select 48 kHz Language Display Audio Parental Select Set OK Cancel Exit SETUP La...

Страница 41: ...ER Cancel Exit SETUP Select Set OK Cancel Exit SETUP 6 5 Language Display Audio Parental Audio Controls Digital Audio Out Dynamic Range On Down Mix Mode Dolby Surround Down Sampling 48kHz Digital Audio Out Dolby Digital Off DTS On MPEG Off Select Set ENTER Cancel Exit SETUP Select Set OK Cancel Exit SETUP Language Display Audio Parental Audio Controls Digital Audio Out Dynamic Range On Down Mix Mo...

Страница 42: ...Aspect Ratio in the Display menu To change such settings follow these steps 2 Press the Arrow o op p buttons to select Display Then press the OK button Language Display Audio Parental Select Set OK Cancel Exit SETUP Language Display Audio Parental Select Set OK Cancel Exit SETUP Display Controls TV Aspect 4 3 Pan Scan On Screen Info On Panel Display Bright Angle Icon On 1 Selecting a different TV ...

Страница 43: ...isplay Bright Angle Icon On Select Set ENTER Cancel Exit SETUP Select Set OK Cancel Exit SETUP Language Display Audio Parental Display Controls Panel Display Bright Angle Icon On Background Color Blue Auto Power Off On Select Set ENTER Cancel Exit SETUP Select Set OK Cancel Exit SETUP 4 If you selected On Screen Info Angle Icon Background Color or Auto Power Off press the OK button repeated ly to ...

Страница 44: ...ish Select Set ENTER Cancel Exit SETUP Select Set OK Cancel Exit SETUP Language Display Audio Parental Language Controls Audio English Subtitle English Disc Menu English Player Menu English Subtitle Off English French Spanish Select Set ENTER Cancel Exit SETUP Select Set OK Cancel Exit SETUP Subtitles are not shown Subtitles are in English Subtitles are in Spanish Subtitles are in French The disc ...

Страница 45: ...languages for Audio Subtitle and Disc Menu if the language is available on the Disc 5 Press the SETUP button to remove the menu Language Display Audio Parental Language Controls Audio English Subtitle English Disc Menu English Player Menu English Audio Irish Portuguese Dutch Other _ Select Set ENTER Cancel Exit SETUP Select Set OK Cancel Exit SETUP 4 5 If the automatic settings for Audio and Subti...

Страница 46: ...9 Kirghiz 5771 Kirundi 6460 Korean 5761 Kurdish 5767 L N Laothian 5861 Latin 5847 Latvian 5868 Lettish 5868 Lingala 5860 Lithuanian 5866 Macedonian 5957 Malagasy 5953 Malay 5965 Malayalam 5958 Maltese 5966 Maori 5955 Marathi 5964 Moldavian 5961 Mongolian 5960 Nauru 6047 Nepali 6051 Norwegian 6061 O R Occitan 6149 Oriya 6164 Oromo Afan 6159 Panjabi 6247 Pashto 6265 Persian 5247 Polish 6258 Portuges...

Страница 47: ...Disc in a straight line from the center to the edge Never wipe the Disc in a circular motion Do not use detergent or abrasive cleaning agents Handle the Discs so that fingerprints and dust do not adhere to the surfaces of the Discs Always store the Disc in its protective case when it is not in use Checking the Laser If the DVD Player does not operate as described in this owner s manual the laser m...

Страница 48: ...rrectly You may connect either the yellow video cable supplied or an optional S Video cable Details are on pages 8 12 Make sure the TV is set to the correct Video or S Video In channel usually the AUX IN A V IN Auxiliary In or S Video In channel Check your TV owner s manual for details Insert a Disc that is playable on this DVD Player Details are on page six Disc cannot play Insert a playable Disc...

Страница 49: ... are available Details are on pages 32 33 An X appears on the TV screen prohibiting an operation The DVD Player prohibits the current operation or it is not available on the Disc Details are on page five The DVD Player turns off after 35 minutes The DVD Player turns off automatically if playback stops for more than 35 min utes and you press no buttons on the remote control or the DVD Player Detail...

Страница 50: ...io CD 0 007 EIAJ Wow and Flutter Below the measurement limitation 0 001 W PEAK EIAJ Power Requirement 120V AC 10 60 Hz 0 5 Connections S Video output Mini DIN 4 pin jack 75 Ω Video output One pin jack 1 Vpp 75 Ω Coaxial digital output One pin jack 500m Vpp 75Ω Analog audio output Two pin jacks one left channel one right channel 2 Vrms 47 kΩ Power Consumption Power on 17 W Standby power off 5 W Ope...

Страница 51: ...n This format is used often when you see a movie in a theater If the Disc does not include a letterbox format selecting Letterbox may have no effect For example some DVD discs are two sided with one side playing in Letterbox and the other side playing in a normal for mat Pan Scan A TV aspect ratio setting 4 3 Displays the video with full height picture with one or both sides of the picture trimmed...

Страница 52: ...tempt to exchange the product although there may be a delay if the appropri ate product is not readily available MAKE SURE YOU KEEP Please keep your sales receipt or other document showing proof of date of purchase Attach it to the owner s manual and keep both nearby Also keep the original box and packing material in case you need to return your product BEFORE EXCHANGING THE PRODUCT Please check y...

Страница 53: ...xchange Form a copy of the original sales receipt and the proper payment amount into an envelope DO NOT SEND CASH Do not staple or clip these items together Label the envelope Return Documents Enclosed Place this envelope in the box with the product 5 Seal the box with packing tape and return the product via United Parcel Service UPS insured and freight prepaid to Philips Recovery Center Rojas 6 1...

Страница 54: ... language 32 33 marker button 17 39 markers 39 menus 5 19 mode button 17 30 31 next button 14 22 number buttons 16 ok button 16 open close button 14 16 18 parental lock 35 36 password 35 pause button 14 17 20 21 23 play button 14 16 18 playing 18 power button 16 cord 15 prev ious button 14 22 program 30 random 31 rear panel 15 remote control buttons 16 17 sensor 14 using 7 repeat button 16 28 repe...

Страница 55: ... your DVD Player OP EN CL OS E OK CLEAR A B RE TURN DIS PLA Y TIT LE SEAR CH MO DE MO DE ZO OM RE PEAT RE PEAT MA RK ER SETUP AU DIO SUBTI TLE ANGLE PO WE R DIS C 3 2 1 6 5 4 9 8 7 0 10 ME NU 9 Remote Control 4835 218 37322 Two AA Batteries 4835 138 17012 This owner s manual is made of recyclable materials Remember to recycle Audio and Video Cables 4835 321 17148 ...

Отзывы: