background image

9

3 Get 

started

Caution

Use of controls or adjustments or 


performance of procedures other than herein 
may result in hazardous radiation exposure or 
other unsafe operation.

Always follow the instructions in this chapter in 
sequence.
If you contact Philips, you will be asked for the 
model and serial number of this apparatus. The 
model number and serial number are on the 
rear of the apparatus. Write the numbers here: 
Model No. __________________________
Serial No. ___________________________

Placement

You can place the unit on a flat surface or 
mount the unit on a wall.

Mount on a wall

To wall mount the unit, see the included 
separate sheet of wall mounting instructions.

Prepare the remote control

Caution

Risk of explosion! Keep batteries away from 


heat, sunshine or fire. Never discard batteries 
in fire.


1

  Open the battery compartment.

2

  Insert 2 AAA batteries with correct 

polarity (+/-) as indicated.

o


/MENU

Stop play or erase a program.

• 

Access the iPod menu.

• 

p

 iPod

Select iPod source.

• 

q

 TUNER

Select tuner source.

• 

English

EN

Содержание DCM276

Страница 1: ...Register your product and get support at www philips com welcome DCM276 EN User manual ...

Страница 2: ...ew of the main unit 7 Overview of the remote control 8 3 Get started 9 Placement 9 Prepare the remote control 9 Connect power 10 Auto install radio stations 10 Set clock 10 Turn on 11 4 Play 11 Play a disc 11 Play from USB 11 Play options 12 5 Play iPod 13 Compatible iPod 13 Play an iPod player 13 Charge the iPod 13 6 Listen to radio 14 Tune to a radio station 14 Program radio stations automatical...

Страница 3: ...from direct sunlight naked flames or heat Never look into the laser beam inside this apparatus Ensure that you always have easy access to the power cord plug or adaptor to disconnect this apparatus from the power 1 Important Safety a Read these instructions b Keep these instructions c Heed all warnings d Follow all instructions e Do not use this apparatus near water f Clean only with dry cloth g Do...

Страница 4: ...person even for exposure less than a minute The higher decibel ranges are offered for those that may have already experienced some hearing loss Sound can be deceiving Over time your hearing comfort level adapts to higher volumes of sound So after prolonged listening what sounds normal can actually be loud and harmful to your hearing To guard against this set your volume to a safe level before your...

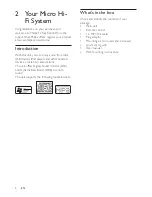
Страница 5: ...System Congratulations on your purchase and welcome to Philips To fully benefit from the support that Philips offers register your product at www philips com welcome Introduction With this unit you can enjoy audio from discs USB devices iPod players and other external devices or listen to radio stations The unit offers Digital Sound Control DSC and Dynamic Bass Boost DBB to enrich sound The unit su...

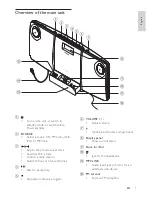
Страница 6: ...audio device l FM antenna Improve FM reception Overview of the main unit a Turn on the unit or switch to standby mode or switch to Eco Power standby b SOURCE Select a source CD FM tuner USB iPod or MP3 link c Skip to the previous next track Search within a track Tune to a radio station Select 12 hour or 24 hour format d Start or pause play e Stop play or erase a program En gl i s h EN ...

Страница 7: ...during play RDS is not available g Mute or restore volume h VOL Adjust volume i Numeric keypad Select a track from a disc directly j PROG CLOCK SET Program tracks Program radio stations Set the clock k SLEEP TIMER Set the sleep timer Set the alarm timer l DSC Select a preset sound setting m DBB Turn on or off dynamic bass enhancement n REPEAT SHUFFLE Play a track or all tracks repeatedly Play trac...

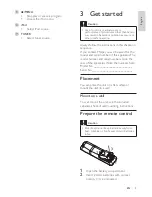
Страница 8: ...s here Model No __________________________ Serial No ___________________________ Placement You can place the unit on a flat surface or mount the unit on a wall Mount on a wall To wall mount the unit see the included separate sheet of wall mounting instructions Prepare the remote control Caution Risk of explosion Keep batteries away from heat sunshine or fire Never discard batteries in fire 1 Open the...

Страница 9: ...or 24 hour format 3 Press PROG CLOCK SET to confirm The hour digits are displayed and begin to blink 4 Press to set the hour 5 Press PROG CLOCK SET to confirm The minute digits are displayed and begin to blink 6 Press to set the minute 7 Press PROG CLOCK SET to confirm the clock setting 3 Close the battery compartment Note If you are not going to use the remote control for a long time remove the batt...

Страница 10: ...t the USB device into the socket 2 Press USB MP3 LINK to select the USB source Play starts automatically If not press To select a folder press To select an audio file press Turn on 1 Press The unit switches to the last selected source Switch to standby 1 Press again to switch the unit to standby mode The clock if set appears on the display panel To switch the unit to Eco Power Standby mode 1 In the...

Страница 11: ...e resume play 1 During play press to pause resume play Skip to a track For CD 1 Press to select another track To select a track directly you can also press a key on the numerical keypad For MP3 disc and USB 1 Press to select an album or a folder 2 Press to select a track or a file Search within a track 1 During play press and hold 2 Release to resume normal play Select repeat shuffle play options 1 ...

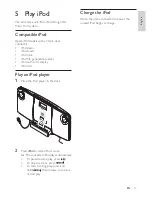
Страница 12: ...ls with a 30 pin dock connector iPod classic iPod touch iPod nano iPod 5th generation video iPod with color display iPod mini Play an iPod player 1 Place the iPod player in the dock 2 Press iPod to select iPod source The connected iPod plays automatically To pause resume play press To skip to a track press To search during play press and hold then release to resume normal play E n gl i s h EN ...

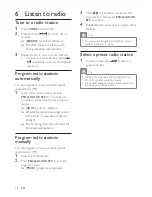
Страница 13: ...CH search is displayed The radio tunes to a station with strong reception automatically 3 Repeat step 2 to tune to more stations To tune to a weak station press repeatedly until you find optimal reception Program radio stations automatically You can program a maximum of 20 preset radio stations FM 1 In the tuner mode press and hold PROG CLOCK SET for more than 2 seconds to activate automatic progra...

Страница 14: ...s activated to play at a preset time Note Ensure that you have set the clock correctly 1 Press to switch to standby mode 2 Press and hold SLEEP TIMER for more than two seconds A prompt to select the source is displayed 3 Press CD TUNER USB or iPod to select a source 4 Press SLEEP TIMER to confirm The clock digits are displayed The hour digits begin to blink 5 Press to set the hour 6 Press SLEEP TIM...

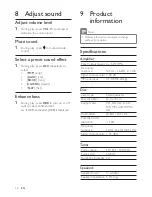
Страница 15: ... Frequency response 60 Hz 16 kHz 44 1 kHz Signal to noise ratio 75 dBA Tuner Tuning range FM 87 5 108 MHz Tuning grid 50 KHz Number of presets 20 Speakers Speaker driver 3 woofer Speaker impedance 5 W 4 8 Adjust sound Adjust volume level 1 During play press VOL to increase decrease the volume level Mute sound 1 During play press to mute unmute sound Select a preset sound effect 1 During play press...

Страница 16: ...mmercially available cleaner Follow the instructions supplied with cleaner General information AC power 110 127 V 220 240 V 50 60 Hz Operation Power Consumption 15 W Standby Power Consumption 5 W USB Direct Version 2 0 1 1 Dimensions Main Unit W x H x D 542 x 238 x 102 mm Weight Main Unit 3 935 kg USB playability information Compatible USB devices USB flash memory USB 2 0 or USB 1 1 USB flash player...

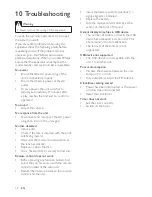
Страница 17: ...counter problems when using this apparatus check the following points before requesting service If the problem remains unsolved go to the Philips web site www philips com welcome When you contact Philips ensure that the apparatus is nearby and the model number and serial number are available No power Ensure that the AC power plug of the unit is connected properly Ensure that there is power at the ...

Страница 18: ...19 ...

Страница 19: ...20 ...

Страница 20: ...21 ...

Страница 21: ...22 ...

Страница 22: ...23 ...

Страница 23: ...24 ...

Страница 24: ... 2010 Koninklijke Philips Electronics N V All rights reserved DCM276_55_UM_V3 0 ...

Отзывы: