background image

9

EN

Prepare the remote control

Caution


Risk of product damage! When the remote control is 

not used for long periods, remove the batteries.

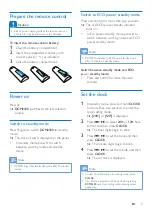
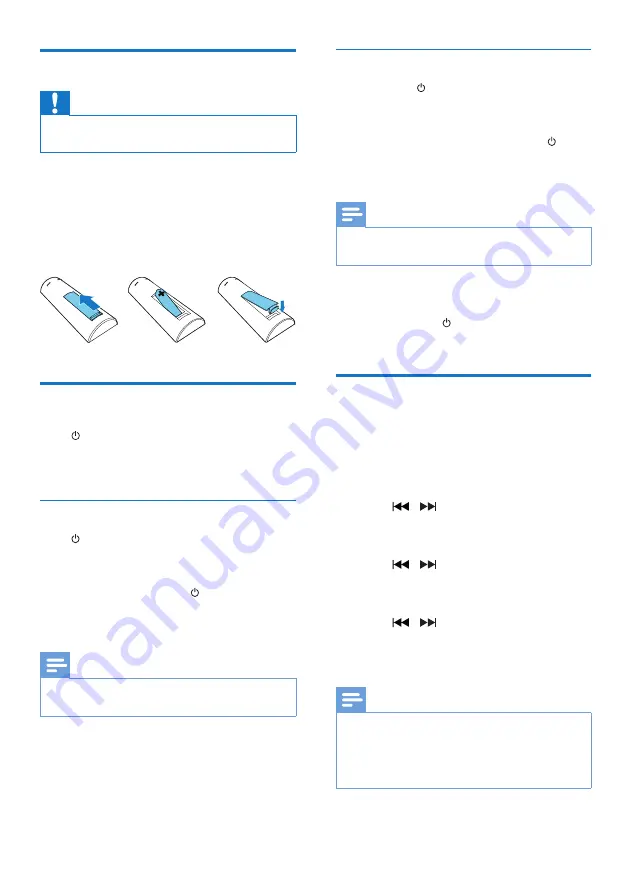
To insert the remote control battery:

Open the battery compartment.

Insert the supplied AAA battery with 

correct polarity (+/-) as indicated.

Close the battery compartment.


Power on

Press  .


»

DCM2330

 switches to the last selected 

source.

Switch to standby mode

Press   again to switch 

DCM2330

 to standby 

mode.


»

The clock (if set) is displayed on the panel.

•  In standby mode, press   to switch 

between working mode and standby 

mode.

Note


DCM2330 switches to Standby mode after 15 minutes 

inactive.

Switch to ECO power standby mode

Press and hold   for more than two seconds.


»

The red ECO power standby indicator 

turns on.

•  In Eco power standby mode, press   to 

switch between working mode and ECO 

power standby mode.

Note


DCM2330 switches to ECO power Standby mode 

after 15 minutes in standby mode.

Switch between standby mode and ECO 

p

ower 

standby mode:

•  Press and hold   for more than two 

seconds.

Set the clock

In standby mode, press and hold 

CLOCK


for more than two seconds to enter the 

clock setting mode.


»

[24H]

 or 

[12H]

 is displayed.

Press   /   to select 

24H

 or 

12H 

hour 

format, and then press 

CLOCK

.


»

The hour digits begin to blink.

Press   /   to set the hour, and then 

press 

CLOCK

.


»

The minute digits begin to blink.

Press   /   to set the minute, and then 

press 

CLOCK

.


»

The set clock is displayed.

Note


To view clock information in working mode, press 

CLOCK

.


If no button is pressed in 90 seconds during setting, 

DCM2330

 exits clock setting without saving earlier 

operations.

Содержание DCM2330

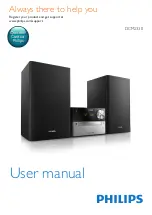
Страница 1: ...User manual Always there to help you Register your product and get support at www philips com support DCM2330 Question Contact Philips ...

Страница 2: ......

Страница 3: ...tible iPod iPhone 12 Load the iPod iPhone 12 Listen to the iPod iPhone 13 Charge the iPod iPhone 13 Remove the iPod iPhone 13 6 Listen to FM radio 14 Tune to FM radio stations 14 Program radio stations automatically 14 Program radio stations manually 14 Tune to a preset radio station 14 7 Adjust sound 15 Select a preset sound effect 15 Adjust volume level 15 Mute sound 15 8 Other features 16 Set t...

Страница 4: ...oduct Never connect the product to the power outlet if the voltage is different Never expose the remote control or batteries to rain water sunshine or excessive heat Avoid force coming onto power plugs Loose power plugs can cause arcing or fire Correctly install the battery with its polarity signs as marked on the remote control Danger of explosion if battery is incorrectly replaced Replace only w...

Страница 5: ...move the disposable batteries see battery installation section Environmental information All unnecessary packaging has been omitted We have tried to make the packaging easy to separate into three materials cardboard box polystyrene foam buffer and polyethylene bags protective foam sheet Your system consists of materials which can be recycled and reused if disassembled by a specialized company Plea...

Страница 6: ...d has been certified by the developer to meet Apple performance standards Apple is not responsible for the operation of this device or its compliance with safety and regulatory standards Please note that the use of this accessory with iPod or iPhone may affect wireless performance iPod and iPhone are trademarks of Apple Inc registered in the U S and other countries ...

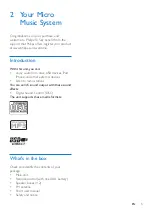
Страница 7: ... this unit you can enjoy audio from discs USB devices iPod iPhone and other external devices listen to radio stations You can enrich sound output with these sound effects Digital Sound Control DSC The unit supports these media formats What s in the box Check and identify the contents of your package Main unit Remote control with one AAA battery Speaker boxes 2 FM antenna Short user manual Safety a...

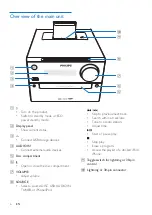
Страница 8: ... compartment f Open or close the disc compartment g VOLUME Adjust volume h SOURCE Select a source DISC USB AUDIO IN TUNER or iPhone iPod b c d e f h g a i j Skip to previous next track Search within a track disc Tune to a radio station Adjust time Start or pause play Stop play Erase a program Access the playlist of a docked iPod iPhone i Toggle switch for lightning or 30 pin control j Lightning or...

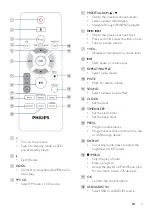
Страница 9: ... radio station g VOL Increase or decrease the volume level h Start pause or resume play i REPEAT SHUFFLE Select a play mode j MUTE Mute or restore volume k SOUND Select a preset sound effect l CLOCK Set the clock m TIMER SLEEP Set the alarm timer Set the sleep timer n PROG Program radio stations Program tracks that are stored in a disc or USB storage device o DISPLAY In working mode press to adjus...

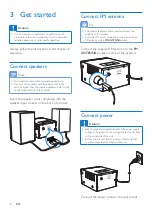
Страница 10: ...l Insert the speaker wires completely into the speaker input sockets on the back of product Connect FM antenna Tip For optimal reception fully extend and adjust the position of the antenna For better FM stereo reception connect an outdoor FM antenna to the FM ANTENNA socket Connect the supplied FM antenna to the FM ANTENNA socket on back of the product Connect power Caution Risk of product damage ...

Страница 11: ...wo seconds The red ECO power standby indicator turns on In Eco power standby mode press to switch between working mode and ECO power standby mode Note DCM2330 switches to ECO power Standby mode after 15 minutes in standby mode Switch between standby mode and ECO power standby mode Press and hold for more than two seconds Set the clock 1 In standby mode press and hold CLOCK for more than two second...

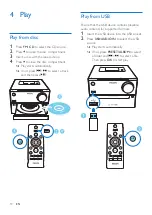
Страница 12: ...lay starts automatically If not press to select a track and then press CD Play from USB Ensure that the USB device contains playable audio contents for supported formats 1 Insert the USB device into the USB socket 2 Press USB AUDIO IN to select the USB source Play starts automatically If not press PRESET ALBUM to select a folder and to select a file Then press OK to start play USB ...

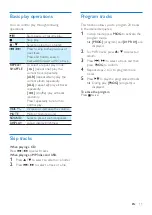
Страница 13: ...or decrease the volume MUTE Mute or restore sound SOUND Select a preset sound equalizer DISPLAY Adjust display brightness Skip tracks When playing a CD Press to select tracks When playing an MP3 disc and USB 1 Press to select an album or a folder 2 Press to select a track or a file Program tracks This function allows you to program 20 tracks in the desired sequence 1 In stop mode press PROG to act...

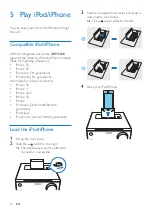
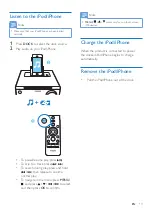
Страница 14: ...ion iPod touch 5th generation Also made for 30 pin connector iPhone 4S iPhone 4 iPhone 3GS iPhone 3G iPhone iPod nano 2nd 3rd 4th 5th 6th generation iPod classic iPod touch 1st 2nd 3rd 4th generation Load the iPod iPhone 1 Lift up the dock cover 2 Slide the switch to the right The dock swivels and the alternate connector is accessible 3 Select your desired connector and press it down until a click...

Страница 15: ... a track press To search during play press and hold then release to resume normal play To navigate in the menu press MENU and press to select and then press OK to confirm DOCK Note MENU works only for non touch screen iOS devices Charge the iPod iPhone When the product is connected to power the docked iPod iPhone begins to charge automatically Remove the iPod iPhone Pull the iPod iPhone out of the...

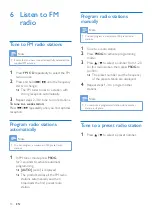
Страница 16: ...ations 1 In FM tuner mode press PROG for 3 seconds to activate automatic programming AUTO auto is displayed The product stores all the FM radio stations automatically and then broadcasts the first preset radio station Program radio stations manually Note You can program a maximum of 20 preset radio stations 1 Tune to a radio station 2 Press PROG to activate programming mode 3 Press to select a num...

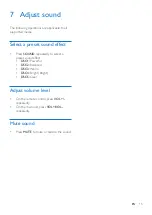
Страница 17: ...eset sound effect Press SOUND repeatedly to select a preset sound effect DSC1 Powerful DSC2 Balanced DSC3 Warm DSC4 Bright Bright DSC5 Clear Adjust volume level On the remote control press VOL repeatedly On the main unit press VOL VOL repeatedly Mute sound Press MUTE to mute or restore the sound ...

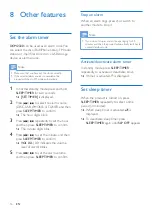
Страница 18: ...EP TIMER to confirm The minute digits blink 4 Press to set the minute and then press SLEEP TIMER to confirm VOL XX XX indicates the volume level of alarm blinks 5 Press to set the alarm volume and then press SLEEP TIMER to confirm Stop an alarm When an alarm rings press or switch to another mode to stop it Note If you do not stop an alarm it keeps ringing for 30 minutes and then the product automa...

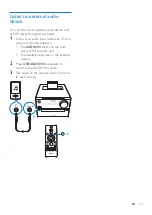
Страница 19: ...product 1 Connect an audio input cable with 3 5 mm plug on both ends between the AUDIO IN socket on the back panel of this product and the headphone socket on the external device 2 Press USB AUDIO IN repeatedly to switch to the AUDIO IN source 3 Play audio on the external device refer to its user manual AUDIO IN ...

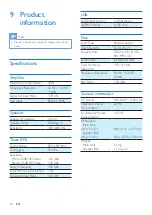
Страница 20: ...tio 22 dBu 45 dBu Search Selectivity 30 dBu Total Harmonic Distortion 3 Signal to Noise Ratio 45 dB USB USB DirectVersion 2 0 full speed USB 5V Power 500 mA Disc LaserType Semiconductor Disc Diameter 12 cm 8 cm Support Disc CD DA CD R CD RW MP3 CD Audio DAC 24 Bits 44 1 kHz Total Harmonic Distortion 1 1 kHz Frequency Response 60 Hz 16 kHZ 3 dB S N Ratio 70 dBA General information AC power 100 240V...

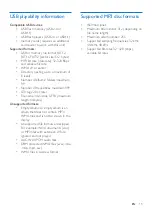
Страница 21: ... maximum 999 ID3 tag v2 0 or later File name in Unicode UTF8 maximum length 64 bytes Unsupported formats Empty albums an empty album is an album that does not contain MP3 WMA files and is not be shown in the display Unsupported file formats are skipped For example Word documents doc or MP3 files with extension dlf are ignored and not played AAC WAV PCM audio files DRM protected WMA files wav m4a m...

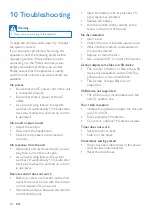
Страница 22: ...he end and no control is operated Remote control does not work Before you press any function button first select the correct source with the remote control instead of the main unit Reduce the distance between the remote control and the unit Insert the battery with its polarities signs aligned as indicated Replace the battery Aim the remote control directly at the sensor on the front of the unit No...

Страница 23: ......

Страница 24: ...is sold under the responsibility of Gibson Innovations Ltd and Gibson Innovations Ltd is the warrantor in relation to this product Philips and the Philips Shield Emblem are registered trademarks of Koninklijke Philips N V and are used under license from Koninklijke Philips N V DCM2330_12_UM_V3 0 ...

Отзывы: