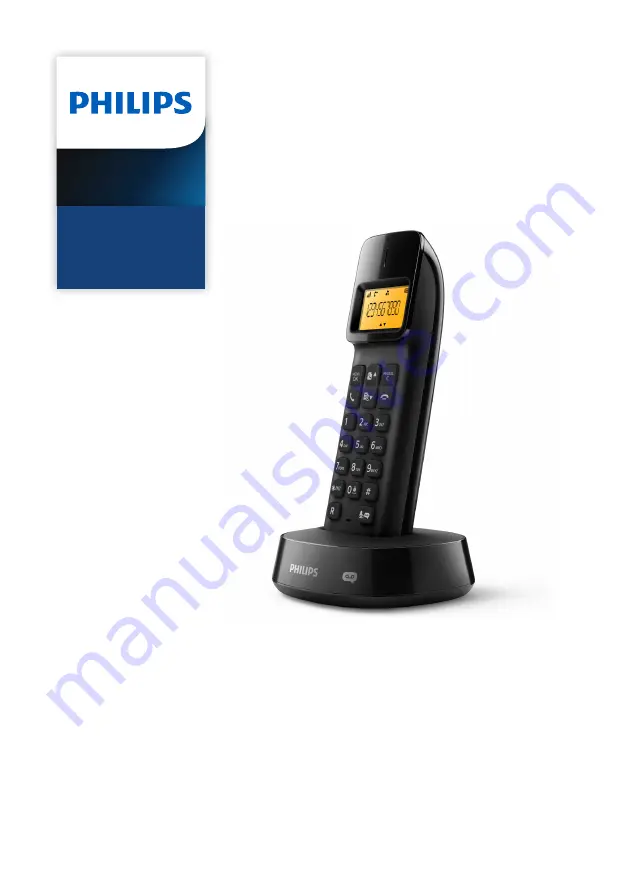
background image

Extended user 
documentation

Hier können Sie Ihr Produkt registrieren und Unterstützung erhalten:

www.philips.com/support

Extended user 

documentation

Register your product and get support at

www.philips.com/support

Philips cordless phone

Philips cordless 
phone with answering 
machine

D140 

D145

Содержание D140

Страница 1: ...Extended user documentation Register your product and get support at www philips com support Philips cordless phone Philips cordless phone with answering machine D140 D145 ...

Страница 2: ......

Страница 3: ...lls 14 Make a call to another handset 14 Make a conference call 14 6 Text and numbers 16 Enter text and numbers 16 7 Phonebook 17 View the phonebook 17 Search a record 17 Call from the phonebook 17 Add a record 17 Edit a record 18 Delete a record 18 Delete all records 18 8 Call log 19 View the call records 19 Save a call record to the phonebook 19 Return a call 19 Delete a call record 20 Delete al...

Страница 4: ...r the handset or additional handsets 31 Unregister the handsets 31 Restore default settings 32 13 Technical data 33 14 Notice 34 Declaration of conformity 34 Use GAP standard compliance 34 Compliance with EMF 34 Disposal of your old product and battery 34 15 Frequently asked questions 36 16 Appendix 39 Text and number input tables 39 ...

Страница 5: ... if placed near or on the handset receiver Do not use the product in places where there are explosive hazards Do not open the handset base station or charger as you could be exposed to high voltages For pluggable equipment the socket outlet shall be installed near the equipment and shall be easily accessible Handsfree activation could suddenly increase the volume in the earpiece to a very high lev...

Страница 6: ...ips com welcome What is in the box Handset Base station D140 Base station D145 Charger Power adapter Line cord Guarantee Short user manual Note In some countries you have to connect the line adapter to the line cord then plug the line cord to the telephone socket In multi handset packs there are additional handsets chargers and power adapters 4XLFN VWDUW JXLGH ...

Страница 7: ...the keypad in standby mode g Press and hold to enter a pause h for D140 or for D145 Mute or unmute the microphone Access to the answer machine menu in standby mode for D145 only Listen to new messages from the answering machine for D145 only i Power switch j Microphone k R Recall key This function is network dependent l Set the dial mode pulse mode or temporary tone mode This function is country d...

Страница 8: ...6 EN Overview of the base station D140 a Press to find handsets Press and hold to enter the registration mode D145 a Press to find handsets Press and hold to enter the registration mode 1 1 ...

Страница 9: ...wer socket The filter prevents noise and caller ID problems caused by the DSL interference For more information on the DSL filters contact your DSL service provider The type plate is located on the bottom of the base station 1 Connect each end of the power adapter to the micro USB jack at the bottom of the base station the power socket on the wall 2 Connect each end of the line cord to the telepho...

Страница 10: ...en using your phone for the first time you see a welcome message 2 Press MENU OK Set the country language Select your country language then press MENU OK to confirm The country language setting is saved Note The country language setting option is country dependent If no welcome message is displayed it means the country language setting is preset for your country To re set the language see the foll...

Страница 11: ...K 2 Select REMOTE ACC CHANGE PIN then press MENU OK to confirm 3 Enter the old PIN passcode then press MENU OK to confirm 4 Enter the new PIN passcode then press MENU OK to confirm 5 Enter the new PIN passcode again then press MENU OK to confirm The setting is saved Charge the handset Place the handset on the base station or the charging cradle to charge the handset When the handset is placed corr...

Страница 12: ...dset Icon Descriptions When the handset is off the base station charger the bars indicate the battery level from full to low When the handset is on the base station charger the bars keep scrolling until charging is complete The empty battery icon flashes and you hear an alert tone The battery is low and needs recharging It displays the connection status between the handset and base station The mor...

Страница 13: ...igits on the right Press REDIAL C to read Check the signal strength The number of bars indicates the connection status between the handset and base station The more bars are shown the better the connection is Make sure the handset is connected to the base station before you make or receive calls and carry out the phone functions and features If you hear warning tones when you are on the phone the ...

Страница 14: ...L C To enter a pause press and hold 2 Press to dial out the call Note The talk time of your current call is displayed on the call timer If you hear warning tones the phone is almost out of battery or out of range Charge the battery or move the phone close to the base station Answer a call When there is an incoming call press to answer the call Warning When the handset rings or when the handsfree i...

Страница 15: ...a second call Note This service is network dependent When there is a periodical beep to notify you of an incoming call you can answer the call in these ways 1 Press R and to answer the call The first call is put on hold and you are now connected to the second call 2 Press R and 1 to end the current call and answer the first call Switch between two calls Note This service is network dependent Check...

Страница 16: ...ercom is established 4 Press REDIAL C or to cancel or end the intercom call While you are on the phone You can go from one handset to another during a call 1 Press and hold The current caller is put on hold For multi handset versions the handsets available for intercom are displayed then go to step 2 2 Select a handset then press MENU OK to confirm Wait for the other side to answer your call Switc...

Страница 17: ...o end the conference call Note Press to join an ongoing conference with another handset if SERVICES CONFERENCE is set to AUTO During the conference call 1 Press and hold to put the internal call on hold and go back to the external call The internal call is put on hold 2 Press and hold again to put the external call on hold and go back to the internal call The external call is put on hold 3 Press M...

Страница 18: ...bers 1 Press once or several times on the alphanumeric key to enter the selected character 2 Press REDIAL C to delete a character Press and hold REDIAL C to delete all characters Press and to move the cursor left and right 3 Press to add a space Note For information on key mapping of characters and numbers see the chapter Appendix ...

Страница 19: ...ress and to scroll through the phonebook list Enter the first character of a contact 1 Press or press MENU OK PHONEBOOK VIEW to access the phonebook list 2 Press the alphanumerical key that matches the character The first record that starts with this character is displayed Call from the phonebook 1 Press or press MENU OK PHONEBOOK VIEW to access the phonebook list 2 Select a contact in the phonebo...

Страница 20: ...m 4 Edit the name then press MENU OK to confirm 5 Edit the number then press MENU OK to confirm The record is saved Delete a record 1 Press MENU OK 2 Select PHONEBOOK DELETE then press MENU OK to confirm 3 Select a contact then press MENU OK to confirm A confirmation request is displayed on the handset 4 Press MENU OK to confirm The record is deleted Delete all records Press MENU OK 1 Select PHONE...

Страница 21: ...you can call back directly from the call list The icons shown on the screen tell you whether they are missed received calls Icons Description It remains steadily on when browsing incoming calls in the call log It flashes when there is a new missed call It remains steadily on when browsing the missed calls in call log View the call records 1 Press The incoming call log is displayed 2 Select a recor...

Страница 22: ...rm A confirmation request is displayed on the handset 4 Press MENU OK to confirm The record is deleted Delete all call records 1 Press The incoming call log is displayed 2 Press MENU OK to enter the options menu 3 Select DELETE ALL then press MENU OK to confirm A confirmation request is displayed on the handset 4 Press MENU OK to confirm All records are deleted ...

Страница 23: ...ER then press MENU OK to confirm 4 Enter and edit the name then press MENU OK to confirm The record is saved Delete a redial record 1 Press REDIAL C to enter the list of dialed calls 2 Select a record then press MENU OK to confirm 3 Select DELETE then press MENU OK to confirm A confirmation request is displayed on the handset 4 Press MENU OK to confirm The record is deleted Delete all redial recor...

Страница 24: ... ringtone for external calls You can select from 10 ringtones for external calls 1 Press MENU OK 2 Select PHONE SETUP SOUNDS RINGTONE EXT then press MENU OK to confirm 3 Select a ringtone then press MENU OK to confirm The setting is saved Set the key tone Key tone is the sound made when you press a key on the handset 1 Press MENU OK 2 Select PHONE SETUP SOUNDS KEY TONE then press MENU OK to confir...

Страница 25: ...o erase a character press REDIAL C 4 Press MENU OK to confirm The setting is saved Set the date and time For information see Set the date and time Set the display language Note This feature only applies to models with multiple language support Languages available vary from country to country 1 Press MENU OK 2 Select PHONE SETUP LANGUAGE then press MENU OK to confirm 3 Select a language then press ...

Страница 26: ...CORD ALSO means calls are answered and messages are recorded ANSWER ONLY means calls are only answered messages are not recorded When the answering machine is switched on it answers incoming calls after a certain number of rings based on the ring delay setting Set the answering machine language Note This feature only applies to models with multiple language support The answering machine language i...

Страница 27: ...Y then press MENU OK to confirm 4 Select PLAY then press MENU OK to confirm You can listen to the current announcement Note You can no longer listen to the announcement when you pick up an incoming call Restore the default announcement 1 Press or MENU OK ANSW MACHINE MENU OK 2 Select ANNOUNCEMENT then press MENU OK to confirm 3 Select RECORD ALSO or ANSWER ONLY then press MENU OK to confirm 4 Sele...

Страница 28: ... is displayed on the handset 3 Press MENU OK to confirm All old messages are permanently deleted Note You can delete the read messages only No deleted messages can be recovered Set the ring delay You can set the number of times the phone rings before the answering machine picks up the call 1 Press or MENU OK ANSW MACHINE MENU OK 2 Select RING DELAY then press MENU OK to confirm 3 Select a new sett...

Страница 29: ...confirm 5 Enter the new PIN passcode again then press MENU OK to confirm The setting is saved Access the answering machine remotely 1 Make a call to your home number with a touch tone phone 2 Enter when you hear the announcement 3 Enter your PIN code You now have access to your answering machine and you can listen to the new messages Note You have 2 chances to enter the correct PIN code before you...

Страница 30: ...age 2 Listen to messages 3 Skip to the next message 6 Delete the current message 7 Switch the answering machine on not available when you listen to the messages 8 Stop listening to the message 9 Switch the answering machine off not available when you listen to the messages ...

Страница 31: ... detect number and 1250 as the prefix When you have dialed out a number such as 6043338888 your phone changes the number to 12503338888 when it dials out Note The maximum length of a detect number is 5 digits The maximum length of an auto prefix number is 10 digits This is a country dependent feature Set auto prefix 1 Press MENU OK 2 Select SERVICES AUTO PREFIX then press MENU OK to confirm 3 Pres...

Страница 32: ...CES RECALL TIME then press MENU OK to confirm 3 Select an option then press MENU OK to confirm The setting is saved Dial mode Note This feature is country dependent and only applies to models that support both tone and pulse dial Dial mode is the telephone signal used in your country The phone supports tone DTMF and pulse rotary dial Consult the service provider for detailed information Set the di...

Страница 33: ...cation message will be displayed on your handset If registration fails unplug the power adapter from the base station and plug it back Wait for 15 seconds and then repeat the registration procedure The preset PIN is 0000 No change can be made on it The handset and the base station are GAP compliant which means they guarantee the minimum functions register a handset take the line make a call and re...

Страница 34: ... to the base station Restore default settings You can reset your phone settings to the original factory settings 1 Press MENU OK 2 Select SERVICES RESET then press MENU OK to confirm A confirmation request is displayed on the handset 3 Press MENU OK to confirm All settings are reset ...

Страница 35: ...TMF Battery Rechargeable Ni MH 2 4V 300mAh non removable batteries Power adapter Base and charger SPPS SSY050050 UK input 100 240 V 50 60 Hz 200 mA output 5 Vdc 500 mA Alternative power source Power bank output 5Vdc 500mA minimum RF output power 24 dBm Frequency band 1880 MHz 1900 MHz Power consumption Power consumption in idle mode around 0 70 W D140 0 75 W D145 Weight and dimensions Handset 100 ...

Страница 36: ...nual for registering a handset To register a handset from different make to the base station put the base station in registration mode then follow the procedure described in the handset manufacturer s instructions Compliance with EMF This product complies with all applicable standards and regulations regarding exposure to electromagnetic fields Disposal of your old product and battery Your product...

Страница 37: ...g has been omitted We have tried to make the packaging easy to separate into three materials cardboard box polystyrene foam buffer and polyethylene bags protective foam sheet Your system consists of materials which can be recycled and reused if disassembled by a specialized company Please observe the local regulations regarding the disposal of packaging materials exhausted batteries and old equipm...

Страница 38: ... appear on the screen CONFIG TÉL LANGUE PHONE SETUP LANGUAGE TEL SETUP SPRACHE CONF TELEF LINGUA 4 Select it to access the language options 5 Select your own language 15 Frequently asked questions My handset displays SEARCHING or UNAVAILABLE or UNREGISTERED what do I do Make sure that the base station has power supply The handset is out of range Move it closer to the base station The handset is no...

Страница 39: ...ake sure the handset is placed properly on the charger If the docking tone is turned on you can hear the docking tone when you place the handset on the charging cradle The battery icon animates when charging The charging contacts are dirty Disconnect the power supply first and clean the contacts with a damp cloth The battery is not fully recharged Leave the handset on the charging cradle for at le...

Страница 40: ...ervice is not activated Check with your service provider The caller s information is withheld or unavailable Note If the above solutions do not help disconnect the power supply from both the handset and base station Try again after 1 minute ...

Страница 41: ...F 3 4 G H I 4 5 J K L Ł 5 6 M N O 6 7 P Q R S 7 8 T U V 8 9 W X Y Z 9 16 Appendix Text and number input tables key Characters for English Latin 0 space 0 1 1 2 A B C 2 3 D E F 3 4 G H I 4 5 J K L 5 6 M N O 6 7 P Q R S 7 8 T U V 8 9 W X Y Z 9 key Characters for Norwegian Danish 0 space 0 1 1 2 A Æ B C 2 3 D E F 3 4 G H I 4 5 J K L 5 6 M N O 6 7 P Q R S 7 8 T U V 8 9 W X Y Z 9 ...

Страница 42: ...n manufactured by and is sold under the responsibility of Gibson Innovations Ltd and Gibson Innovations Ltd is the warrantor in relation to this product Philips and the Philips Shield Emblem are registered trademarks of Koninklijke Philips N V UM_D140 145_05_EN_V1 0 WK1711 ...

Отзывы: