background image

The EDIT function has two recording modes in which you
can store the recording time in the changer memory.

EDIT NORMAL

– The changer will determine which

tracks fit on each side of the tape and will stop after the
last track. The tracks will be recorded in the order in
which they appear on the CD(s).

EDIT OPTIMAL 

– The changer now calculates the

combination of tracks that will optimize the use of
available recording time.

NOTE!
– The EDIT function 

cannot

be used for CDs containing

more than 40 tracks.

– The – keys on the remote control may not

be used during recording as they affect the strength
of the signal from the changer.

Before Recording

Important!
The volume level will influence the sound level
during recording. Set the volume level to the
maximum and do not change the volume setting
during recording.

Preparation:

• A program to be recorded, must be stored in advance.

See 'PROGRAMMING'.

• If required you can search the loudest passage and

adjust your recording device. See 'SEARCHING THE
LOUDEST PASSAGE (PEAK SEARCH)'.
This can also be done after selecting the recording
mode and the recording time. See below.

• Press 

EDIT

to activate the EDIT mode.

SELECt dISC

appears on the display.

• Press 

EDIT

again to select the last selected disc or

press any

CD DIRECT PLAY

button or 

DISC

(on the

remote control) to select the desired disc.
When recording a program there is no need to enter
the CD number(s).

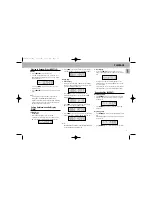
Selecting the recording mode:

– The display shows  

NO

RM

AL

(= EDIT NORMAL

which is the default setting).

• With 

S T

can now select OPT(imal), CANCEL

or EDIT (NORMAL) again.

– The display shows 

OPt

(imal), 

CANCEL

or

NO

RM

AL

again.

• Press 

EDIT

to store the required recording mode

(NORMAL or OPTimal).
If you select CANCEL, the EDIT mode will be
cancelled and the changer will go back to STOP
mode.

– As soon as you have stored the recording mode the

display shows 

C90

(default setting).

Selecting the recording time:

As soon as you have stored the recording mode the
display shows 

C90

(default setting).

• With

S T

you can now select the required

recording time:

C30

,

C45

,

C60

,

C90

,

C100

,

C120

,

Cd

R

21

,

Cd

R

60

or

Cd

R

74

.

In EDIT NORMAL mode the recording time must be at
least equal to the playing time of the first track on the
first CD or in the program.
In EDIT OPTimal mode the recording time must be at

least equal to the playing time of the shortest track
on the CD(s) or in the program.

NOt POSSIbLE

lights up if you select a 'wrong'

time.

• Press 

EDIT

to store the required recording time.

– The CD changer will now go back to STOP mode 
• You can now record the CD or the program.

Recording

• Press

PLAY

2

.

– Playback starts with the selected CD (or with the first

track of the program).

– The display shows the elapsed playing time of the

current track.

• Press 

TIME

to switch to other time display

information.

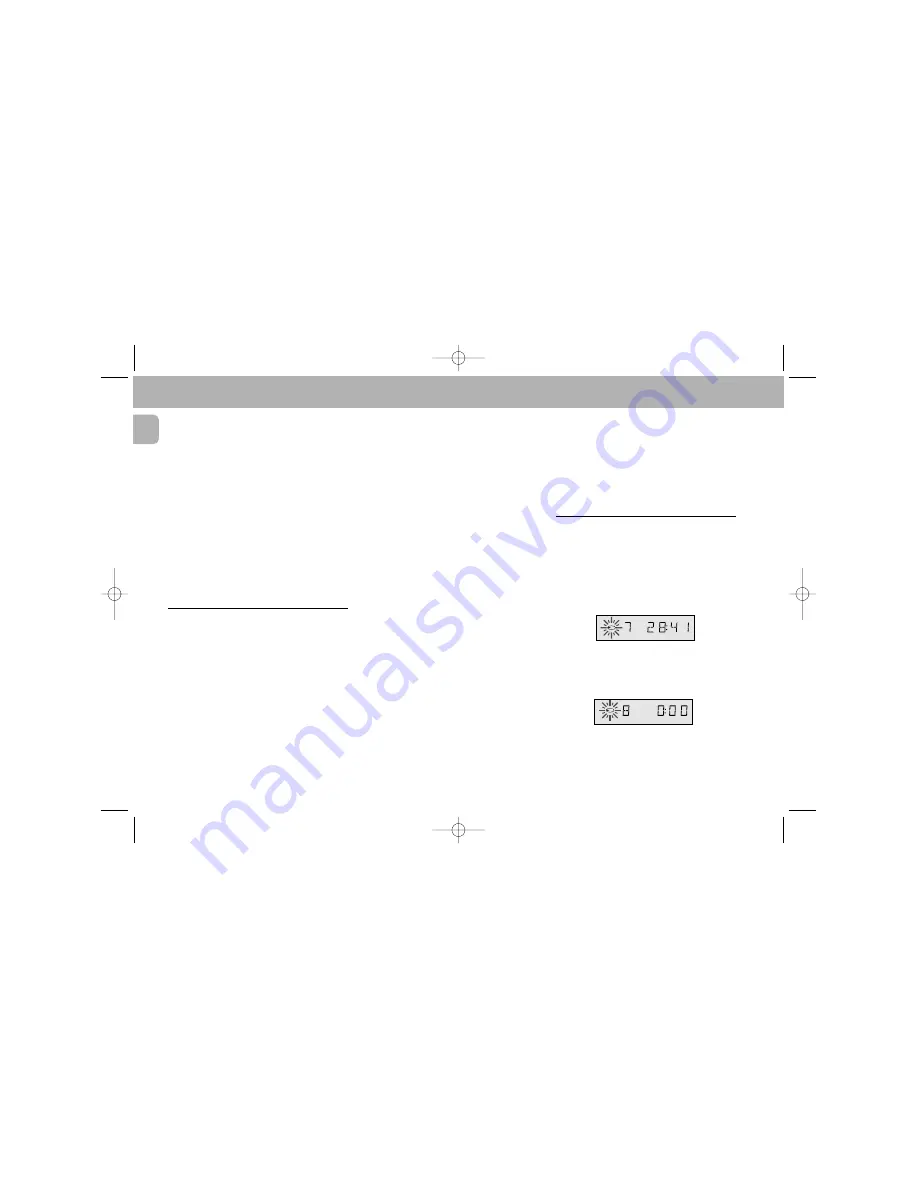
– The number of tracks for side A and their playing time

are shown on the display.

– After the last track that fits on side A of the tape, the

CD changer will go into PAUSE mode.

– PAUSE lights up.
– Under TRACK you will see the number of the first

track to be recorded on side B of the tape.

• Turn the tape over or select the tape travel direction

for side B.

TRACK

TOT

TIME

PAUSE

1

TRACK

TOT

TIME

1

14

English

EDIT

CDC775/22-Eng  6/15/00  1:37 PM  Page 14

Содержание CDC775

Страница 1: ...1 3139 116 17401 Compact Disc Changer CDC775 Untitled 19 6 15 00 1 34 PM 1 ...

Страница 2: ...lug proceed as follows Connect the blue wire to the terminal marked N or coloured black Connect the brown wire to the terminal marked L or coloured red Do not connect either wire to the earth terminal in the plug marked E or e or coloured green or green and yellow Before replacing the plug cover make certain that the cord grip is clamped over the sheath of the lead not simply over the two wires Co...

Страница 3: ...utsch Nederlands Italiano Svenska Dansk Suomi Português ÏÏËÓÈÎ CLASS 1 LASER PRODUCT INDEX English 4 Français 17 Español 30 Deutsch 43 Nederlands 56 Italiano 69 Svenska 82 Dansk 95 Suomi 108 Português 121 ÏÏËÓÈÎ 134 Untitled 19 6 15 00 1 34 PM 3 ...

Страница 4: ... voltage If your mains supply voltage is different consult your dealer or our Service Organisation Siting the Compact Disc Changer Free standing Always position the changer horizontally on a flat firm surface Allow a free space of at least 3 cm above the changer so as not to interfere with the cooling of the changer In an audio rack The changer can be sited in any desired position Stacked Site the...

Страница 5: ...to the R socket and the other plug into the L socket Insert the two other plugs into the corresponding sockets of the CD or AUX input of your amplifier You can also use the TUNER or TAPE IN connection but never the PHONO input Connecting Headphones Connect headphones with a 6 3 mm jack plug to the PHONES socket The sound level is adjusted with the LEVEL control Note The volume control on the remot...

Страница 6: ...e recording time during edit STOP 9 Stopping play Cancel a Program Peak Search or Edit PLAY 2 Starting play Returning to the beginning of a track CD DIRECT PLAY Selecting another CD during play Selecting a CD to start play with Selecting CDs when compiling a Program Peak Search or Edit OPEN CLOSE Opening and closing the CD compartment CD CAROUSEL TRAY LEVEL Adjusting the volume when listening with...

Страница 7: ...em without its own remote control Also for adjusting the sound level on the headphones 10 í PREV NEXT ë Selecting another track during play Selecting a track to start play with Selecting tracks when compiling a program Fast search to a particular passage during play Selecting the recording mode during edit Selecting the recording time during edit 11 STOP 9 Stopping play Cancel a Program Peak Searc...

Страница 8: ...TOT al TIME Indicates the total playing time of a CD SHUFFLE Lights up when the tracks are played in random order PAUSE Lights up when play is interrupted REPEAT 1 Lights up when you repeat a track REPEAT DISC Lights up when you repeat a CD REPEAT Lights up when you repeat all CDs or a program from them Display messages REAd Lights up when a CD s contents list is being scanned NO dISC Lights up wh...

Страница 9: ...rent CD Press PLAY 2 to start playback The CD number indicator 1 5 always shows what CD is being played B X flashes The track being played and its elapsed playing time are shown under TRACK and TRACK TIME See CALLING UP INFORMATION ON THE DISPLAY if you wish to see other information on the display Play will stop after all CDs have been played Press POWER ON OFF to switch the changer off Quick Play...

Страница 10: ...y in the required CD number If the CD compartment was open it will now close Play starts from the selected CD NO dISC lights up when there is no CD in the selected CD compartment You can also select the number by using the DISC button on the remote control Starting With A Particular Track CD DIRECT PLAY S T and PLAY 2 First select the number of the required CD using CD DIRECT PLAY or DISC on the r...

Страница 11: ...nt track REM TRACK TIME Press TIME if you wish to know the total playing time from the beginning TOTAL TIME Press TIME again if you wish to know the remaining playing time of the entire CD TOTAL REM TIME Note TOTAL REM aining TIME and TOTAL TIME indications are not available in SHUFFLE mode 2 Text display If you press TIME again you will switch to text display the display shows the number of the c...

Страница 12: ...mber s If you wish to record tracks from different CDs you have to repeat peak search for each CD You can interrupt PEAK SEARCH by pressing STOP 9 Adjusting The Sound Level VOLUME on the remote control only The volume output of the CD changer can be adjusted This will affects the analog out digital out and heaphones level Press VOLUME or to reduce or increase the sound level The display will show ...

Страница 13: ...or DISC on the remote control to select the desired disc Press T or S less than 0 5 seconds until the first track number you wish to program appears under TRACK Press PROGRAM again The track number has now been stored in the changers memory Select the other track numbers required and store each track by pressing PROGRAM The number of tracks and the playing time of your program will be shown under ...

Страница 14: ...th S T can now select OPT imal CANCEL or EDIT NORMAL again The display shows OPt imal CANCEL or NORMAL again Press EDIT to store the required recording mode NORMAL or OPTimal If you select CANCEL the EDIT mode will be cancelled and the changer will go back to STOP mode As soon as you have stored the recording mode the display shows C90 default setting Selecting the recording time As soon as you ha...

Страница 15: ...time Maintenance The CDs Never write on the printed side of a CD Do not attach any stickers to the CD Keep the shiny surface of the disc clean Use a soft lint free cloth and always wipe the disc in a straight line from centre to edge Never use cleaning agents for conventional records Detergents or abrasive cleaning agents should not be used either The changer A chamois leather slightly moistened w...

Страница 16: ...ns Leave the CD changer in a warm environment until the moisture evaporates Sound skips at the same part The current CD is dirty Clean the CD with a soft lint free cloth The current CD skips tracks The CD is damaged or dirty Replace or clean the CD Playback does not start from the first track of the current CD PRG program or SHUFFLE activated Switch off SHUFFLE or clear program No sound or bad sou...

Отзывы: