background image

7

EN

3  Get started

Caution


Use of controls or adjustments or performance of 

procedures other than herein may result in hazardous 

laser exposure or other unsafe operation.

Always follow the instructions in this chapter in 

sequence.
If you contact Philips, you will be asked for the 

model and serial number of this apparatus. The 

model number and serial number are on the 

back of the apparatus. Write the numbers here: 
Model No. __________________________
Serial No. ___________________________

Connect FM antenna

• 

Connect the supplied antenna to this 

device before listening to the radio.


Connect power

Caution


Risk of product damage! Make sure that the power 

supply voltage matches the voltage printed on the back 

of the main unit.


Risk of electric shock! Before you plug the AC power 

adaptor, make sure that the adaptor plug converter is 

fixed securely. When you unplug the AC power adaptor, 

always pull the plug, never the cord.


Before you connect the AC power adaptor, make sure 

that you have completed all the other connections.


Prepare the remote control

Caution


Risk of product damage! When the remote control is 

not used for long periods, remove the batteries.

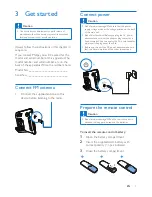
To insert the remote control battery:

Open the battery compartment.

Insert the supplied AAA battery with 

correct polarity (+/-) as indicated.

Close the battery compartment.


Содержание BTB2462

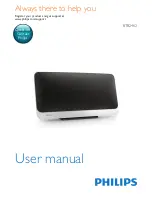
Страница 1: ...www philips com support User manual Always there to help you Register your product and get support at BTB2462 Question Contact Philips ...

Страница 2: ......
Страница 3: ... Play from Bluetooth enabled devices 10 5 Listen to the radio 12 Listen to DAB radio 12 Listen to FM radio 13 6 Adjust sound 15 Select a preset sound effect 15 Adjust volume level 15 Mute sound 15 7 Other features 16 Set the alarm timer 16 Set the sleep timer 16 Listen from an external device 16 Listen through a headphone 17 8 Product information 18 Specifications 18 USB playability information 19...

Страница 4: ...wer cord plug or adaptor to disconnect this device from the power Hearing safety Listen at a moderate volume Using headphones at a high volume can impair your hearing This product can produce sounds in decibel ranges that may cause hearing loss for a normal person even for exposure less than a minute The higher decibel ranges are offered for those that may have already experienced some hearing los...

Страница 5: ... discs Bluetooth enabled devices USB storage devices or other external devices listen to Digital Audio Broadcasting DAB or FM radio stations You can select one of the following sound effects Balanced Warm Bright Clear and Powerful The unit supports these media formats What s in the box Check and identify the contents of your package Main unit 1 x FM wire antenna Remote control with one AAA battery...

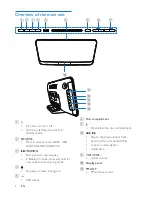
Страница 6: ...ause or resume play In Bluetooth mode press and hold for 3 seconds to enter pairing mode d Stop play or erase a program e USB socket g h i j k a b c d e l m n o f f Disc compartment g Open close the disc compartment h Skip to the previous next track Search within a track disc USB Tune to a radio station Adjust time i VOL VOL Adjust volume j Display panel k FM ANT FM antenna socket ...

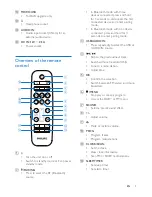
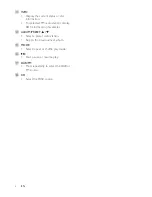
Страница 7: ... enter pairing mode In Bluetooth mode with one device connected press and hold for 3 seconds to enter pairing mode c USB AUDIO IN Press repeatedly to select the USB or AUDIO IN source d Skip to the previous next track Search within a track disc USB Tune to a radio station Adjust time e OK Confirm the selection Switch between FM stereo and mono broadcast f MENU Stop play or erase a program Access t...

Страница 8: ...o stations display RDS information if available n ALBUM PRESET Select a preset radio station Skip to the previous next album o MODE Select repeat or shuffle play mode p Start pause or resume play q DAB FM Press repeatedly to select the DAB or FM source r CD Select the DISC source ...

Страница 9: ...istening to the radio Connect power Caution Risk of product damage Make sure that the power supply voltage matches the voltage printed on the back of the main unit Risk of electric shock Before you plug the AC power adaptor make sure that the adaptor plug converter is fixed securely When you unplug the AC power adaptor always pull the plug never the cord Before you connect the AC power adaptor mak...

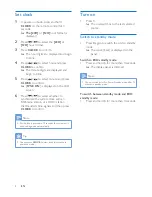
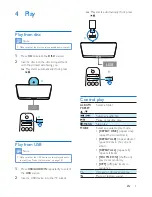
Страница 10: ...ith an RDS radio station or a DAB station that transmits time signals and then press CLOCK to confirm Note If no button is pressed in 10 seconds the system exits clock setting mode automatically Tip You can press CLOCK to view clock information in power on mode Turn on Press The unit switches to the last selected source Switch to standby mode Press again to switch the unit to standby mode The cloc...

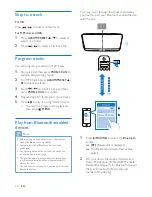
Страница 11: ...age 18 1 Press USB AUDIO IN repeatedly to select the USB source 2 Insert a USB device into the socket Play starts automatically If not press Control play ALBUM PRESET Select a folder Select an audio file Pause or resume play MENU Stop play MODE Select an available play mode REPEAT ONE repeat one repeat the current track REPEAT ALB repeat album repeat tracks in the current album REPEAT ALL repeat a...

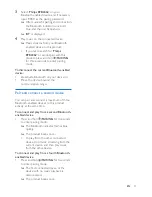
Страница 12: ...th this unit read its user manual for Bluetooth compatibility Compatibility with all Bluetooth devices is not guaranteed Any obstacle between the unit and the device can reduce the operational range The effective operation range between this unit and your Bluetooth enabled device is approximately 10 meters 30 feet The unit can memorize up to 2 previously connected Bluetooth devices To enjoy music ...

Страница 13: ...oth on your device or Move the device beyond the communication range Pair and connect a second device You can pair and connect a maximum of three Bluetooth enabled devices to this product actively at the same time To connect and play from a second Bluetooth enabled device Press and hold PAIRING for 3 seconds to enter pairing mode The Bluetooth indicator flashes blue quickly The product beeps once ...

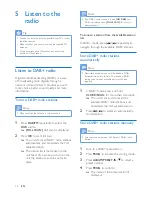
Страница 14: ...turn on the unit the station scan does not take place Note If no DAB radio station is found NO DAB no DAB is displayed then FULL SCAN full scan is displayed again To tune to a station from the available station list In DAB mode press repeatedly to navigate through the available DAB stations Store DAB radio stations automatically Note New stations and services will be added in DAB broadcast from ti...

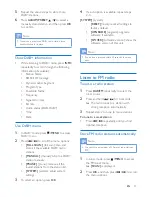
Страница 15: ...all the invalid stations from the station list SYSTEM system adjust system settings 3 To select an option press OK 4 If a sub option is available repeat steps 2 3 SYSTEM system RESET reset reset all settings to factory default UPGRADE upgrade upgrade software if available SWVER software version show the software version of this unit Note If no button is pressed within 30 seconds the menu exits Lis...

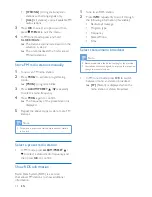
Страница 16: ...at the above steps to store more FM stations Note To remove a pre stored station store another station in its place Select a preset radio station In FM mode press ALBUM PRESET to select a stored radio frequency and then press OK to confirm Show RDS information Radio Data System RDS is a service that allows FM stations to show additional information 1 Tune to an RDS station 2 Press INFO repeatedly ...

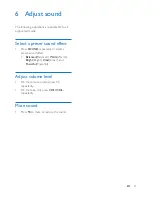
Страница 17: ...reset sound effect Press SOUND repeatedly to select a preset sound effect Balanced Balanced Warm Warm Bright Bright Clear Clear and Powerful Powerful Adjust volume level On the remote control press repeatedly On the main unit press VOL VOL repeatedly Mute sound Press to mute or restore the sound ...

Страница 18: ...ivate the alarm If the timer is activated TIMER Timer is displayed If the timer is deactivated TIMER OFF timer off is displayed and TIMER Timer disappears Tip If the DISC USB source is selected but no disc is placed or no USB connected the system switches to the tuner source automatically Set the sleep timer To set the sleep timer when the unit is switched on press SLEEP TIMER repeatedly to select...

Страница 19: ...17 EN 3 Start to play music on the connected device see the device user manual Listen through a headphone Plug a headphone not supplied into the socket ...

Страница 20: ...3dB S N Ratio 72dBA Bluetooth Bluetooth version V3 0 EDR Bluetooth frequency band 2 4GHz 2 48GHz ISM Band Range 10 m free space USB USB DirectVersion 2 0 full speed Tuner FM Tuning Range 87 5 108 MHz Tuning grid 50 KHz Sensitivity Mono 26 dB S N Ratio Stereo 46 dB S N Ratio 22 dBf 43 dBf Search Selectivity 28dBf Total Harmonic Distortion 3 Signal to Noise Ratio 55dBA DAB DAB Range 174 928MHz 239 2...

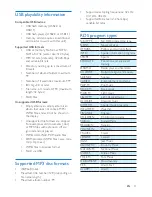
Страница 21: ...tected WMA files wav m4a m4p mp4 aac WMA files in Lossless format FLAC via USB Supported MP3 disc formats ISO9660 Joliet Maximum title number 128 depending on file name length Maximum album number 99 Supported sampling frequencies 32 kHz 44 1 kHz 48 kHz Supported Bit rates 32 256 kbps variable bit rates RDS program types NOTYPE No RDS programme type NEWS News services AFFAIRS Politics and current ...

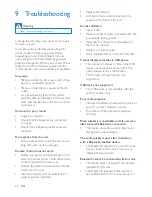
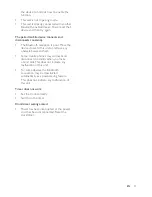
Страница 22: ...ert the battery with its polarities signs aligned as indicated Replace the battery Aim the remote control directly at the sensor on the front of the unit No disc detected Insert a disc Make sure that the disc is inserted with the printed side facing upward Wait until the moisture condensation at the lens has cleared Replace or clean the disc Use a finalized CD or correct format disc Cannot display...

Страница 23: ...to this unit or remove any obstacle between them Some mobile phones may connect and disconnect constantly when you make or end calls This does not indicate any malfunction of this unit For some devices the Bluetooth connection may be deactivated automatically as a power saving feature This does not indicate any malfunction of this unit Timer does not work Set the clock correctly Switch on the time...

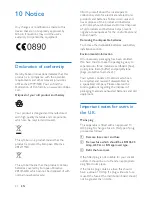
Страница 24: ...osal of old products and batteries helps prevent negative consequences for the environment and human health Removing the disposable batteries To remove the disposable batteries see battery installation section Environmental information All unnecessary packaging has been omitted We have tried to make the packaging easy to separate into three materials cardboard box polystyrene foam buffer and polye...

Страница 25: ...ed Do not connect either wire to the earth terminal in the plug marked E or e or coloured green or green and yellow Before replacing the plug cover make certain that the cord grip is clamped over the sheath of the lead not simply over the two wires Copyright in the U K Recording and playback of material may require consent see Copyright Act 1956 andThe performer s Protection Acts 1958 to 1972 The ...

Страница 26: ...is sold under the responsibility of Gibson Innovations Ltd and Gibson Innovations Ltd is the warrantor in relation to this product Philips and the Philips Shield Emblem are registered trademarks of Koninklijke Philips N V and are used under license from Koninklijke Philips N V BTB2462_05_UM_V1 0 ...

Отзывы: