background image

Register your product and get support at

www.philips.com/welcome

COAXIAL

COAXIAL

A

A

(           )

HDMI

1

2-2

Содержание BDP2105

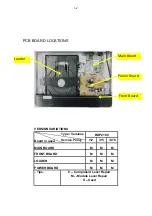
Страница 1: ...rieval system or transmitted in any form or by any means electronic mechanical photocopying or otherwise without the prior permission of Philips CLASS 1 LASER PRODUCT PHILIPS GB DFU Instruction 2 1 Revision List 11 1 Blu ray Player Technical Specifications 1 3 Safety Instruction Warning Notes 1 4 Location of PCB Boards Version Variation and Repair Scenario Matrix 1 2 Published by Arya Sophie 1305 ...

Страница 2: ...RIATIONS Type Versions Service Policy 12 05 X78 MAIN BOARD M M M M M M LOADER M M M POWER BOARD M M M Tips Board in used FRONT BOARD BDP2180 C Component Lever Repair M Module Lever Repair X Used Loader Main Board Power Board Front Board ...

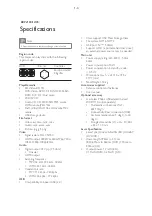
Страница 3: ...ps 320 kpbs WMA 48 kpbs 192 kpbs USB Compatibility Hi Speed USB 2 0 B Class support USB Mass Storage Class File system FAT16 FAT32 USB port 5V 500mA Support HDD a portable hard disc drive an external power source may be needed Main unit Power supply rating 220 240V 50Hz 60Hz Power consumption 10 W Power consumption in standby mode 0 5 W Dimensions w x h x d 310 x 39 5 x 217 7 mm Net Weight 1 12 kg...

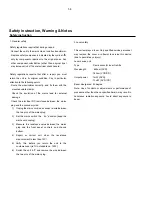
Страница 4: ... wire between the two pins of the mains plug 2 Set the mains switch the on position keep the mains cord unplug 3 Measure the resistance value between the mains plug and the front panel controls and chassis bottom 4 Repair or correct unit when the resistance measurement is less than 1M 5 Verify this before you return the unit to the customer user ref UL standard no 1492 6 Switch the unit off and re...

Страница 5: ...ch copper tracks and or components in this unshielded primary area when you service the player Service personnel must take precautions to prevent touching this area or components in this area A lighting stroke and a stripe marked printing on the printed wiring board indicate the primary side of the power supply Never replace modules or components while the unit is on 2 Laser The use of optical ins...

Страница 6: ...WV J 5HSODFH WKH GHIHFWLYH ORDGHU ZLWK D QHZ ORDGHU 5HPRYH SDSHUFOLS IURP WKH ÀH IRLO DQG FRQQHFW LW WR WKH QHZ ORDGHU 5HPRYH VROGHU MRLQW RQ WKH 6 SURWHFWLRQ SRLQW 77 17 21 7KH ODVHU GLRGH RI WKLV ORDGHU LV SURWHFWHG DJDLQVW 6 E D VROGHU MRLQW ZKLFK VKRUWFLUFXLWV WKH ODVHUGLRGH WR JURXQG RU SURSHU IXQFWLRQDOLW RI WKH ORDGHU WKLV VROGHU MRLQW PXVW EH UHPRYH DIWHU FRQQHFWLRQ ORDGHU WR WKH VHW 2QO D...

Страница 7: ...ch off un used equipment or reduce heat x Mix of lead free solder alloy parts with leaded solder alloy parts is possible but PHILIPS recommends strongly to avoid mixed solder alloy types leaded and lead free If one cannot avoid clean carefully the solder joint from old solder alloy and re solder with new solder alloy SAC305 x Use only original spare parts listed in the Service Manuals Not listed s...

Страница 8: ...Before you connect this Blu ray disc DVD player read and understand all accompanying instructions 2 1 ...

Страница 9: ...Register your product and get support at www philips com welcome COAXIAL COAXIAL A A HDMI 1 2 2 ...

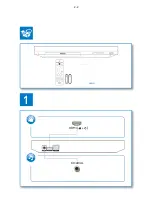
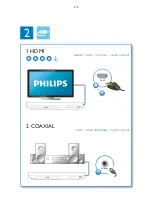
Страница 10: ...2 HDMI 1 HDMI HDMI VIDEO COAXIAL AUDIO LINE OUT COAXIAL COAXIA AL A A 2 COAXIAL HDMI VIDEO COAXIAL AUDIO LINE OUT 2 3 ...

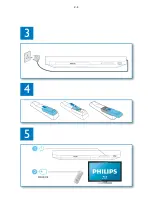
Страница 11: ...4 3 5 SOURCE 1 2 TV 2 4 ...

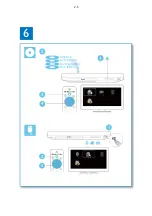
Страница 12: ...6 USB DVD VCD CD BD BD 3D DivX Plus HD MKV MP3 JPEG 2 3 4 1 1 2 3 2 5 ...

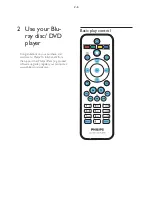
Страница 13: ...sc DVD player Congratulations on your purchase and ZHOFRPH WR 3KLOLSV 7R IXOO EHQHÀW IURP the support that Philips offers e g product software upgrade register your product at www philips com welcome Basic play control 2 6 ...

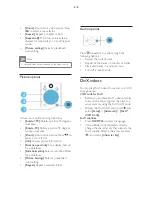
Страница 14: ...ay Alphanumeric buttons Select an item to play Enter values Enter letters via SMS style entry Video audio and picture options More options are available for video or picture play from a disc or USB storage device Video options Access more options during video play Audio language Select an audio language Subtitle Language Select a subtitle language Subtitle shift Change the subtitle position on the...

Страница 15: ...a transition effect for a slideshow Picture Settings 6HOHFW D SUHGHÀQHG color setting Repeat Repeat a selected folder 1 2 3 Audio options Press repeatedly to cycle through the following options Repeat the current track Repeat all the tracks on the disc or folder Play audio tracks in a random loop Turn off a repeat mode DivX videos You can play DivX videos from a disc or a USB storage device VOD co...

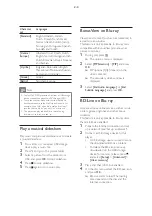
Страница 16: ...press OK to start slideshow 4 Press to stop slideshow 5 Press again to stop music play BonusView on Blu ray View special content such as commentaries in a small screen window This feature is only applicable to Blu ray discs compatible with BonusView also known as picture in picture 1 During play press The options menu is displayed 2 Select PIP Selection PIP and press OK PIP options 1 2 depend on t...

Страница 17: ...Internet to access the services BD Live access online bonus features applicable to Blu ray discs that are BD Live enabled Update software update the software of this player via the Internet Browse PC DLNA play photos music DQG YLGHR ÀOHV VWUHDPHG IURP RXU computer Note For wireless connection you need to use an optional Philips Wi Fi USB adapter named WUB1110 Te Wi Fi USB Adapter WUB1110 is not in...

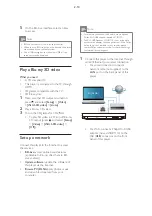
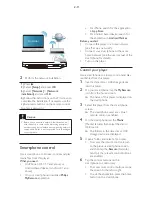
Страница 18: ...rt Connect this player to a home network VHH 6HW XS D QHWZRUN Connect your smartphone to the same home network see the user manual of the smartphone for details Turn on this player Control your player Use a smartphone to browse control and play PHGLD ÀOHV IURP WKLV SOD HU 1 Insert a data disc or USB storage device into this player 2 On your smartphone tap the MyRemote icon from the home screen The...

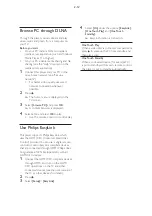
Страница 19: ...lips EasyLink This player supports Philips EasyLink which uses the HDMI CEC Consumer Electronics Control protocol You can use a single remote control to control EasyLink compliant devices that are connected through HDMI Philips does not guarantee 100 interoperability with all HDMI CEC devices 1 Connect the HDMI CEC compliant devices through HDMI and turn on the HDMI CEC operations on theTV and oth...

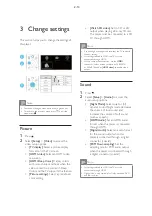
Страница 20: ...ure that theTV supports the new setting For settings related to HDMI theTV must be connected through HDMI For the composite connection via the VIDEO connector select a video resolution of 480i 576i or 480p 576p under HDMI video to enable video output Sound 1 Press 2 Select Setup Audio to access the audio setup options Night Mode Select quiet or full dynamic sound Night mode decreases the volume of...

Страница 21: ...he subtitle SRVLWLRQ LV FKDQJHG DXWRPDWLFDOO WR ÀW theTV screen this feature works with some PhilipsTVs only Change Password Set or change a password to play a restricted disc QSXW LI RX GR QRW KDYH D password or if you have forgotten your password Auto Standby Enable or disable auto standby If enabled the player switches to standby after 30 minutes of inactivity for example in pause or stop mode ...

Страница 22: ... of this player Restore default settings Reset this player to the default settings made at the factory except for password and parental control level Note You cannot restrict Internet access on commercial Blu ray discs Before you purchase DivX videos and play them on this player register this player on www divx com with the DivXVOD code 2 15 ...

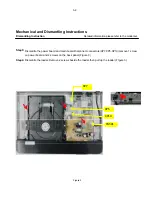
Страница 23: ...ack panel pull back the top cover and then open it 3 1 Detailed information please refer to the model set Figure 1 Figure 1 Step 2Remove the front panel Open the tray dismantle the CD door remove 1 screw on power board Figure 2 disconnect connectors XP3 USB401 dismantle 1 buckle under the panel and 2 buckles on both sides then pull out the front panel Figure 2 XP3 USB401 ...

Страница 24: ... refer to the model set Step3 Dismantle the power board and main board Disconnect connectors XP7 XP5 XP10 remove 1 screw on power board and 2 screws on the back panel Figure 3 Step4 Dismantle the loader Remove 2 screws beside the loader then pull up the loader FIgure 3 Figure 3 XP7 XP5 XP10 CN501 ...

Страница 25: ...tware via network 1 1 Setup the network connection 2 start up DUT enter into HOME screen select Setup Advance software update Network You are prompted to start upgrading processes if upgrade media is detected 3 Follow the instructions on the TV screen to confirm update operation 4 When upgrade file download completed select Start to upgrade 5 Once you start upgrade please don t power off the DUT a...

Страница 26: ...3 Factory Reset Steps Press Home button on remote control Press 0 3 5 8 Select Restore Press OK on remote control 4 2 ...

Страница 27: ...exist on PCBs and cables Fix XP1 or XP3 Fix the PCB or bad component Replace the LED light or the whole LED board Go Yes No Check whether every pin of XP1 on PSU board connects well to main board XP3 connects well to front board 1 Check whether any bad component or soldering exists on PSU board main board and front board 2 Check whether the circuit connected to the keys is broken Trouble shooting ...

Страница 28: ...soldering exists around DRV632 U13 on main board Try to fix the issue by replacing DRV632 U13 Replace main board Yes No Go Check if the RCA socket is OK No audio output Yes Trouble shooting chart 5 2 Yes NO Check if the voltage on R52 and CE204 is normal No Fix the open circuit or short circuit which may exist on PCBs ...

Страница 29: ...remote control works well Check whether every pin of XP1 on PSU board connects well to main board especially the 3th and 4th pin and XP3 connects well to front board Fix XP1 or XP3 Replace IR1 on front board Yes Trouble shooting chart 5 3 Check if any bad component or soldering exists around XP1 XP3 and IR1 on front board Fix the bad component or soldering Yes No ...

Страница 30: ... cable from main board connection to the loader is normal Replace U409 XP7 or main board NO GO Check whether load motor runs well Fix the connection 45pin cable or 8pin cable NO Yes Trouble shooting chart 5 4 Check if any bad component or soldering exists around U409 and XP7 including the bottom layer Fix the bad component or soldering Try to replace loader or update software to fix the issue Yes ...

Страница 31: ...Video display Replace the HDMI JACK Check if the HDMI JACK is broken Replace the main board Trouble shooting chart 5 5 Check weather the HDMI cable has connect to the screen No Connect the HDMI cable to the screen Yes No Yes ...

Страница 32: ...is OK Go No No Can not connect to network Yes Fix or replace LAN socket or U12 Check if the LAN socket and U12 is broken Solder or fix the abnormal components Check weather the twisted pair has connect to Internet No Connect the twisted pair to Internet Yes Replace the main board Trouble shooting chart 5 6 ...

Страница 33: ... connect to network Yes Fix the circuit or replace wifi model Check if wifi circuit is OK especially the 4th PIN in USB401 Check whether USB401 on main board connects well to wifi model No Fix it Yes Replace the main board Trouble shooting chart 5 7 ...

Страница 34: ...AVERSE 8PIN FFC TRAVERSE INTERFACE TRAY 4PIN CABLE TRAY IN OUT M0TOR CONTROL SPINDLE SLED M0TOR CONTROL TRAY INTERFACE MAIN BOARD 40 B5519U MA 4G RF SIGNAL and OTHER PSU TNY177 DuPont PINS MALE DuPont PINS FEMALE 12V IR USB 01UUSBJAK 402 1 5V 3 3V 3 3V 3 3V 1 5V 1 2V 3 3V_STBY 9 5V VCC_D 12V_D 3 3V ASM4953 DC DC AS5422 LDO 1117 01UDCTODC 302 12V 5V 5V 3 3V 1 5V 1 2V 3 3V_STBY 3 DC DC 1 LDO G5175 1...

Страница 35: ...N CLOSE R331 1K R331 1K R336 5 1K R336 5 1K C317 47pF 50V NP0 C317 47pF 50V NP0 Q7 NPN_3DG3904M Q7 NPN_3DG3904M LED2 LED_GREEN LED2 LED_GREEN C310 1uF 10V Y5V C310 1uF 10V Y5V C309 0 1uF 50V X7R C309 0 1uF 50V X7R R335 200 R335 200 R325 NC R325 NC C313 100pF 50V NP0 C313 100pF 50V NP0 R303 100 R303 100 R328 2 2K R328 2 2K Q8 NPN_3DG3904M Q8 NPN_3DG3904M XS2 4PIN 2 0mm XS2 4PIN 2 0mm 1 1 2 2 3 3 4 ...

Страница 36: ...D2 LED_GREEN R305 100 R305 100 R335 200 R335 200 C312 100pF 50V NP0 C312 100pF 50V NP0 P1 4PIN 2mm P1 4PIN 2mm VCC 1 D 2 D 3 GND 4 Shell B 6 Shell A 5 R303 100 R303 100 R336 5 1K R336 5 1K Q8 NPN_3DG3904M Q8 NPN_3DG3904M CE36 220uF 6 3V CE36 220uF 6 3V XS1 6PIN 2 0mm XS1 6PIN 2 0mm 1 1 2 2 3 3 4 4 5 5 6 6 R337 NC 10K R337 NC 10K R325 NC R325 NC KEY1 OPEN CLOSE KEY1 OPEN CLOSE C310 1uF 10V Y5V C310...

Страница 37: ...GND IR VCC1 IR1 IRM_7 7MM IR1 IRM_7 7MM IR 1 GND 2 VCC 3 VCC VCC GND GND IR IR 7 3 7 3 Front Board Circuit Diagram for BDP2100X 78 ...

Страница 38: ... BZX79C9V1 U501 TNY177PN U501 TNY177PN S 8 EN UV 1 S 5 S 6 Drain 4 S 7 NC 3 BP M 2 10uF 50V CE506 10uF 50V CE506 C502 NC C502 NC F501 10ohm 2W F501 10ohm 2W R502 150K R502 150K R505 22 R505 22 R509 22K R509 22K R515 NC R515 NC R510 NC R510 NC R506 200 R506 200 R503 150K R503 150K R512 NC R512 NC D505 FR107 1A 1000V D505 FR107 1A 1000V CN501 2PIN 7 92mm CN501 2PIN 7 92mm 1 1 2 2 C504 1000pF 1KV C50...

Страница 39: ... 0MM XP6 18PIN 2 0MM 1 1 2 2 3 3 4 4 5 5 6 6 7 7 8 8 9 9 10 10 11 11 12 12 13 13 14 14 15 15 16 16 17 17 18 18 XP4 16PIN 2 0MM XP4 16PIN 2 0MM 1 1 2 2 3 3 4 4 5 5 6 6 7 7 8 8 9 9 10 10 11 11 12 12 13 13 14 14 15 15 16 16 R518 0 R518 0 VCC_D VCC_D VSTB VSTB R519 0 R519 0 12V 12V 12V_D 12V_D USB401 4PIN 2 0mm USB401 4PIN 2 0mm 1 1 2 2 3 3 4 4 R521 0 R521 0 USBP USBP R517 0 R517 0 MIC2 MIC2 XP3 9PIN ...

Страница 40: ...7 6 7 6 Front Board Print layout bottom side for BDP2180 12 05 ...

Страница 41: ...7 7 7 7 Front Board Print layout bottom side for BDP2180X 78 ...

Страница 42: ...7 8 7 8 Front Board Print layout bottom side for BDP2180X 78 ...

Страница 43: ...7 9 7 9 Power Board Print layout bottom side for BDP2180 12 05 X78 ...

Страница 44: ...i Board only for BDP2105 F7 and BDP2185 F7 Pin No Pin Assin Remarks 1 GND 2 USBP0 HIGH SPEED SIGNAL 3 USBM0 HIGH SPEED SIGNAL 4 WIFI_VCC 3 3V Pin No Pin Assin Remarks 1 12V 12V 2 GND 3 IR_IN 4 VCC 5V 5 GND 6 USBP1 HIGH SPEED SIGNAL 7 USBM1 8 USB_VCC1 5V 9 VSTB1 10 VCLK1 11 VDATA1 12 GND 13 MICIN 14 12V_D 12V 8 1 ...

Страница 45: ...BLOCK DIAGRAM FOR MANI IC MT8551 MT8551 HD SD Decode 810MHz ARM11 400MHz AudioDSPx3 HDMI 1 4 Ethernet OPU DDR3 256 384MB NAND 1GB USB 2 CH 7 1 CH HDMI Component CVBS Ethernet Audio DAC S PDIF DVO Motor Driver 9 1 ...

Страница 46: ...PIN ASSIGNMENT 9 2 ...

Страница 47: ...PIN DESCRIPTION Pin Symbol Type Description Digital power ground K9 K11 K12 K15 K17 K18 L9 L17 L18 N17 N18 P9 P18 R17 T9 T11 T12 T14 T16 T17 U9 U11 U12 U14 U15 U16 DVCC12_K Power 1 2 V digital power 9 3 ...

Страница 48: ...n H14 H21 J22 K21 L5 L6 L7 L10 L11 L12 L13 L14 L15 L16 L21 M10 M12 M14 M16 N4 N10 N11 N13 N15 N16 N22 N23 P10 P12 P14 P16 R4 R10 R11 R12 R13 R14 R15 T21 U6 U22 V5 Y13 Y15 Y17 Y19 AA19 AB13 AC18 DGND12_K Ground Digital ground 9 4 ...

Страница 49: ...LL AA21 AVDD33_MEM PLL Power 3 3 V Analog Power for MEMPLL AB19 AVSS33_MEM PLL Ground Analog Ground for MEMPLL AA22 TN_MEMPLL Analog Test Pin AB23 TP_MEMPLL Analog Test Pin H16 AVDD12_LDO Power 1 2V standby power F17 AVDD33_LDO Power 3 3V power for standby G16 AVSS33_LDO Ground Analog ground for standby C12 AVDD33_PLLG P Power 3 3V Analog Power for PLL Group C13 AVSS33_PLLG P Power Analog Ground f...

Страница 50: ...ce U5 AMUTE I O Multiple function 1 1st Audio DAC mute 2 GPIO C10 AOLRCK I O Multiple function 1 Audio output left right clock 2 2nd Audio DAC mute 3 Video out DE signal 4 2nd RS232 TX 5 External Interrupt 4 6 Slave I2C clock 7 PWM control signal output 8 Ethernet Activity LED 9 GPIO D10 AOSDATA0 I O Multiple function 1 Audio output serial data 0 2 2nd Audio DAC mute 3 Video out DE signal 4 2nd RS...

Страница 51: ...terrupt 4 6 3th RS232 RX 7 Slave I2C data 8 PWM control signal output 9 Ethernet Duplex LED 10 1st Audio DAC mute 11 GPIO D7 AOSDATA3 I O 5V Multiple function 1 Audio output serial data 3 2 Audio output left right clock 3 Microphone input left right clock 4 Video out DE signal 5 External Interrupt 2 6 2nd RS232 TX 7 Slave I2C clock 8 PWM control signal output 9 Ethernet Speed LED 10 GPIO C7 AOSDAT...

Страница 52: ...rface F22 VOUTCLK I O 5V Multiple function 1 Video out mode CLOCK 2 2nd RS232 TX 3 Slave I2C clock 4 PWM control signal output 5 Ethernet Activity LED 6 NAND Flash Data input output bit 5 7 Secure Disk interface clock 8 GPIO H22 VOUTHSYNC I O Multiple function 1 Video out mode HSYNC 2 2nd RS232 RX 3 Slave I2C data 4 External Interrupt 1 5 Ethernet Duplex LED 6 NAND Flash Data input output bit 7 7 ...

Страница 53: ...Multiple function 1 Video out 16 bit 422 mode C2 2 Slave I2C data 3 NAND Flash Data input output bit 2 4 Secure Disk interface data bit 3 5 GPIO G23 VOUTD3 I O Multiple function 1 Video out 16 bit 422 mode C3 2 JTAG ICE data out 3 GPIO E25 VOUTD4 I O Multiple function 1 Video out 16 bit 422 mode C4 2 JTAG ICE clock 3 GPIO F24 VOUTD5 I O Multiple function 1 Video out 16 bit 422 mode C5 2 JTAG ICE m...

Страница 54: ... output bit 0 8 GPIO B25 VOUTD10 I O 5V Multiple function 1 Video out 16 bit 422 mode Y2 2 Microphone input left right clcok 3 3th RS232 TX 4 Slave I2C clock 5 External Interrupt 2 6 Ethernet Speed LED 7 NAND Flash ready busy 8 GPIO C24 VOUTD11 I O 5V Multiple function 1 Video out 16 bit 422 mode Y3 2 Microphone input data 3 3th RS232 RX 4 Slave I2C data 5 External Interrupt 4 6 Ethernet Link LED ...

Страница 55: ...ideo out 16 bit 422 mode Y7 2 SPDIF input data 3 3th RS232 RX 4 Slave I2C data 5 External Interrupt 4 6 Ethernet Link LED 7 NAND Flash write enable 8 GPIO HDMI TX C16 AVDD12_HDMI _C Power 1 2V Analog Power C15 AVDD12_HDMI _D Power 1 2V Analog Power D14 AVDD33_HDMI Power 3 3V Analog Power E14 AVSS33_HDMI Ground Analog Ground A15 CH0_M Analog HDMI TX data 0 differential pair M B15 CH0_P Analog HDMI ...

Страница 56: ...PO AD5ʳ NFCLE I O Multiple function 1 NAND Flash command latch enable 2 GPO AC3ʳ NFD0 I O Multiple function 1 NAND Flash Data input output bit0 2 GPIO AE2ʳ NFD1 I O Multiple function 1 NAND Flash Data input output bit1 2 GPIO AD2ʳ NFD2 I O Multiple function 1 NAND Flash Data input output bit2 2 GPIO AE1ʳ NFD3 I O Multiple function 1 NAND Flash Data input output bit3 2 GPIO AC2ʳ NFD4 I O Multiple f...

Страница 57: ...2 GPO AD6ʳ NFWEN I O Multiple function 1 NAND Flash write enable 2 GPO Dram Channel A AA25ʳ RA0 O Memory address bit 0 U21ʳ RA1 O Memory address bit 1 AB25ʳ RA2 O Memory address bit 2 AA23ʳ RA3 O Memory address bit 3 W21ʳ RA4 O Memory address bit 4 AA24ʳ RA5 O Memory address bit 5 W22ʳ RA6 O Memory address bit 6 AB24ʳ RA7 O Memory address bit 7 W20ʳ RA8 O Memory address bit 8 AC24ʳ RA9 O Memory ad...

Страница 58: ...ory data bit 5 K23ʳ RDQ6 I O Memory data bit 6 J24ʳ RDQ7 I O Memory data bit 7 T23ʳ RDQ8 I O Memory data bit 8 T22ʳ RDQ9 I O Memory data bit 9 R24ʳ RDQ10 I O Memory data bit 10 T24ʳ RDQ11 I O Memory data bit 11 M24ʳ RDQ12 I O Memory data bit 12 L23ʳ RDQ13 I O Memory data bit 13 L22ʳ RDQ14 I O Memory data bit 14 M23ʳ RDQ15 I O Memory data bit 15 R23ʳ RDQM0 O Memory data mask bit 0 R22ʳ RDQM1 O Memo...

Страница 59: ...bit 7 W10ʳ RA8_B O Memory address bit 8 AD7ʳ RA9_B O Memory address bit 9 AB6ʳ RA10_B O Memory address bit 10 W12ʳ RA11_B O Memory address bit 11 Y8ʳ RA12_B O Memory address bit 12 AB11ʳ RA13_B O Memory address bit 13 AB8ʳ RBA0_B O Memory bank address bit 0 W8ʳ RBA1_B O Memory bank address bit 1 AC11ʳ RBA2_B O Memory bank address bit 2 Y12ʳ RCAS_B O Memory column address strobe AA6ʳ RCKE_B O Memor...

Страница 60: ...AE19ʳ RDQ14_B I O Memory data bit 14 AD18ʳ RDQ15_B I O Memory data bit 15 AB16ʳ RDQM0_B O Memory data mask bit 0 AA15ʳ RDQM1_B O Memory data mask bit 1 AD16ʳ RDQS0_B I O Memory positive data strobe bit 0 AE16ʳ RDQS0__B I O Memory negative data strobe bit 0 AD17ʳ RDQS1_B I O Memory positive data strobe bit 1 AC17ʳ RDQS1__B I O Memory negative data strobe bit 1 AD10ʳ RODT_B O Memory on die terminati...

Страница 61: ...ontrol signal output 6 Ethernet Speed LED 7 GPIO AA5ʳ GPIO3 I O 5V Multiple function 1 Audio line input data 2 2nd RS232 RX 3 External Interrupt 2 4 Slvae I2C data 5 PWM control signal output 6 Ethernet Link LED 7 GPIO AA4ʳ GPIO4 I O 5V Multiple function 1 Microphone input data 2 2nd RS232 TX 3 External Interrupt 4 4 Slvae I2C clock 5 PWM control signal output 6 Ethernet Activity LED 7 GPIO AB1ʳ G...

Страница 62: ...t Link LED 7 GPIO B20ʳ HDMISCK I O 5V Multiple function 1 HDMI I2C Clock 2 GPIO 3 JTAG ICE clock B19ʳ HDMISD I O 5V Multiple function 1 HDMI I2C Data 2 GPIO 3 JTAG ICE mode select C20ʳ HTPLG I O 5V Multiple function 1 HDMI Hot Plug 2 GPIO 3 JTAG ICE data out B22ʳ IR I O 5V Multiple function 1 Infrared input 2 GPIO D22ʳ LCDRD I O 5V Multiple function 1 LCD read strobe 2 GPIO E6ʳ RSTI I Front End Po...

Страница 63: ...e function 1 Serial interface data line 2 Slave I2C data 3 GPIO USB AA3 AVDD33_USB Power 3 3V Analog power for USB W4 AVSS33_USB Ground Analog ground for USB W2 USB_DM_P0 Analog USB port0 differential serial data bus minus W1 USB_DP_P0 Analog USB port0 differential serial data bus plus Y2 USB_DM_P1 Analog USB port1 differential serial data bus minus Y1 USB_DP_P1 Analog USB port1 differential seria...

Страница 64: ...og Ground Analog Ground K7 AGND33_2 Analog Ground Analog Ground F7 AGND33_3 Analog Ground Analog Ground H5ʳ AGND12_1 Analog Ground Analog Ground H7 AGND12_2 Analog Ground Analog Ground F5ʳ AUX1 Analog I O Auxiliary Input Alternative Function Signal Monitoring K5ʳ AVDD12_1 Analog Power 1 2V Power Pin J4ʳ AVDD12_2 Analog Power 1 2V Power Pin E3ʳ AVDD33_1 Analog Power 3 3V Power Pin J6ʳ AVDD33_3 Anal...

Страница 65: ...nput The pin is spike free at power on stage N1ʳ FEFMO Analog Output Feed motor 1 control DAC output N2ʳ FEFMO2 Analog Output Feed motor 2 control DAC output N3ʳ FEFMO3 Analog I O Feed motor 3 control DAC output Alternative Function Auxiliary servo input M3ʳ FEFMO4 Analog I O Feed motor 4 control DAC output Alternative Function Auxiliary servo input H4ʳ FOO Analog Output Focus servo output PDM out...

Страница 66: ... output port CLOCK 2 Internal monitored signal output 3 LED Control Output Initial 0 Output 4 General IO U1ʳ FEGIO11 3 3V LVTTL I O 5V tolerance 2 4 6 8 mA PDR 75K pull up 3 3V PC RS232 serial transmit data The pin is spike free at power on stage Alternate function 1 High speed serial output port Data 2 Internal monitored signal output 3 General IO U2ʳ FEGIO3 3 3V LVTTL I O 5V tolerance 2 4 6 8 mA...

Страница 67: ...og Input Input of Main Beam Signal A B1ʳ INB Analog Input Input of Main Beam Signal B C2ʳ INC Analog Input Input of Main Beam Signal C C1ʳ IND Analog Input Input of Main Beam Signal D E2ʳ INE Analog Input Input of Sub Beam Signal E E1ʳ INF Analog Input Input of Sub Beam Signal F D1ʳ ING Analog Input Input of Sub Beam Signal G D2ʳ INH Analog Input Input of Sub Beam Signal H F4ʳ MPXOUT1 Analog Outpu...

Страница 68: ...dback Flag is from Tray Connector The pin is spike free at power on stage Alternate function General IO U4ʳ FETRAYOUT_ 3 3V LVTTL I O 5V tolerance 6 mA 75K pull up 3 3V Tray_is_out Input A Logical Low Indicates the Tray is OUT Feedback Flag is from Tray Connector The pin is spike free at power on stage Alternate function General IO P2ʳ FETRAYPWM Analog Output Tray DAC PWM control output Controlled...

Страница 69: ...Pin Symbol Type Description A4 VWDC3O Analog Output Output Voltage 3 of Laser Diode Control in APC 9 25 ...

Страница 70: ...10 1 10 1 Exploded View for BDP2180 12 05 ...

Страница 71: ...1 1 1 Revision List Version 1 0 γ Initial Release for BDP2180 12 05 Version 1 1 γ Initial Release for BDP2180X 78 ...

Отзывы: