BDL4270EL
31
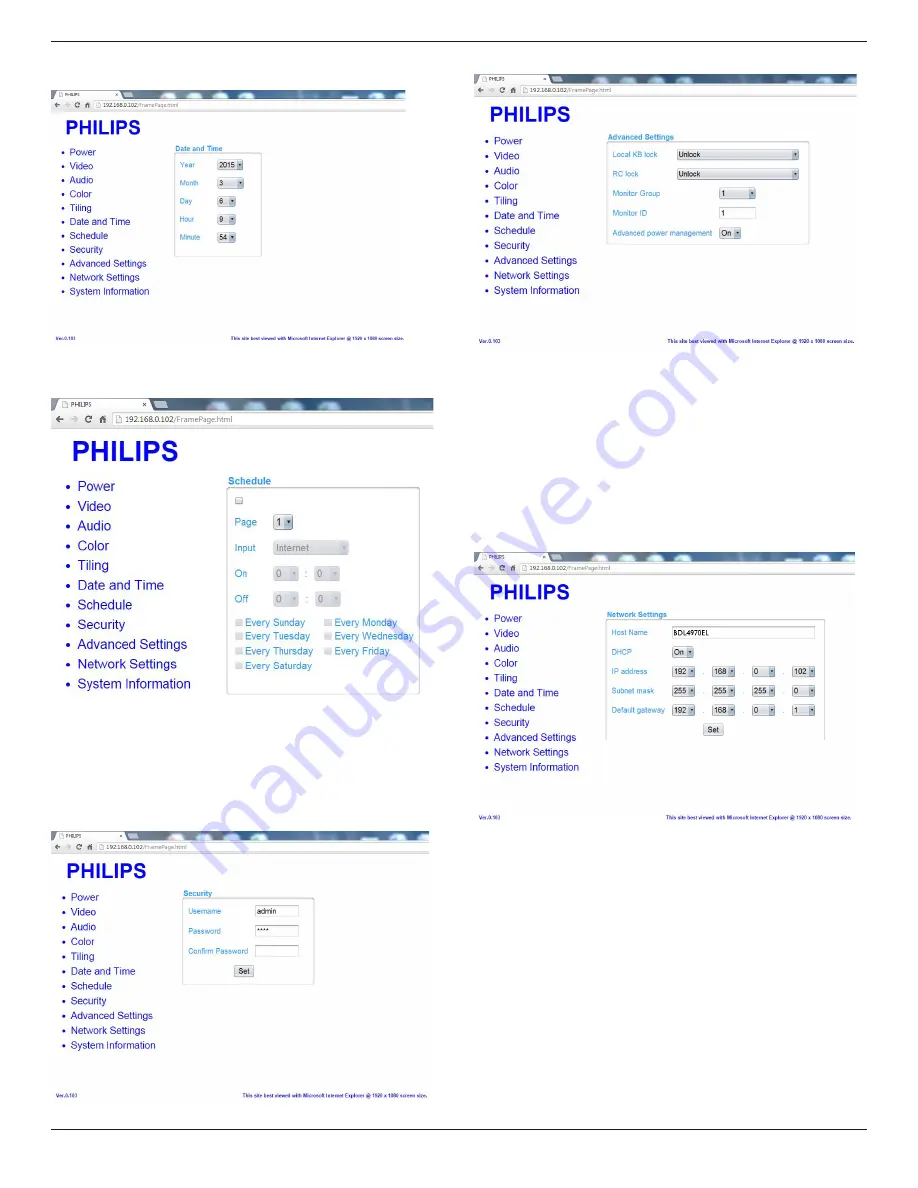
provides you an easy way to set date and time for the display’s
internal clock.
H. Click on Schedule to switch to Schedule Page. The function allows
you to program up to 7 different scheduled time intervals for this
display to activate.
Note: See scheduling on Page 21 for the detail descriptions about
Scheduling setting.
I. Click Security to switch to Security Page. It provides you an easy way
to change your username and password.
Enter your new Username and Password into the Username and
Password fields and then click on the Set button to set your new
username and password.
J. Click on Advanced Setting to switch to Advanced Settings Page.
Local KB lock: Choose to enable or disable the keyboard (control buttons)
function of the display
RC lock: Choose to enable or disable the button function of the remote
control.
Monitor Group: Adjust the group range between 1 to 255. The default
setting is 1
Monitor ID: Adjust the ID number for controlling the display via the RS232
connection. Each display must have a ID number when multiple sets of
this display are connected. Monitor ID number range is between 1 to 255.
The Default setting is 1.
K. Click on Network Setting to switch to Network Setting Page.
Host Name: In the multiple-display connection, you can rename each
display for easy identification.
DHCP: Choose how this display should assign address to the network
resource. (On: DHCP & Auto IP, Off: Static IP). If DHCP is set to On,
device will request and be assigned an address every time it’s booted up.
Otherwise, you need to ask your network administrator for the appropriate
IP settings.
L. Click on System information to switch to System information Page.
Getting the display information. Such as Serial number, running time and
Temperature via the RS232/Network.


