background image

This apparatus is fitted with an approved 13 Amp plug. To change a fuse in this type of plug proceed as follows:

• Remove fuse cover and fuse.
• Fix new fuse which should be a BS1362 5A, A.S.T.A. or BSI approved type.
• Refit the fuse cover.

If the fitted plug is not suitable for your socket outlets, it should be cut off and an appropriate plug fitted in its place.
If the mains plug contains a fuse, this should have a value of 5A. If a plug without a fuse is used, the fuse at the dis-
tribution board should not be greater than 5A.

Note: 

The severed plug must be disposed to avoid a possible shock hazard should it be inserted into a 13A socket

elsewhere.

How to connect a plug

The wires in the mains lead are coloured in accor-dance with the following code: 
BLUE – "NEUTRAL" ("N") and BROWN – "LIVE" ("L").
As these colours may not correspond with the colour markings identifying the terminals in your plug, proceed as follows:
• The BLUE wire must be connected to the terminal which is marked with the letter "N" or coloured BLACK.
• The BROWN wire must be connected to the terminal which is marked with the letter "L" or coloured RED.
• Do not connect either wires to the earth terminal in the plug which is marked by the letter "E" or by the safety

earth symbol or coloured green or green-and-yellow.

Before replacing the plug cover, make certain that the cordgrip is clamped over the sheath of the lead – not simply
over the two wires.

Copyright in the U.K.
Recording and playback of material may require consent. See Copyright Act 1956 and The Performer’s Protection
Acts 1958 to 1972.

Environmental information

We have done our best to reduce the packaging and make it easy to separate into 3 materi-
als:cardboard, expandable polystyrene, polyethylene.
Your set consists of materials which can be recycled if disassembled by a specialized company.
Please observe the local regulations regarding the disposal of packaging, exhausted batteries
and old equipment.

This set complies with the radio interference requirements 

of the European Union.

Fitting a mains plug (U.K. only)

Содержание AZ1316/05

Страница 1: ...16 MP3 CD Soundmachine Printed in China AL JW 0502 W CLASS 1 LASER PRODUCT AZ 1316 Meet Philips at the Internet http www audio philips com User Manual Manuel d utilisation Manual del usario Benutzerhandbuch ...

Страница 2: ...must be connected to the terminal which is marked with the letter N or coloured BLACK The BROWN wire must be connected to the terminal which is marked with the letter L or coloured RED Do not connect either wires to the earth terminal in the plug which is marked by the letter E or by the safety earth symbol or coloured green or green and yellow Before replacing the plug cover make certain that the...

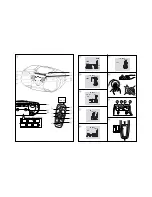
Страница 3: ... 6 0 See A VOLUME SEARCH ALBUM PRESET TUNING REPEAT SHUFFLE SEARCH 1 9 8 6 7 2 4 3 5 1 PRESET MHz FM TUNER 2 CD TRK ALB MP3 3 CD REP PROG ALL TRK MP3 CD SHUF TRK CD PROG TRK ALB MP3 6 CD PROG TRK ALB MP3 7 8 A A B C 9 X A 4 5 ...

Страница 4: ...automatically starts programming radio sta tions from preset 1 Any previous presets e g manual ly programmed will be erased 1 Select MW or FM 2 Press PROG until flashes Available stations are programmed MW or FM After all stations are stored the first autostore preset station will then automatically play To listen to a preset or autostore station Press the ALBUM PRESET on the remote con trol 3 4 b...

Страница 5: ...at edly 1 To select play mode press MODE SHUFFLE or REPEAT on the remote control once or more 2 Press 2 to start playback if in the stop position 3 To select normal playback press MODE repeatedly until the various modes are no longer displayed You can also press 9 to cancel your play mode Helpful hints In shuffle mode press on the remote control to go to the beginning of current track Programming ...

Страница 6: ...k maintenance To ensure quality recording and playback of the tape deck clean parts A B and C as shown once a month Use a cotton bud slightly moistened with alco hol or a special head cleaning fluid to clean the deck 1 Open the cassette door 2 Press PLAY 1 and clean the roller C 3 Press PAUSE and clean the heads A and the capstan B 4 After cleaning press STOP OPEN 9 Remote control does not functio...

Отзывы: