

1
Press
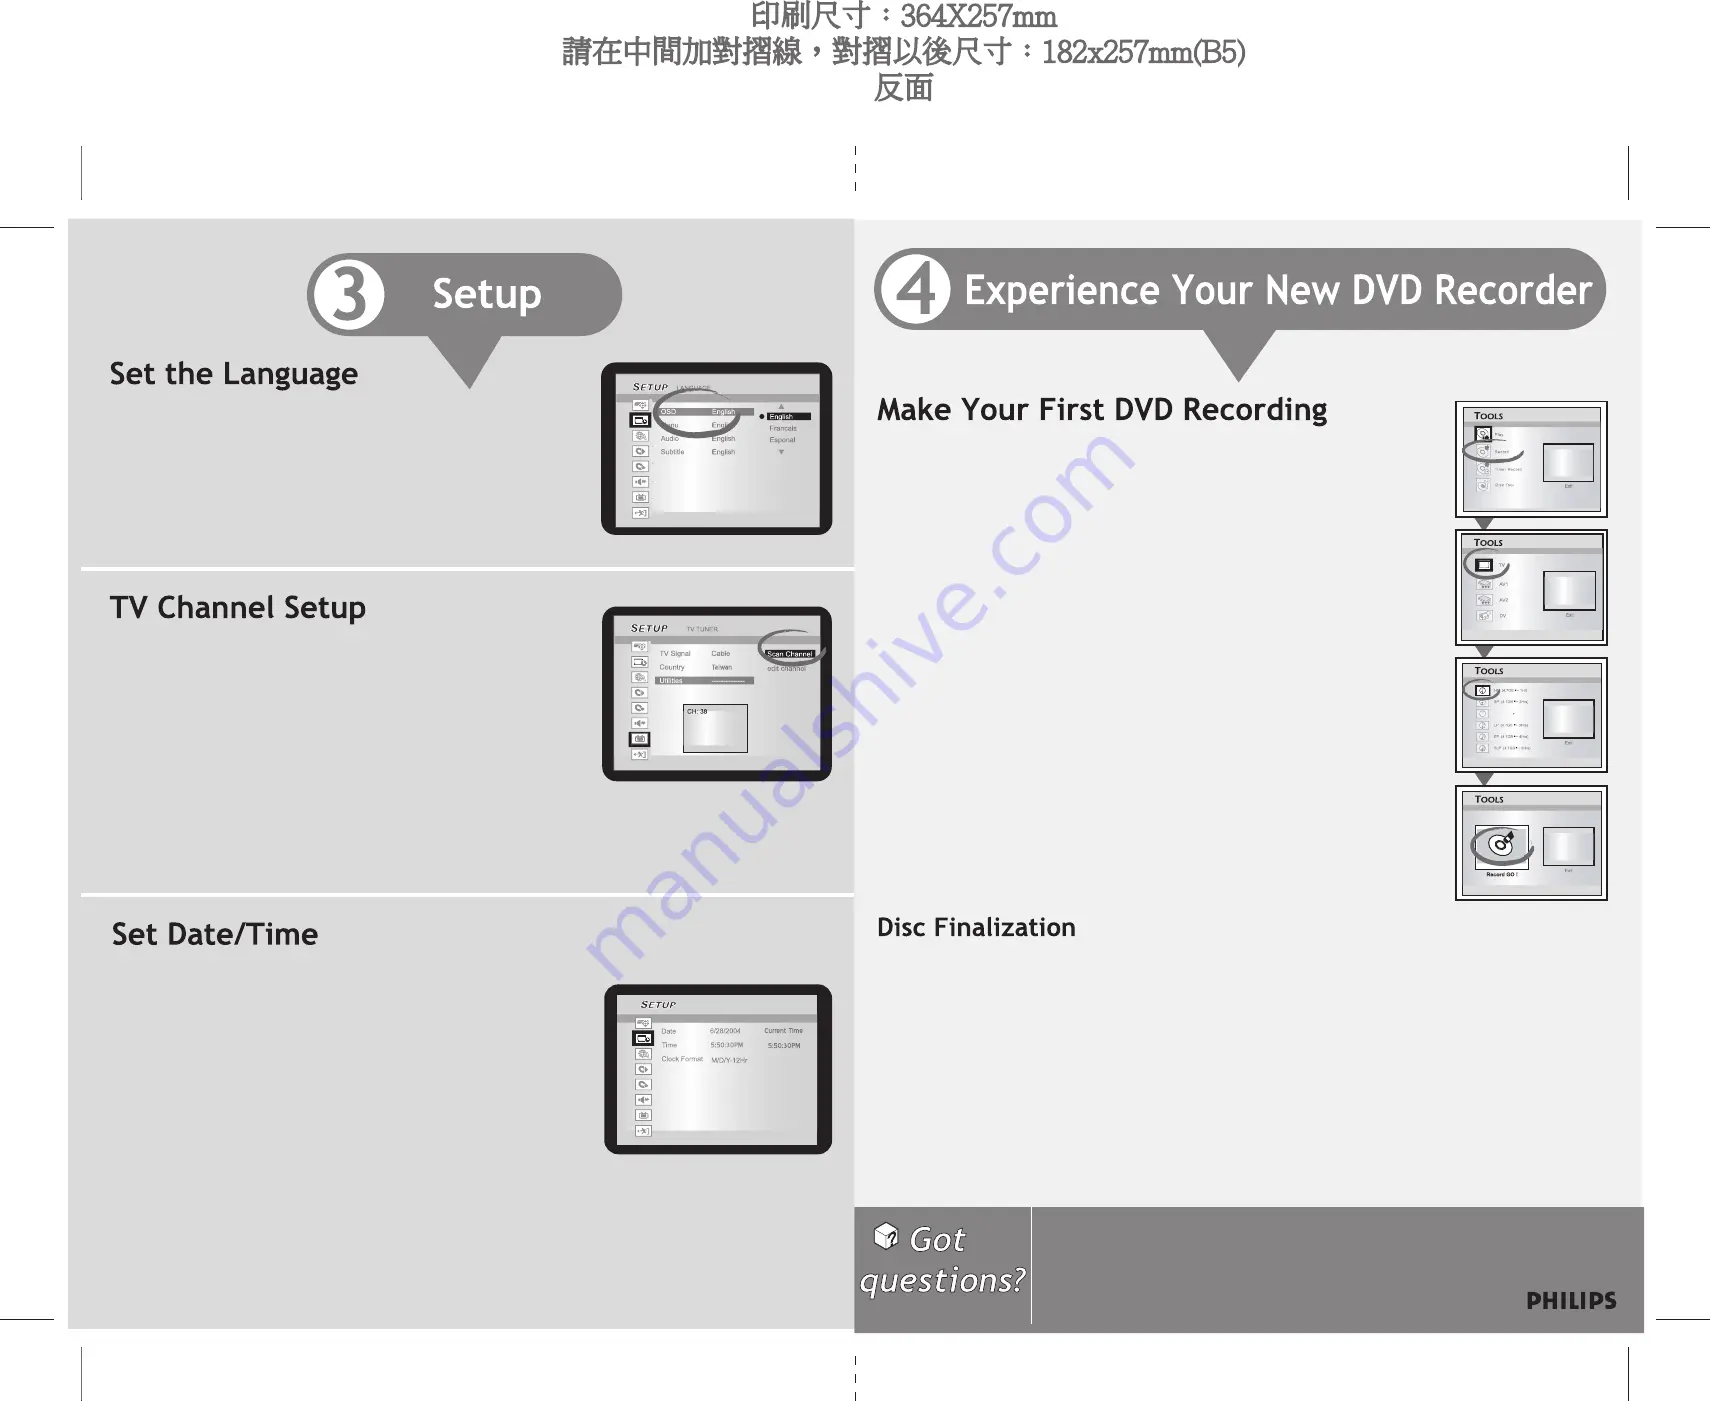
SETUP
key on the remote to enter the Setup menu screen.
2
Use the
/
key on the remote to highlight “Language” and press
OK
key on the remote to select.
3
Use the
/
key on the remote to highlight “OSD (On-Screen Display)”
and press
OK
key to select.
.
4
Use the
/
key on the remote to highlight your desired language and
press
OK
key on the remote to select.
5
Press
SETUP
key to exit.
1
Press
SETUP
key on the remote to enter the Setup menu screen.
2
Use the
/
to highlight “TV Tuner” and press
OK
to select.
3
Use the
/
to highlight an item from the list of options and press
OK
to select.
When selecting TV signal, choose:
• “Antenna”, if you are using a standard antenna to receive TV signal.
• “Cable”, if you are using basic cable to receive TV signal.
(For detailed TV signal options, please refer to the “Getting Started” section (p.12)
in the User’s Manual.)
4
Use the
/
to highlight “Utilities” and press
OK
to select. Press
OK
again to start “Scan Channel”.
It will take a few minutes for this DVD recorder to scan for channels provided in your area. You may see the picture change
in the on-screen small window while the system is scanning for channels. Once scanning is completed, the window will be
tuned to the first channel available.
5
Press
SETUP
to exit.
1
Press
OPEN/CLOSE
key to open the disc tray. Place the enclosed blank DVD disc on
the disc tray. Press
OPEN/CLOSE
key to close the disc tray.
It may take a few minutes for the DVD recorder to prepare the disc for recording.
2
Press
TOOLS
key to display the “TOOLS” menu.
3
Select “Record” and press
OK
key to confirm.
4
Select a source and press
OK
key to confirm.
If “TV” is selected, select the channel number and press OK key to confirm.
5
The DVD recorder will automatically detect the disc you have inserted, and suggest
a suitable format for recording. If the suggested format is not what you wish to use,
press
/
key to select “Change Disc” and then press
OK
to confirm.
6
Select a desired recording mode and press
OK
key to confirm.
•
HQ
- High Quality
(1 hr/disc)
•
SP -
Standard Play (2 hrs/disc)
•
SPP -
Standard Play Plus(2.5 hrs/disc)
•
LP -
Long Play (3 hrs/disc)
•
EP -
Extended Play (4 hrs/disc)
•
SLP -
Super Long Play (6 hrs/disc)
7
Press
OK
key to start recording.
•
To pause recording, press
PAUSE/STEP
key.
•
To resume recording, press
PAUSE/STEP
key or
REC
key.
•
To view the status of your recording, press
DISPLAY
key.
8
To stop recording, press
STOP
key.
It may take a few seconds for the DVD recorder to stop the recording.
9
To view what you've recorded, press
PLAY
key, select the thumbnail for the desired
show and press
OK
key to confirm.
Before you take the disc recorded on this DVD recorder to other players, you
must finalize it (except for DVD+RW discs)
1
Press
TOOLS
to display the “Easy Guider” menu.
2
Select
“Disc Tools”, then “Finalize” and press
OK
key to confirm.
3
Press
ENTER
key to start finalizing.
• Once you finalize a disc, you cannot add any more recording on the disc.
• Disc finalization may take a few minutes to complete.
• The disc will now play on most DVD playback device.
For more details on supported disc types and file formats, please refer to the
“Overview” section (p.4) in the User's Manual.
1. Refer to “
Troubleshooting
”
section
(p.38)
in the User’s Manual
2. Check out www.philips.com/support
3. Contact Optimal Customer Care at 0800-231-099
The “Easy Guider” menu makes features
like recording, timer recording and finalizing
a snap.
1
Press
SETUP
key on the remote to enter the Setup menu screen
2
Use the
/
keys to select “Date/Time” and press
OK
key.
3
Use the
/
keys to select “Date” and press
OK
key.
4
Use the
/
and the
/
keys to set the month, day, year and press
OK
key to confirm.
5
Use the
/
keys to select “Time” and press
OK
key.
6
Use the
/
and the
/
keys to set the hour, minute, second and
AM/PM and press
OK
key to confirm.
7
Press
SETUP
key to exit.
DATE/TIME
SPP (4.7GB ~2.5Hrs)
2.5


