background image

7

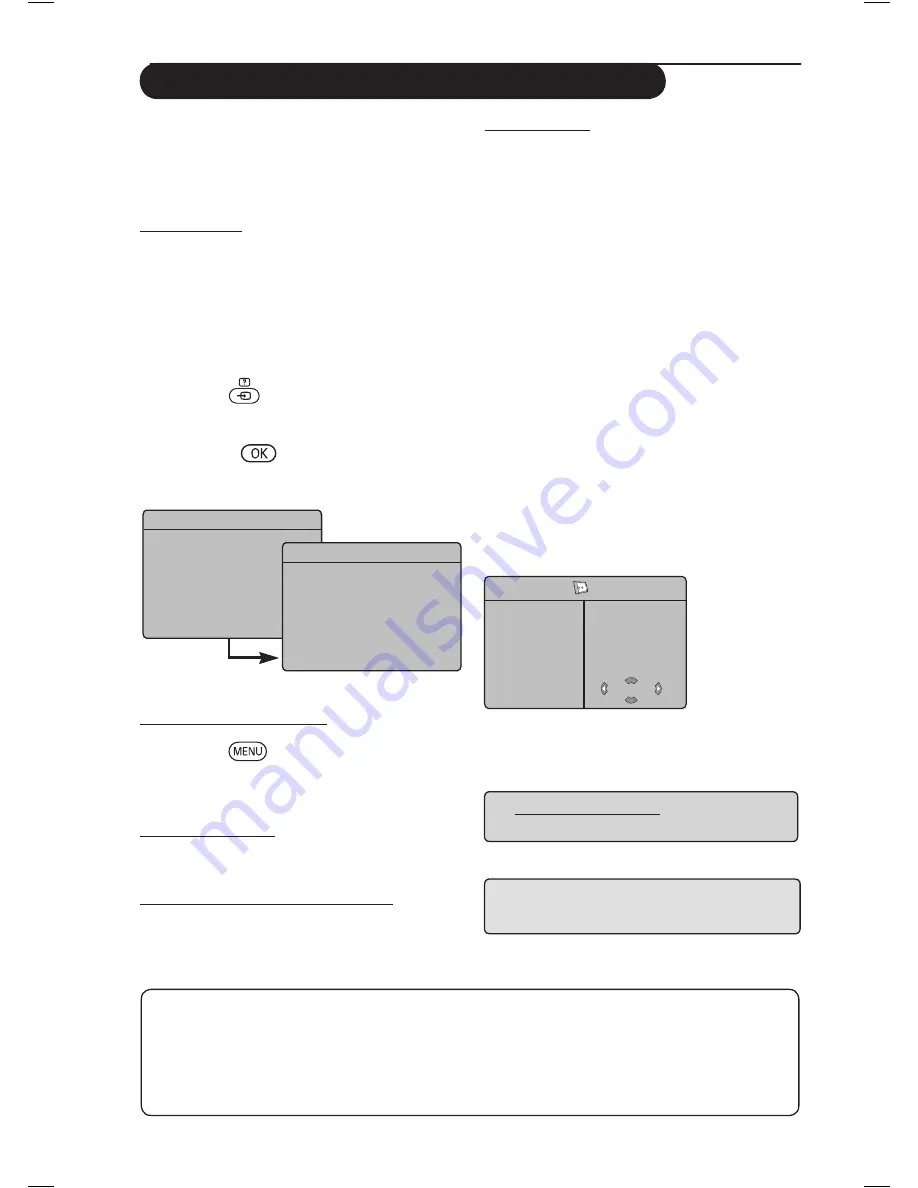
Using the TV in HD (High Definition) Mode

HD Mode

The HD (High Definition) mode allows you to 

enjoy clearer and sharper pictures if you are 

using a HD equipment that can transmit high 

definition programming.

IMPORTANT
For the TV to function in HD mode, the 
following steps must be taken :

&


HDMI 1

 or 

HDMI 2

 input 

MUST 

be 

    connected to the HDMI/DVI output of the HD  

    equipment . Use a HDMI to DVI  adaptor if DVI  

    is connected. 

For more information, refer  

    to Connection Guide

.

é


Press the  

 (

AV

key to 

display 

Source List  


and


use the 

Πï 

key 

to select 

HDMI 1

 or  


HDMI 2

“ 

Use 

the 

Æ 

/  


key to 

switch to the selected  

    source.

Using the HD menus

Press the  

 key to display the HD menu.

é 

Use the 

Πï 

key to access the settings 

and the 

Í


Æ

 key to select or adjust setting.

HD Install menu

Note : 

You cannot access 

Install

 in the HD 

menu There is 

NO


Install

 function in HD mode.  

HD Picture and Sound settings

Functions of HD Picture and Sound settings are

the same as the TV Picture and Sound settings 

and work in exactly the same way as the TV 

Picture and Sound settings (see page 

10

).

HD Features 

Timer

 : Functions of the Sleeptimer and Timer are 

the same as the TV Sleeptimer and Timer functions 

and work in exactly the same way as the TV 

Sleeptimer and Timer functions (see page 1

1

). 

PIP

 : Display a PIP screen to watch TV 

programmes at the same time. The PIP menu

items : 

PIP Size, Horizontal 

and 

Vertical

 work 

in exactly the same way as when calling a PIP 

screen in TV mode. 

For description of PIP menu items and how it 

works, refer to the section on “Using the  PIP 

(Picture-in Picture) Feature” page 12.

* Horizontal Shift 

 : Adjust the horizontal 

position of the image. 

* Mode Selection

 : When you connect PC or 

HD equipment supporting resolutions of 

480p, 

576p

 or 

720p

, the 

Mode Selection

 in the 

Features

 menu will be highlighted. This will allow 

you to select between the PC and HD mode. 

If it does not support the 480p, 576p or 720p 

resolutions, you cannot access this function.

Æ

Æ

Æ

Æ

HD

Features

Timer


C


NR


PIP

Horizontal Shift

Mode Selection

NOTE : For more details on connection to the 
HD equipment, see CONNECTION GUIDE.

Supported HD format

480p           576p 

        720p         1080i

Your Philips TV is HDMI compliant. If you do not get a good picture, please change the video 
format on your device (DVD player, cable set-top box, etc.) to a standard format. For example, 
for DVD player, select 

480p, 

576p, 720p or 1080i. For PC, select 640 x 480, 800 x 600 or 

1024 x 768. If the problem persists, please refer to your PC user manual on possible software 
upgrades to your graphics card. 

Please note that this is not a defect of the TV set.

              Source

TV


Æ

EXT 1
EXT 2 / SVHS2
EXT 3 / SVHS3
EXT 4
HDMI 1
HDMI 2

              Source

TV   


EXT 1
EXT 2 / SVHS2
EXT 3 / SVHS3
EXT 4

HDMI 1


Æ

HDMI 2

Содержание 50PF7321

Страница 1: ......

Страница 2: ...0005 0 23 min Germany 0180 5 356 767 0 12 min Greece 0 0800 3122 1280 free Ireland 01 601 1777 local Italy 199 404 041 0 25 min Luxemburg 40 6661 5644 local Netherlands 0900 8407 0 20 min Norway 2270 8111 local Portugal 2 1359 1442 local Spain 902 888 784 0 15 min Sweden 08 5792 9100 local Switzerland 0844 800 544 local UK 0906 1010 016 0 15 min ...

Страница 3: ...n HD High Definition Mode 17 Troubleshooting Tips 18 Glossary 19 Specifications 20 Reference table of Countries for selection 20 Introduction Table of Contents Recycling The packaging of this product is intended to be recycled Apply to the local authorities for correct disposal Disposal of your old product Your product is designed and manufactured with highly quality material and components which ...

Страница 4: ... dripping with water Do not use acetone toulene or alcohol to clean the TV As a safety precaution unplug the power cord from the mains As a safety precaution do not touch any part of the TV power lead or aerial lead during lightning storms Installation of the TV set on the wall should be carried out by qualified serviceman Improper and incorrect installation may render the set unsafe Avoid placing...

Страница 5: ...ard or the P key on the remote control 1 Preparation Getting started Connections Insert the aerial plug into the 75Ω socket at the bottom of the set Insert the mains plug into a wall socket 220 240V 50 60Hz Using the Remote Control Pull out the plastic insulation sheet from the battery to enable the remote control to operate NOTE For more details on other connections see CONNECTION GUIDE PROGRAM M...

Страница 6: ...deo In S Video AUDIO IN R L VIDEO IN S VIDEO 11 EXT3 SVHS3 3 PROGRAM MENU VOLUME POWER 4 2 1 1 2 3 4 11 LCD TV 5 5 6 7 8 9 10 EXT 4 EXT 2 SVHS2 EXT 1 DVI AUDIO IN HDMI 2 HDMI 1 AUDIO R L IN Pr Pb Y L R MAINS AC in Plasma TV CAUTION This a Class 1 apparatus It must be connected to a MAINS socket out with a protective earthing connection ï EXT3 SVHS3 ...

Страница 7: ...onnect the audio inputs of the TV to the outputs of the device together with the Component Video Inputs 8 HDMI 1 HDMI 2 sockets to connect to set top boxes DVD player recorder High Definition equipment or Personal Computer 9 EXT1 and EXT2 SVHS2 sockets connect to equipment like DVD player recorder VCR Decorder which have scart connections Important In order to connect your decoder please use EXT1 ...

Страница 8: ...olume VOL To adjust the sound level 12 Smart Picture Sound Used to access a series of predefined picture and sound settings see page 14 13 Numerical keys For direct access to programmes For a 2 digit programme number the 2nd digit must be entered before the dash disappears 14 Screen information To display remove the programme number the sound mode the remaining time of the sleeptimer and the signal...

Страница 9: ... selection on page 20 é Use the Æ key to move to the Language mode and select your language by the Î ï keys Use the Æ key to start search The search starts automatically All the available TV programmes will be stored This operation takes a few minutes The display shows the progress of the search and the number of programmes found Important To exit or interrupt the search before it is completed pre...

Страница 10: ... another and do not understand the language to operate the set do the following to bring you back to your preferred language press the Auto Store Press the key é Using the ï key select Install and the Æ key to enter the Install menu Language is highlighted Before you proceed to do auto store of channels select your desired menu Language with the Í Æ keys Select Country with the ï key and use the Í...

Страница 11: ... a time Press the key é With the ï key select Install and the Æ key to enter the Install menu Use the ï key to select Manual Store and the Æ key to enter Manual Store menu Use the Î ï keys to select the items in the Manual Store menu to adjust or activate TV Menu Picture Sound Features Install Manual Store System Search Program No Fine Tune Store Europe Æ Æ Æ Æ Naming of Channel You can give a nam...

Страница 12: ...s in the picture Colour Temp this changes the colour rendering Cool bluer Normal balanced or Warm redder Store to store the picture adjustments and settings Description of the Sound settings Equalizer to adjust the sound tone from bass 120 Hz to treble 10 KHz Balance this balances the sound level on the left and right speakers Delta Volume this is used to compensate any volume differences between ...

Страница 13: ...ith the ï key select the Features menu then Timer Sleep to select an automatic standby period Time enter the current time Note the time is updated automatically each time the TV set is switched on via the teletext information on programme 1 If this programme does not have teletext the update will not take place Start Time enter the start time Stop Time enter the standby time è Program No enter the...

Страница 14: ...Press the key a fifth time exit PIP screen The PIP Picture in Picture feature allows you to call up a PIP screen of the PC Personal Computer or HD High Defintion device while watching a TV programme IMPORTANT To call up a PIP screen of the PC equipment the following step must be taken HDMI 1 or HDMI 2 input MUST be connected to the DVI output of the PC equipment Use a HDMI DVI cable to do the conn...

Страница 15: ... displayed on either side of the picture Movie expand 14 9 The picture is enlarged to 14 9 format a thin black band remains on both sides of the picture Movie expand 16 9 The picture is enlarged to 16 9 format This mode is recommended when displaying pictures which have black bands at the top and bottom letterbox format Subtitle Zoom This mode is used to display 4 3 pictures using the full surface...

Страница 16: ...repeatedly to cycle through the settings to select your desired mode Rich or Personal Multimedia Natural Soft Theatre or Music Voice Personal Definition of Picture Settings Rich Brilliant and sharp picture settings suitable for bright environment and for use in demonstrations to show off the quality of the TV on good sources Natural Reference mode for living room conditions and average signals Sof...

Страница 17: ... This returns you to the contents page usually page 100 Certain pages contain sub pages which are automatically displayed successively Press the key to hold sub page and press the key a second time to resume Use the Í Æ keys to select previous or next sub page No Function Not applicable To display or hide the concealed information games solutions This allows you to display the top or bottom part o...

Страница 18: ... Format Chooses between full screen or native format of the PC screen PIP Picture in Picture Displays a PIP screen to watch TV programmes at the same time Mode Selection When you connect PC or HD equipment supporting resolutions of 480p 576p or 720p the Mode Selection in the Features menu will be highlighted This will allow you to select between the PC and HD mode If it does not support the 480p 5...

Страница 19: ... page 11 PIP Display a PIP screen to watch TV programmes at the same time The PIP menu items PIP Size Horizontal and Vertical work in exactly the same way as when calling a PIP screen in TV mode For description of PIP menu items and how it works refer to the section on Using the PIP Picture in Picture Feature page 12 Horizontal Shift Adjust the horizontal position of the image Mode Selection When ...

Страница 20: ...hone is connected Disconnect headphone connection Sound interference Electrical appliances Try switching off any electrical appliances for interference example hairdryer vacuum cleaner that are in use Unable to understand Wrong language selected Press the key to exit menu from screen Press the language on accidently the key to enter main menu Use the ï key screen to operate set to select the fourt...

Страница 21: ...Europe SECAM in France Russia and most African countries The United States and Japan use a different system called NTSC HDCP High bandwidth Digital Content Protection HDCP encrypts the transmission of digital content between the video source or transmitter such as a computer DVD player or set top box and the digital display or receiver such as a monitor television or projector Symptom Possible Cau...

Страница 22: ...xx 32PF7xxx 37PF7xxx 42PF7xxx Panel screen size 66 cm 80 cm 94 cm 107 cm Audio output 2 x 5 W 2 x 15 W 2 x 15 W 2 x 15 W TV System PAL SECAM Video playback NTSC PAL SECAM Sound System Mono Nicam Stereo Virtual Dolby Surround Connectivity Rear Antenna In 75 Ω Scart 1 Scart 2 HDMI 1 HDMI 2 Component Video Input Audio In Side Audio In Video In S Video In Headphone Power consumption 100 W 120 W 180 W ...

Страница 23: ...f heat Leave a space of at least 5 cm all around the TV for ventilation making sure that curtains cupboards etc cannot obstruct the air flow through the ventilation apertures The TV is intended for use in a domestic environment only and should never be operated or stored in excessively hot or humid atmospheres General Points Please take note of the section entitled Tips at the end of this booklet ...

Страница 24: ... subject to change without notice Trademarks are the property of Koninklijke Philips Electronics N V or their respective owners 2005 Koninklijke Philips Electronics N V All rights reserved www philips com 3139 125 35753 ...

Отзывы: