


4
I
NSTALLING THE
TV
SOURCE
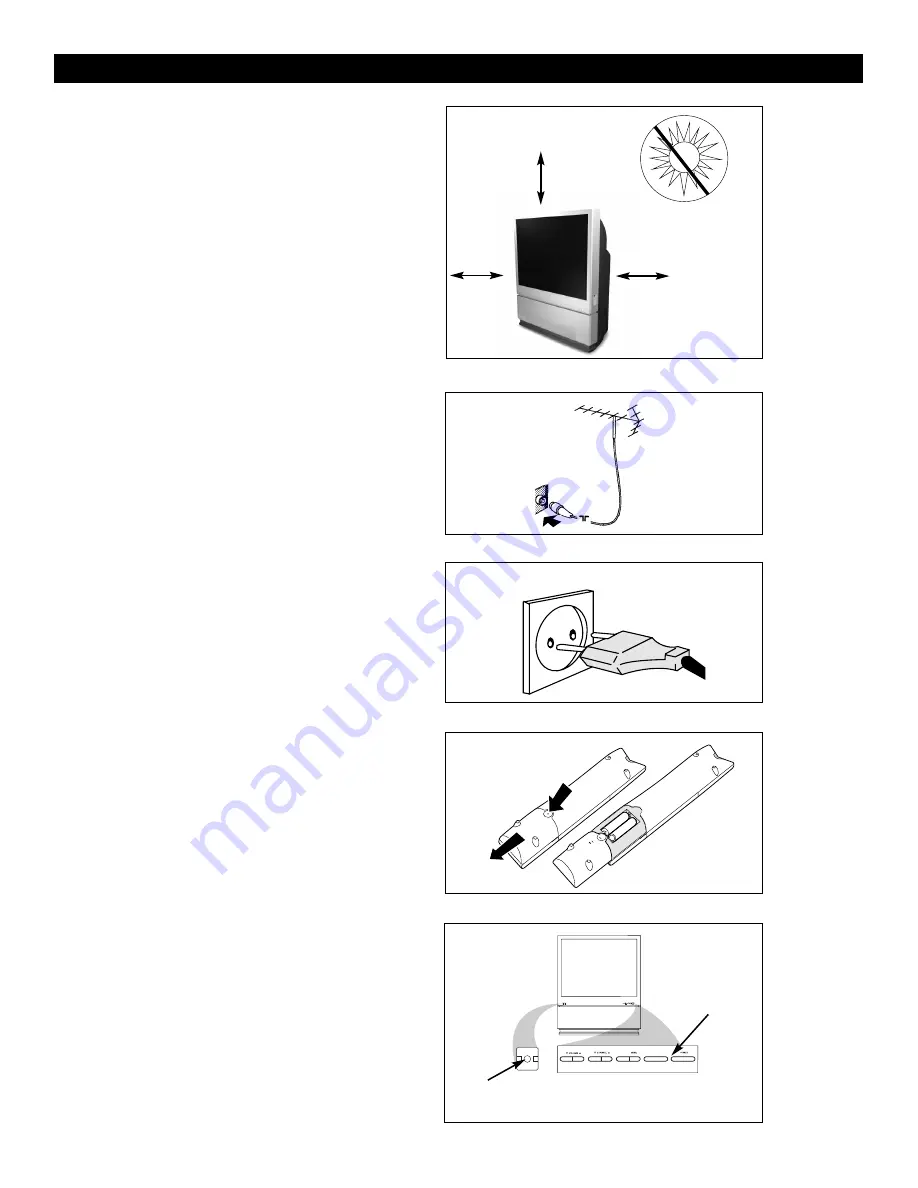
15 cm
Do not place
the TV in
direct
sunlight or
near a heat-
ing appliance.
Mains Power
Switch
Standby
1
The major benefit of this projection tel-
evision is its large viewing screen. To
see the large screen at its best, test vari-
ous locations in the room to find the
optimal spot for viewing.
Be sure to allow a minimum of 15 cm
of space around the TV.
To avoid cabinet warping, cabinet color
changes, and increased chance of set
failure, do not place the TV where tem-
peratures can become excessively
hot—for example, in direct sunlight or
near a heating appliance.
Magnetic fields, such as those of exter-
nal speakers, may cause the picture to
distort if the speakers are placed too
close to the television. Move the mag-
netic field source away from the TV
until there is no picture distortion.
2
Insert the aerial plug firmly into the
ANTENNA IN 75
Ω
socket at the rear
of the set.
3
Insert the mains plug in the wall sock-
et. Refer to the back of the TV set for
the correct operation voltage. Consult
your local dealer if your main supply is
different. To prevent damaging the
mains (AC) cord, which could cause
hazard, do not place the TV on the
cord.
4
Remove the cover of the battery com-
partment on the remote control. Insert
the two batteries supplied
(Type R6-1.5V).
The batteries supplied do not contain
the heavy metals mercury and cadmi-
um. Nevertheless, in many countries
exhausted batteries may not be dis-
posed of with your household waste.
Please check on how to dispose of
exhausted batteries according to local
regulations.
See the battery caution statement on
page 2.
Note
: This remote control functions
with TVs that use the RC5 signalling
standard.
5
Switch the TV on : Press the mains
power switch on the front of the TV. If
the Standby key is lighted, press the
CH +/– keys, digit keys, or the Standby
key on the remote control. Or press the
Standby or CH keys on the front of the
TV.
15 cm
15 cm
ANTENNA IN 75
Ω
Socket on the rear of
the TV
Содержание 43PP8441
Страница 43: ...43 ...


