9
Switching on
Follow the instructions on this page on how to switch on your TV set and the remote
control before going on to following pages describing how to use the channel set-up
procedure.
1 .To fix the double support base on the unit by screws,the installation is completed.
*To bring you better visual experience, please remove all labels, if any, from
TV front panel and screen before use.
*Figures and illustrations in this User Manual are provided for reference only
and may differ from actual product appearance.Product design and specifications
may be changed without notice.
2. Insert two AAA batteries in the remote control.
Precautions on using batteries:
- Only use the battery types specified.
- Make sure you use the correct polarity.
- Do not mix new and used batteries.
- Do not use rechargeable batteries.
- Do not expose batteries to excessive heat such as sunshine, fire or the like,
throw them in a fire, recharge them or try to open them, as this could cause
them to leak or explode.
- Remove the batteries from the remote control if you are not using it for a long
period of time.
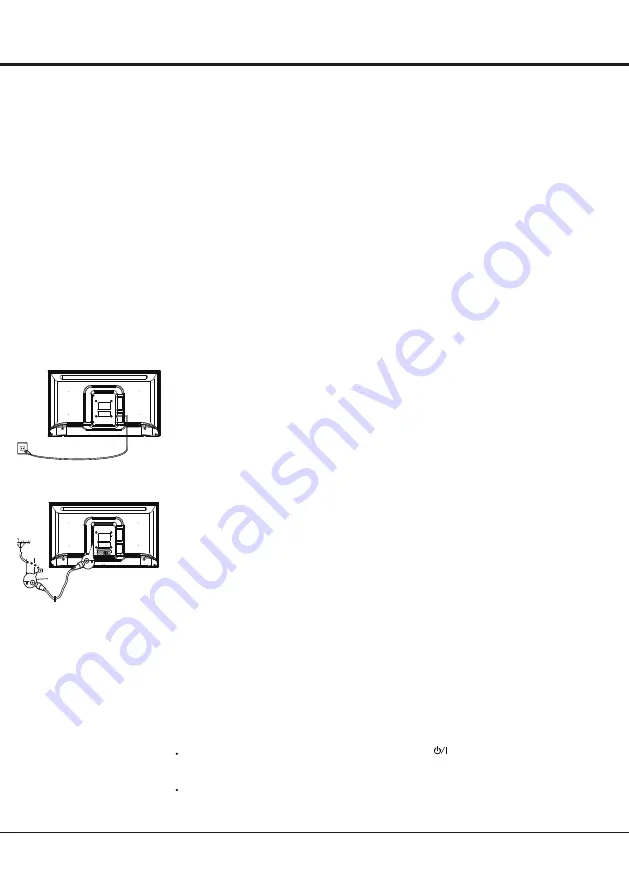
3. Connect the power cable FIRST to the television, THEN to a mains socket.
(Note: If the power cable is connected to the television, please only connect the
power cable to the mains socket.)
Your TV set should only be connected to an AC supply. It must not be connected
to a DC supply. If the plug is detached from the cable, do not, under any
circumstances, connect it to a mains socket, as there is a risk of electric shock.
Note: The figures are for representation only. The location of the power socket at
the back of the television might differ depending on the model.
4. Connect an outside aerial to the ANT/CABLE IN or SAT IN socket at the back of
the TV set.
The aerial socket (75 OHM - VHF / UHF / cable) can be used for connecting
an external aerial or other equipment fitted.
5. When powered on, the TV will be turned on directly or be in standby.
Note: For some models, switch the TV on by pressing the power button.
If the power indicator lights up, the TV set is in standby mode. Press the
button on the remote control or on the TV set to turn on the TV.
Switching off
To put the TV set into standby mode, press the button on the remote control
or on the TV, the TV set remains powered up, but with low energy consumption.
To switch off the TV set, unplug the mains socket from the mains outlet.
Note: For some models, press the power button to switch off the TV set .
1. Press to display homepage.
2. Press ▲/▼/◄/►to select icons from the screen list.
3. Press
OK
to enter each option.
4. To exit the menu, press
EXIT
.
Using Homepage
Note: This manual is for common use. Figures and illustrations in this User Manual are provided for reference only
and may differ from actual product appearance. And for some models, certain options are not available.
Y
ou can select all the features from homepage.
WARNING:
• Configure the network settings before using Smart
TV.
• Slow responses and/or interruptions may occu
r
, depending on your network conditions.
• If you experience a problem using an application, please contact the content provide
r.
•
According to circumstances of the contents provide
r, an application’
s updates or the application itself may be
discontinued.
• Depending on your country’
s regulations, some applications may have limited service or not be supported.
Homepage-Apps
Many useful and entertaining apps for using.
After entering the
Apps Store, you will see the recommendations.
Press ▲/▼/◄/► to select, press OK to ente
r.
Homepage-Source
Source: Select the input source from devices connected to
TV through di
fferent ports.
Homepage-Smart
Smart: Displays the smart menu.
Homepage-
Source
Homepage-Apps
Homepage-Smart
TV
AV
HDMI1
HDMI2
Media
Source
Smart
APP Store
TV
AV
HDMI1
HDMI2
Media
Source
Smart
APP Store
TV
AV
HDMI1
HDMI2
Media
Source
Smart
APP Store
TV
AV
HDMI1
HDMI2
Media
Source
Smart
APP Store
General Operation
Chapter 2
Содержание 43PFL4504/F8
Страница 2: ......
Страница 10: ......
Страница 20: ...20 Capítulo 4 Otra información ...
Страница 21: ...21 Capítulo 4 Otra información ...


