8
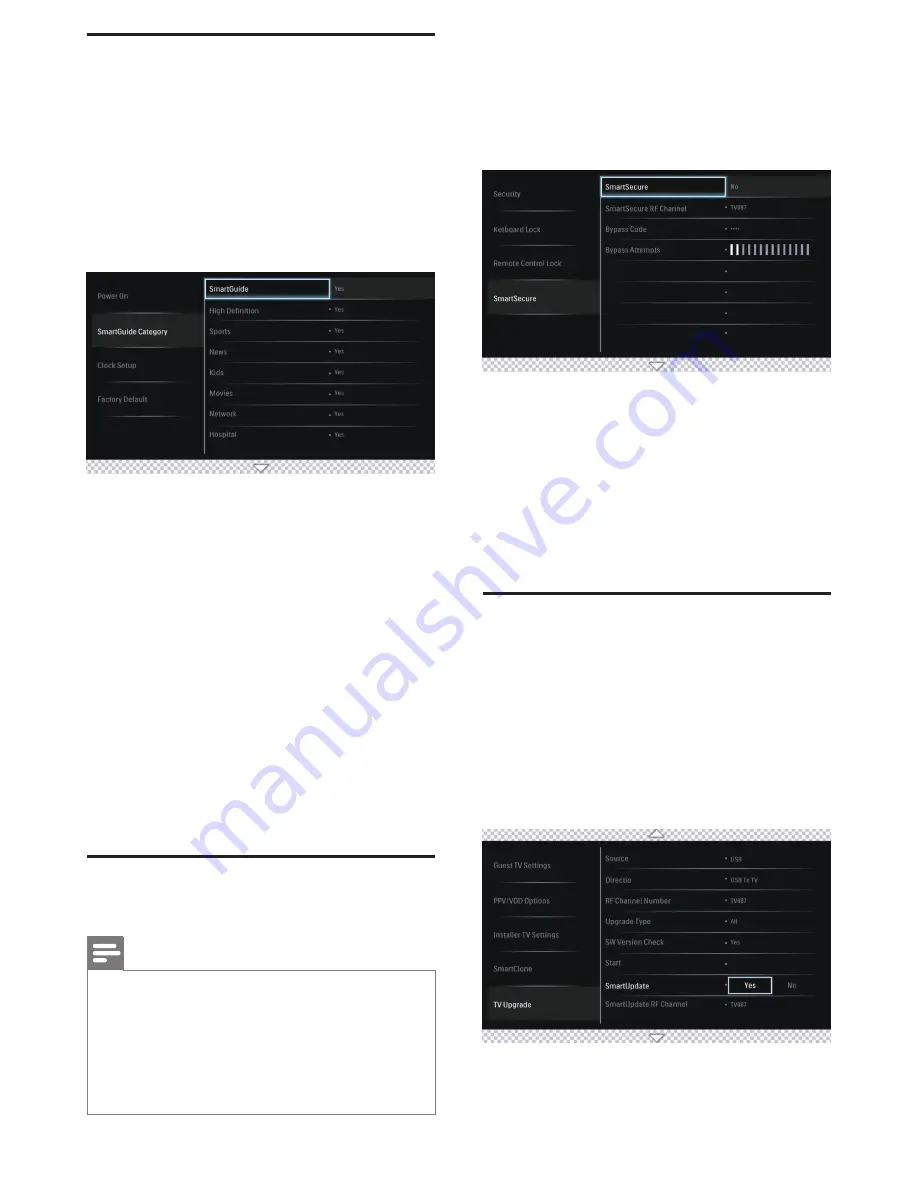
Configure the Smart Guide
Categories
This section provides information to configure SmartGuide
Categories icons. Guests can access these icons by pressing
the SMART GUIDE button on the guest remote control.
1.
Press
M
on the setup remote control to display the setup
menu.
2.
Press
oœpπ
to select the Installer TV settings and
press
oœpπ
to go one level down to SmartGuide
category.
3.
Press
oœpπ
and OK button on remote control to
select one of the followings settings :
•
High Definition:
Enables the High Definition icon in
the SmartGuide categories.
•
Sports:
Enables the Sports icon in the SmartGuide
categories.
•
News:
Enables the News icon in the SmartGuide
categories.
•
Kids:
Enables the Kids icon in the SmartGuide
categories.
•
Movies:
Enables the Movies icon in the SmartGuide
categories.
•
Network:
Enables the Network icon in the
SmartGuide categories.
•
Adult/Hospital:
Enables the Adult/Hospital icon in the
SmartGuide categories.
•
Lifestyle:
Enables the Lifestyle icon in the SmartGuide
categories.
•
Other/Education:
Enables the Other/Education icon
in the SmartGuide categories.
Configure the SmartSecure
settings
Note
• SMARTSECURE feature prevents theft as TV only works
when connected to the property distribution system.
• SMARTSECURE is available on selected models only.
• SMARTSECURE must be used with a Philips Smart
Gateway (PSG) device. Do not enable SMARTSECURE
unless the PSG has been configured at your location.
For more information on the PSG, contact your Philips
authorized agent or dealer.
This section allows the Installer to customize the Security
settings of the TV.
1.
Press
M
on the setup remote control to display the setup
menu.
2.
Press
oœpπ
to select the Installer TV settings and
press
oœpπ
to go one level down to Security.
3.
Press
œ
and
π
to go to SmartSecure menu.
4.
Press
œopπ
to disable or enable SmartSecure via RF
or BLAN*.
* This is only available on certain models.
5.
Press
œopπ
to select SmartSecure RF channel if RF is
selected.
»
The TV checks for the SmartSecure ID on specific
TV channel (when enabled). If the ID is found, the TV will
function. If the ID is not found, the TV will display an error
message and not function.
Configure the SmartUpdate
settings
This section allows the Installer to enables/disables
the SmartUpdate feature of the TV. If set to Yes, then
SmartUpdate will automatically check for new TV upgrades
at regular intervals at specific RF channel and upgrade the TV
software accordingly.
1.
Press
M
on the setup remote control to display the setup
menu.
2.
Press
œopπ
to select the TV Upgrade.
3.
Press
œopπ
to select SmartUpdate.
Содержание 32HFL5662D
Страница 1: ...Quick Start Guide 32HFL5662L 32HFL5662D 37HFL5682L 37HFL5682D 42HFL5682L 42HFL5682D ...
Страница 15: ......
Страница 16: ......
Страница 17: ......
Страница 18: ......


