10
2. Setting up the monitor
1. Toggle to the right to enter OSD
Menu Screen.
2. Toggle to the up or down to select
main menu [PIP / PBP], then toggle
to the right to confirm.
3. Toggle to the up or down to select
[PIP / PBP Mode], then toggle to the
right.
4. Toggle to the up or down to select
[PIP], [PBP], then toggle to the right
to confirm your selection.
5. Now you can move backward to set
the [PIP/PBP Input], [PIP size], [PIP
Position] or [Swap].
Toggle to the right to confirm your
selection.
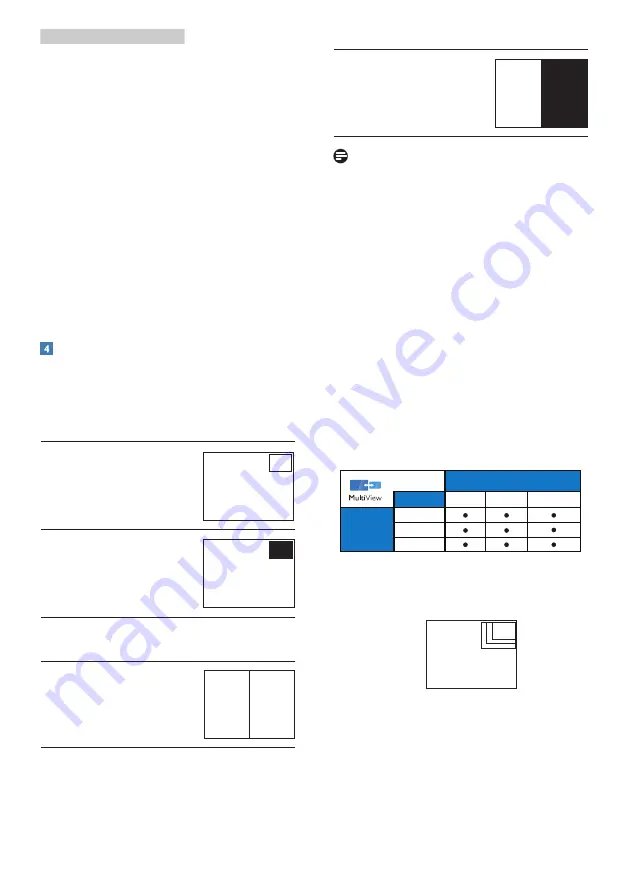
MultiView in OSD menu
• PIP / PBP Mode: There are two
modes for MultiView: [PIP] and
[PBP].
[PIP]: Picture in Picture
Open up a sub-window
of another signal source.
B
A
(main)
When the sub source is
not detected:
B
A
(main)
[PBP]: Picture by Picture
Open up a sub-window
side-by-side of other
signal sources.
B
A
(main)
When the sub source is
not detected.
A
(main)
Note
The black strip shows on the top and
the bottom of the screen for the correct
aspect ratio when in the PBP mode. If
you expect to see full screen side by
side, adjust your devices resolutions as
pop up attention resolution, you will
able to see 2 devices source screen
project to this display side by side
without black strips. Note the analog
signal is not support this full screen in
PBP mode.
• PIP / PBP Input: There are different
video input to choose as the sub
display source: [1 HDMI
1.4
], [2 HDMI
1.4], and [DisplayPort].
Please refer below table for
compatibility of main/sub input source.
HDMI 1
HDMI 1
HDMI 2
HDMI 2
DisplayPort
DisplayPort
SUB SOURCE
SOURCE
Inputs
MAIN
POSSIBILITY (xl)
(xl)
• PIP Size: When PIP is activated,
there are three sub-window sizes to
choose: [Small], [Middle], [Large].
B
A
(main)
Small
Middle
Large
• PIP Position: When PIP is activated,
there are four sub-window positions
to choose.


