5
2. Setting up the monitor
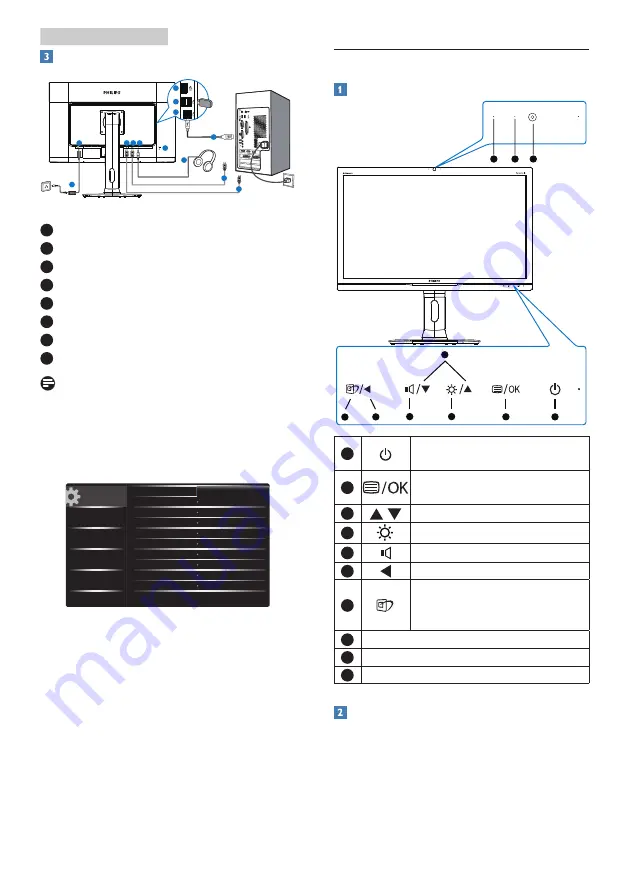
Connecting to your computer
1
2 3 4
5
1
2
4
3
6
7
8
8
1
AC/DC power input
2
DisplayPort 1 input
3
DisplayPort 2 input
4
Earphone jack
5
Kensington anti-theft lock
6
USB fast charger
7
USB downstream
8
USB upstream
Note
1. Connect DP1 for 4K2K(Max)solution.
2. Connect DP1 and DP2 for 5K3K solution.
3. Connect only DP2 can't display.
4. USB ports are off by default, please turn them
on by accessing your OSD menu.
2.2 Operating the monitor
Description of the control buttons
5
4
3
2
1
7
6
10
9
8
1
Switch monitor’s power ON and
OFF
.
2
Access the OSD menu.
Confirm the OSD adjustment.
3
Adjust the OSD menu.
4
Adjust the brightness level.
5
Adjust volume of the display.
6
Return to previous OSD layer.
7
SmartImage hot key. There are 6
modes to select: Office, Photo,
Movie, Game, Economy, Off.
8
2.0 Megapixel Webcam
9
Webcam activity light
10
Microphone
Description of the On Screen Display
What is On-Screen Display (OSD)?
On-Screen Display (OSD) is a feature in all
Philips monitors. It allows an end user to adjust
screen performance or select functions of
the monitors directly through an on-screen


