background image

17

T

O


CREATE


MESSAGE


WITH

 LINE 2:

Highlight 

LINE 2

 with the 

 ( 

¸

 ) key. 


Press the 

 ( 

˙

 ) key to begin.


 The  cursor

will appear in the first character position. 


To input characters, press the 

 ( 

˚

 ) or

 ( 

¸

 ) key to select from the list:- A to Z, 0 to 9, 

❜ 

, –, •,/, :, =, ?, ;, <, >, @ or space. 


Press

the 

 ( 

˙

 ) key to go to the next character position or the 

 ( 

˝

 ) key to go to the

previous character position.

T

O


EXIT

 LINE 2:

Press the 

MENU

 key.

T

O


EDIT


MESSAGE

:

Highlight the message line that you wish to delete. 


Press the 

 ( 

˙

 ) key to begin. 


Move

the cursor to the character position that you wish to edit. 


Press the 

 ( 

˚

 ) or 

 ( 

¸

 )

key to select a new character from the list. 


Exit with the 

MENU

 key after you have finished.

T

O


DELETE


ENTIRE


MESSAGE

:

Highlight 

CLEAR


and press the 

 ( 

˝

 ) or 

 ( 

˙

 ) key.

T

O


SWITCH


ON

/

OFF


MESSAGE

:

Highlight 

DISPLAY

 and select 

YES

 to display message the next time the TV is switched on

or 

NO

 to not display message.

T

O


EXIT


FROM

 MESSAGE 

MENU

:

Press the 

MENU

 key.

C

HINESE

 W

ELCOME

 M

ESSAGE

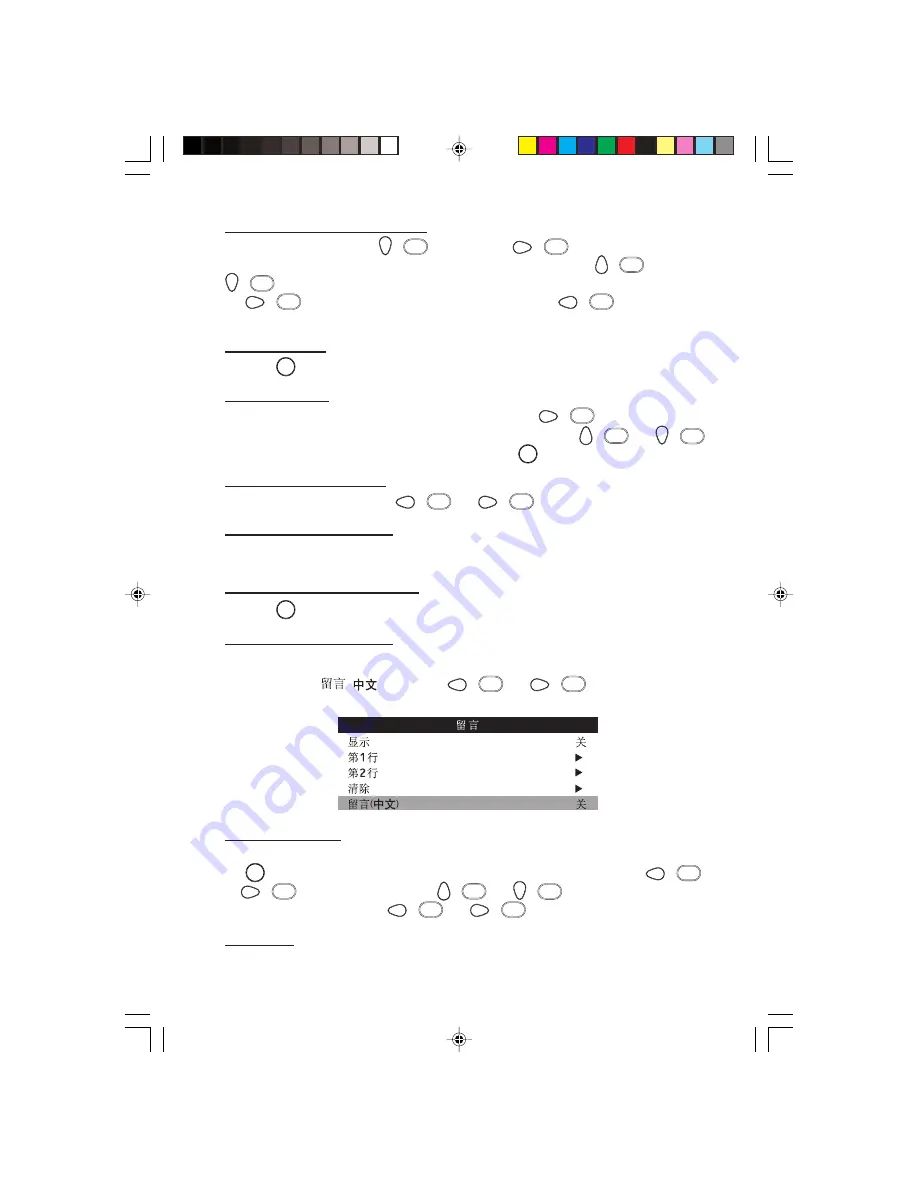
This option is only available when the Language option is set to Chinese. This option allows a
fixed welcome message in Chinese to be displayed with or without the English welcome
message. Highlight 

 (

) and use the 

 ( 

˝

 ) or 

 ( 

˙

 ) key to turn On or Off

the Chinese welcome message.

C

HANNEL

 G

UIDE

Select 

YES

 to see list of channel that has been programmed. For users to see the list, press

the 

MENU

 key to enter user’s menu. Highlight 

CHANNEL GUIDE

 and press the 

 ( 

˝

 )

or 

 ( 

˙

 ) key to enter it. Press the 

 ( 

˚

 ) or 

 ( 

¸

 ) key to select a channel.

To enter the channel, press the 

 ( 

˝

 ) or 

 ( 

˙

 ) key.

R

EMINDER

Select 

YES


if a permanent display of the channel number and label on the top of the screen is

desired.

p13-20

2/17/05, 6:04 PM

17

Содержание 21HT

Страница 1: ...21HT 21HT 21HT 25HT 25HT 25HT 29HT 29HT 29HT Instruction for Use p1 7 2 4 05 1 40 PM 1 ...

Страница 2: ... 18 Low Battery Check 18 Teletext 18 Note Specification in this manual is subjected to change without notification Recycling Directive To minimise harm to the environment the batteries supplied with theTV set do not contain mercury or nickel cadmium If possible when disposing of batteries use recycling means available to you Your TV set uses materials which are reusable or which can be recycled To...

Страница 3: ... sunlight or heat Leave at least 5 cm around each side of TV set for ventilation to avoid over heating Avoid placing your set where it is likely to be exposed to rain or water e g near the window No objects filled with liquids should be placed on top theTV so as to avoid dripping or splashing of liquids on the set USEFUL TIPS Do not leave your set on standby mode for a prolonged period of time Swi...

Страница 4: ...e rear of theTV Possible TV station problem Try another channel Good picture Try increasing the volume but no sound Check that the sound is not muted If it is muted press the Mute button on the remote control to restore sound Good sound but poor Try increasing the contrast and brightness setting colour or no picture Snowish picture and Check antenna connection at the rear of theTV noise Horizontal...

Страница 5: ...ss the Power button on the remote control to switch on the set USE CARE OF REMOTE CONTROL To load the supplied batteries into the remote control Remove the battery compartment lid at the back of the remote control Insert the correct type of batteries into the compartment Ensure the and ends of the batteries are placed in the right position Reattach the battery compartment lid Note Always remove th...

Страница 6: ... In Audio S video For R models For Z models Monitor Out VIDEO AV1 in L Mono Audio R Note 1 Do not connectVideo In and S Video concurrently 2 When a Smart Card with Audio Video and S Video inputs are installed into the Smart Card slot the inputs on the Smart Card cannot be connected concurrently with theVideo In or S Video and Audio L R In of the TV set or vise versa In this case you can only use e...

Страница 7: ... RC2887 is used Remote control RC2573GR is optional and can be purchased separately Refer to its accompanying guide RC2573GR Remote Control Instructions for details of its operation 1 2 3 4 5 6 7 8 9 0 CH VOL M A CH SLEEP POWER SMART TEXT CC GUIDE H RECALL b RESET CH Ñ Ñ Ñ Ñ GUEST E F G DCM SETUP A B C D CLOCK A V RC2887 RC19335025 01 p1 7 2 4 05 3 42 PM 7 ...

Страница 8: ...e TV is in the Commercial mode then proceed to Part B to activate the TV Setup menu Otherwise go to Part C to change theTV mode to Commercial Part B To activateTV Setup menu Press the RECALL key to clear the menu Press the M key to activate the TV Setup menu Part C To select Commercial mode if theTV is in Consumer mode or to select Consumer mode if theTV is in Commercial mode Press the RECALL key ...

Страница 9: ...É CLOCK SETUP É BRIGHTNESS 30 COLOUR 33 CONTRAST 49 SHARPNESS 58 TINT 49 ROTATION 0 SCAVEM YES HS OFFSET 0 VSH OFFSET 0 VA OFFSET 0 FORCED MONO NO BALANCE 0 TREBLE 58 BASS 49 AVL NO AUDIO OUT VOLUME 31 SPATIAL YES ULTRA BASS YES AUDIO I II STEREO SLEEPTIMER OFF VOLUME FIXED NO VOLUME BAR YES MIN VOLUME 0 MAX VOLUME 33 SWITCH ON VOLUME 33 BUZZER VOLUME 15 SWITCH ON CHANNEL TV 1 POWER ON STANDARD LN...

Страница 10: ...ish to change Edit with the digit keys To store changes in the memory highlight STORE and confirm with the key The total number of channels cannot exceed 125 After storing is completed TV will go into standby mode TV INSTALLATION for countries other than Philippines Highlight INSTALLATION in the TV SETUP menu and enter its sub menu with the or key Installation menu via local control is not availab...

Страница 11: ...heTV will stop searching for you to proceed to the next item CHANNEL Press the or key to select the type of channel TV PAYTV INFO CVI AV3YC or RADIO Then key in the channel number with the digit keys Not applicable if AV3YC or CVI are selected STORE Press the or key to store any changes you have done Note Each change in a channel needs to be stored individually FINE TUNE Press the or key to fine t...

Страница 12: ... that of Teletext transmission Highlight TELETEXT TIME DOWNLOAD and select YES TV SETUP DISPLAY YES TIME SETTING 12 10 TELETEXT TIME DOWNLOAD NO TELETEXT LANGUAGE This option allows toggling between different Teletext languages W for Western English or A for Arabic The default selection is W For models without Teletext feature selection of W or A has no effect VIDEO BLANK To blank out picture of t...

Страница 13: ...d for video signals generated by smart cards However depending on the specific smart card design for RGB insertion the adjustment range for some parameters may be limited or in some cases some parameters may have no effect at all Press the or key to adjust FORCED MONO available in stereo sets only Switch this on to force stereo mode to mono BALANCE for stereo signal Balances the sound output from ...

Страница 14: ...xed volume level everytime theTV is switched on The selections are a NO volume level set in SWITCH ON VOLUME in theTV Setup menu b YES volume remain fixed at the SWITCH ON VOLUME level and cannot be adjusted VOLUME BAR To display volume bar when adjusting volume select YES To hide bar select NO MIN VOLUME Sets the limit for the minimum volume of the TV Use the or key to adjust MAX VOLUME Sets the ...

Страница 15: ...TV changes channel Note When an external set top box is connected to the RJ12 port for IR link choose either YES NO for optimum channel switching performance DIGIT TIMEOUT Selects the digit entry timeout period via digit key entry from 1 0 SEC to 9 9 SEC This allows the response time between the 1st digit entry and the 2nd digit entry to be adjusted when 2 digit entry is needed BLANKING TIME Sets ...

Страница 16: ...ut connectors to the same source as what is displayed on theTV The default setting is NO WELCOME MESSAGE This item is used to create edit or delete a welcoming message You can input up to 2 lines with a maximum of 20 characters inclusive of space per line Highlight WELCOME MESSAGE in the TV SETUP menu and enter its sub menu by pressing Note During creating editing or deleting a message you may wis...

Страница 17: ...y TO SWITCH ON OFF MESSAGE Highlight DISPLAY and select YES to display message the next time the TV is switched on or NO to not display message TO EXIT FROM MESSAGE MENU Press the MENU key CHINESE WELCOME MESSAGE This option is only available when the Language option is set to Chinese This option allows a fixed welcome message in Chinese to be displayed with or without the English welcome message ...

Страница 18: ... CHECK Press the OK key for approximately 5 seconds The following appears SERVICE 1 REMOTE BATTERY OK If battery is low the word LOW will appear in place of OK It is an indication that you need to replace the batteries in the remote control TELETEXT for models with Teletext feature only To enter Teletext mode press the b key Function RC2886 RC2887 keys Page up TV Page down TV Select a page Digit D...

Страница 19: ...19 This page is intentionally left blank p13 20 2 4 05 3 21 PM 19 ...

Страница 20: ...3139 125 33061 p13 20 2 4 05 3 21 PM 20 ...

Отзывы: