background image


- 4 - 


In the Channel Install sub-menu, program settings can be set . When this menu is displayed, all the protections 
are inactive. 


• 

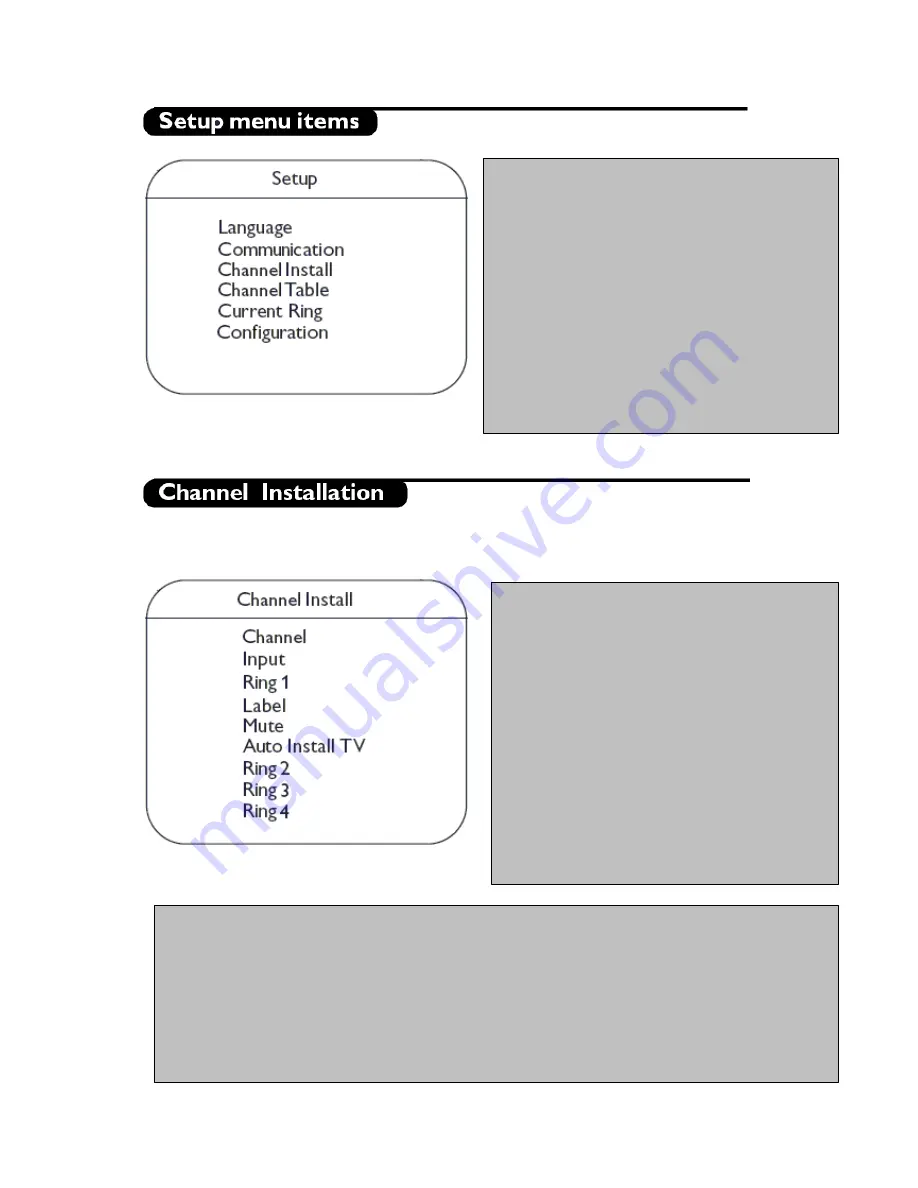
Language

: Select the language of the installation 

menu. Options are “ENGLISH”, “FRANCAIS”, 
and “ESPANOL”. 

• 

Communication

: The Communication menu is 

required to enable interactive applications and 
Healthcare Pendant controls.  Refer to Annex C at 
the end of this document for more information.  

• 

Channel Install:

 This sub menu allows setting the 

number of television channels.  

• 

Channel Table:

 Allows selection between Cable 

and Antenna. 

• 

Current Ring:

 This option allows selection of the 

Channel Ring (from 1 to 4) 

• 

Configuration:

 In the Configuration menu, picture 

and control settings of the TV can be adjusted. 


• 

Channel

: The Channel number can be selected 

with the CH+/- buttons.  

• 

Input

: The "Input" menu item selects the desired 

input source that will be assigned to the channel. 
Possible values are TUNER, AV2, S-VIDEO, 
RADIO, VGA, CVI, HD-D, HD-A, and HDMI. 
Some input sources may not be available on 
certain sets. 

• 

Ring 1

: This menu item allows toggling between 

Saved

 and 

Deleted

 for Channel Ring 1 

• 

Label:

 This menu item will be used to add a 

label/name for each channel.  

By pressing the left/right buttons you 
may enter or exit the label field; by 
pressing the up/down cursor you may 
insert alphanumeric characters. 

Pressing the Menu button lets you exit 
the “Label” menu item. 

• 

Mute:

 This item enables/disables picture and sound for the particular channel. 

NONE: normal picture and sound enabled 

VIDEO: picture is blanked for this channel (e.g. radio channel) 

AUDIO: sound is muted for this channel (e.g. information channel) 

• 

Auto Install TV:

 This menu item initiates the automatic frequency searching of TV channels. Inside the “Auto 

Install TV” sub-menu, select 

Start

 to begin frequency searching. 

(*Note: In some LCD TV models, the TV screen 

may go completely blank for a short period of time, or there may be some brief flashing of images on the screen, while the TV is 
searching for channels to install. This is normal behaviour of the TV set. When all TV channels have been successfully stored, the 
first stored channel will then be displayed).


• 

Ring 2/Ring3/Ring 4:

 This menu item allows toggling between 

Saved

 and 

Deleted

 for Channel Rings 2/3/4. 


Содержание 20FT3310/37

Страница 1: ...Business Display Solutions 20FT3310 37 User s Manual ...

Страница 2: ...hat displaying the same image fora long time can cause a permanent after image to remain on the screen This is called phosphor burn in Normal use of the TV should involve the showing of pictures that contain constantly moving and changing images that fill the screen Warning concerning VGA DVI display mode As this product processes in VGA DVI mode some diagonal lines may be seen under circumstances...

Страница 3: ...e set is in the High Security Mode the Setup menu can be accessed only with an Institutional Set up Remote Control RG4172BK or RC2573 RG4172BK RC 2573 Optional Optional Navigation The current menu item can be selected by means of the cursor up and cursor down keys Submenus can be accessed from menu items with a symbol by pressing the cursor right key To exit any menu press Menu button Select YES t...

Страница 4: ...is menu item allows toggling between Saved and Deleted for Channel Ring 1 Label This menu item will be used to add a label name for each channel o By pressing the left right buttons you may enter or exit the label field by pressing the up down cursor you may insert alphanumeric characters o Pressing the Menu button lets you exit the Label menu item Mute This item enables disables picture and sound...

Страница 5: ...ht Left Cursor buttons on the Remote Control to adjust Switch On Pic Fmt This item sets the television s Picture Format at switch on Use the Right Left Cursor buttons on the Remote Control to adjust Power On The Power On menu function defines the behavior of the television wh enever AC Power is applied The valid states are FORCED ON LAST STATUS and STANDBY o When FORCED ON the television can only ...

Страница 6: ...AVL Automatic Volume Leveller This is used to limit increases in sound especially on programme change or advertising slots Security Level The menu function SECURITY allows the user to select one of two states HIGH or STANDARD The default is STANDARD o While the TV set is in the SecurityHigh Mode the Set up menu can only be accessed with an Institutional Set up Remote Control o While the set is in ...

Страница 7: ...is menu item allows selection of Close Caption channels or to turn Close Caption OFF SavedV Chip This menu item sets the option of saving the V Chip selection to Yes or No V Chip Menu Item This menu item sets the option of toggling the V Chip Menu Item to Yes or No V Chip Setup This sub menu allows the setting and disabling of Movie and TV ratings for the V Chip Channel Guide Select YES to allow t...

Страница 8: ... reproduced in 4 3 format and a black band is displayed on either side of the picture Zoom 14 9 The picture is enlarged to 14 9 format a thin black band remains on both sides of the picture Zoom 16 9 The picture is enlarged to16 9 format This mode is recommended when displaying pictures that have black bands at the top and bottom letterbox format Subtitle Zoom This mode is used to display 4 3 pict...

Страница 9: ... Keys on top of TV Press The Vol key to adjust the volume The P CH key to select the TV channels or source Press the MENU OK key to summon the main menu without the remote control not available on all TVs Use The Vol key and the P CH key to select menu items in the directions as shown The MENU OK key to remove the menu ...

Страница 10: ... 3 Audio In connectors AV1 4 Video In connecto r AV1 5 Progressive Scan Input for connecting Y Pb Pr 2fH 480p 6 Side IO Connectors AV2 Headphones Audio In Video In S Video and PC Audio In 7 Internal Speaker Switch switch to disable enable internal speakers 8 Pendant Control jack 9 Data 2 RJ45 jack for interactive connectivity purposes not currently used 10 Data 1 RJ12 jack for interactive connecti...

Страница 11: ... 11 This section provides information on mounting the stand for the LCD Television set 20 LCD TVs ...

Страница 12: ...dual purpose button that both selects the TV channel and powers the television on and off If the television is in the standby state power off a single press of the channel power button will turn the unit on When the television is on each press of the button increments the currently tuned channel If the television is on it will power off when the the channel power button remains depressed for four ...

Страница 13: ... 13 Annex B Connection Information for Healthcare Pendant The following diagram illustrates the connection of the Healthcare Pendant Control to the Philips LCD TV ...

Страница 14: ...s a Pendant Control to be enabled Select Yes next to the item Pendant to enable the Pendant Control and then select Store to ensure that this setting is saved Make sure the pendant control device has been properly attached to the LCD TV first before enabling it via this menu Communication Toggles between different communications protocols for use with external interactive devices The default setti...

Отзывы: