


4
200WB7 LCD
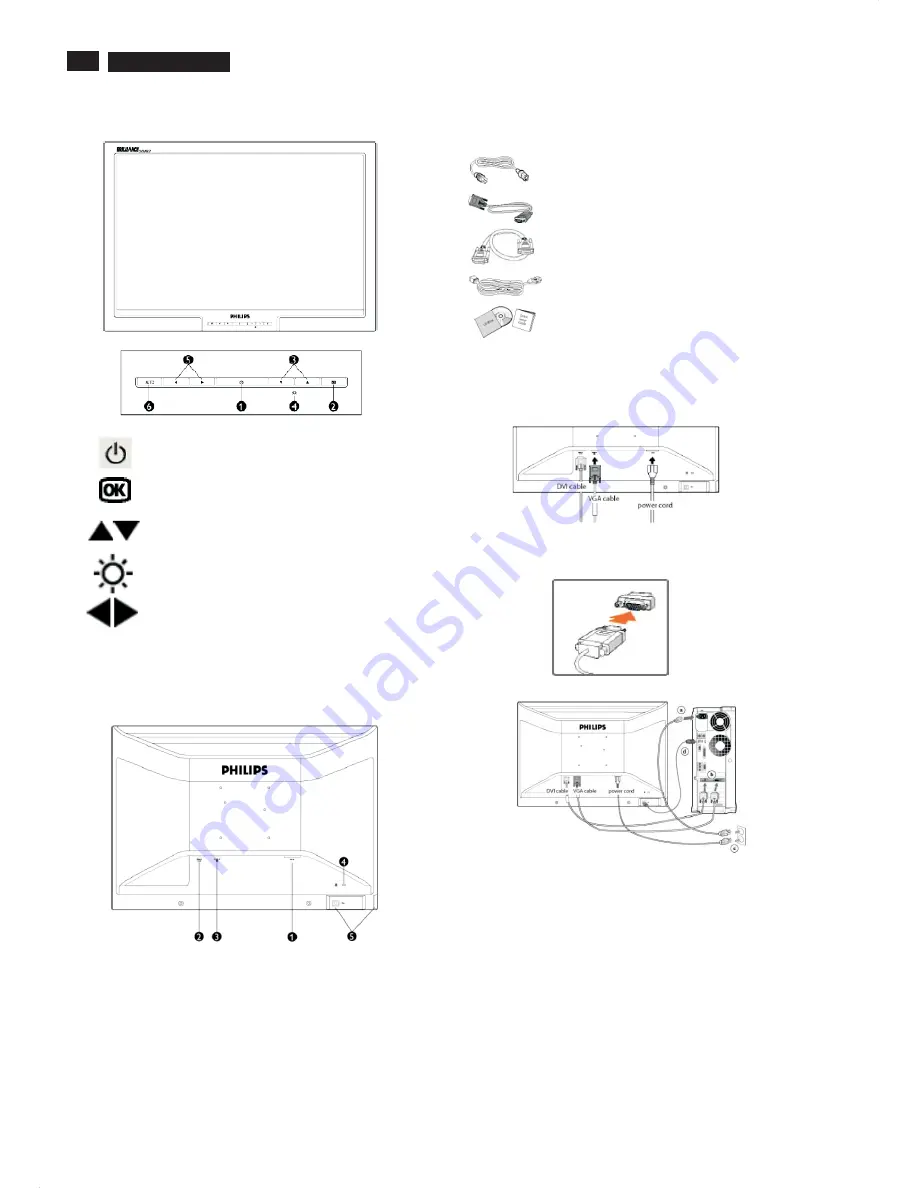
Installation
Front View
Rear View
Power cord
VGA signal cable
EDFU pack
DVI-D cable
USB cable
Accessory Pack
Item
Description
Connecting to Your PC
1
2
3
4
5
6
AUTO
To switch monitor's power On and Off
Automatically adjust the horizontal position,
vertical position, phase and clock setting
To access OSD menu
To adjust the OSD
To adjust brightness of the display
To adjust the OSD
Connect the power cord and DVI cable to the back of the monitor
firmly. (Philips has pre-connected VGA cable for the first
installation.)
Notes:If you use an Apple Macintosh , you need to connect the
special Mac adapter to one end of the monitor signal cable.
TM
1
AC power input
2
DVI-I input
3
VGA input
4
Kensington anti-thief lock
5
USB upstream
Connect the cables to the back of your computer by following these
steps:
(a) Turn off your computer and unplug its power cord.
(b) Connect the monitor signal cable to the video connector on the
back of your computer.
(c) Plug the power cord on your computer and your monitor into a
nearby outlet.
(d) USB plug
(1) Connect USB upstream port on monitor and the USB port on
PC with a USB cable.
(2) The USB downstream port is now ready for any USB device to
plug in.
(e) Turn on your computer and monitor. If the monitor displays an
image, installation is complete.
Note: The USB plug is a pass through connection whether it can
support USB 1.1 or USB 2.0 depends on your PC's specification.
Содержание 200WB7EB/27
Страница 7: ...7 200WB7 LCD Only available for Asia Pacific Model Main Menu Sub Menu On Screen Display ...
Страница 29: ...29 200WB7 LCD Wiring Diagram ...
Страница 31: ...31 200WB7 LCD Scaler Diagram 1 ...
Страница 32: ...32 200WB7 LCD Scaler Diagram 2 ...
Страница 33: ...33 200WB7 LCD Scaler Diagram 3 ...
Страница 34: ...34 200WB7 LCD Scaler Diagram 4 ...
Страница 35: ...35 200WB7 LCD Scaler Diagram 5 ...
Страница 36: ...36 200WB7 LCD Scaler Board C B A 1 ...
Страница 37: ...37 200WB7 LCD Scaler Board C B A 2 ...
Страница 38: ...38 200WB7 LCD Scaler Board C B A 3 ...
Страница 39: ...39 200WB7 LCD Control Diagram ...
Страница 40: ...40 200WB7 LCD Control Board C B A ...
Страница 41: ...41 200WB7 LCD USB Diagram ...
Страница 42: ...42 200WB7 LCD USB Board C B A ...
Страница 43: ...43 200WB7 LCD Power Diagram 1 ...
Страница 44: ...44 200WB7 LCD Power Diagram 2 ...
Страница 45: ...45 200WB7 LCD Power Board C B A 1 ...
Страница 46: ...46 200WB7 LCD Power Board C B A 2 ...


