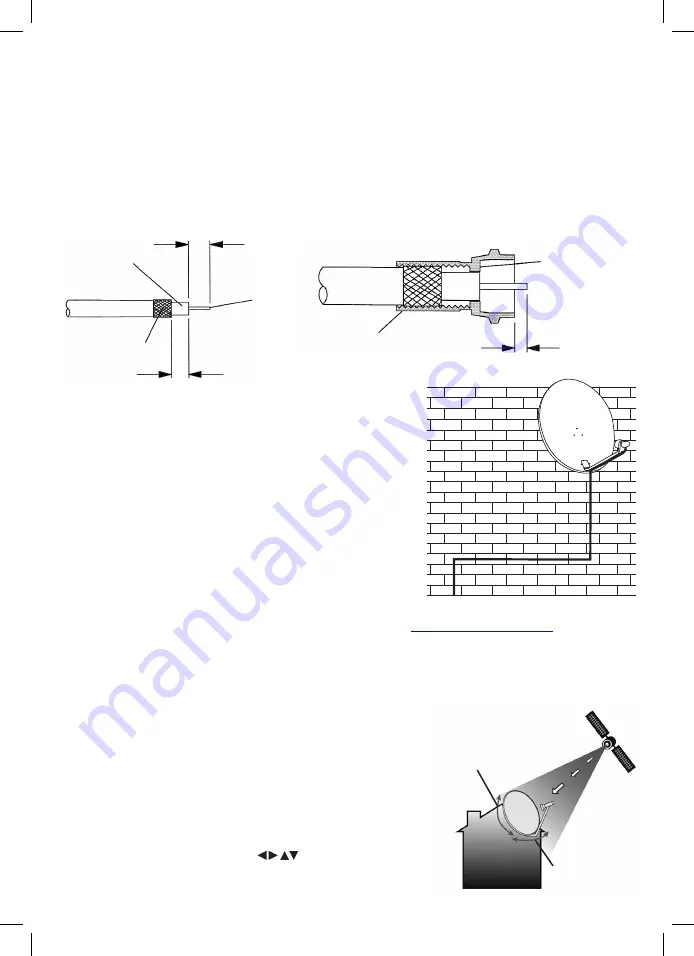
fold braid back
over sheath
8mm
inner
wire
remove
foil
6.5mm
screw connector
body onto cable
2mm approx.
7) Run Cable Down the Wall: Once you have installed the dish you
need to run the cable to the room in which your receiver is going to be
installed. Start at the top and work down, you should clip the cable
every 50cm, always run the cable horizontally or vertically, never
diagonally across a wall.
8) Connect Cable to HD Satellite Receiver: The cable can be run into
the room by drilling a hole in through the window frame or the wall.
Once you have run the cable through to where you intend to position
the receiver, cut off any surplus cable and then fit the ‘F’ connector
following the instructions in step 6. Screw the ‘F’ connector to the LNB-in
terminal on your decoder.
9) Connect your HD Satellite Receiver to your TV: Use the HDMI lead
and select HDMI input on your TV .
10) Align Satellite Dish: To obtain accurate settings go to the website: http://www.dishpointer.com
Enter your location and select satellite 28.2E Astr 2A, 2B, 2C and 2D. By locating your area on the map on the website,
the programme will give the precise settings that you will require to align to the satellites. If you do not have access
to the internet we have enclosed a chart showing settings for the key areas in the UK and Republic of Ireland.
Identify the town nearest to you and work on those settings.
Three settings are required:
a) Dish elevation - this is the angle that the dish has to be pointed at the sky.
This is done by aligning to the correct angle on the elevation bracket.
b) Polarisation angle - this is the angle at which the LNB needs to be set at
in its mount. The LNB angle can be adjusted by loosening the screws of
the LNB mount and twisting the LNB to the correct position.
c) Azimuth angle - This is the compass direction required. You will need
two people to do this, one person to align the dish and one to watch the
TV screen for a signal. Switch the Digibox on, you will see a message on
the screen saying ‘No signal being received’ follow the decoder
instructions to locate the channel search (Menu - Installation -
Automatic Search) function. Use the
and OK keys on the remote
control to select Astra 2A, B 28.2E the Signal Level and Quality Level screen
is displayed at the bottom of the screen.
2
4) Mount the Wall Bracket: Mount the wall bracket (15) using the expansion bolts (16). Make sure that the
mounting holes are drilled into brick or stone and not into the mortar. Also ensure that the wall mount is horizontal
and perfectly level (check using a spirit level).
5) Attach Dish Assembly to Wall Bracket:
The complete dish assembly can now be attached to the wall bracket.
6) Prepare Digital Coax Cable: Firstly fit the LNB rubber weather boot provided, to the dish end of the cable.
Fitting the F connector: Strip the end of the cable as shown below. Once you have stripped the cable, twist the braid
and pull it back on itself, make sure that no braid is touching the copper core, this will cause a short on the cable
and you will not get any signal. Now, simply twist on the ‘F’ connector and connect to the LNB making sure that the
weather boot is correctly secured over the LNB connector.
Azimuth angle
Dish elevation


