background image

EN - 27

Copyright © 2016, Fast ČR, a. s. 

 02/2016

1

2

Step 1 contrarotate the Coarse 
filter ,and then lift it up;

Step 2 lift the Flat filter up

NOTE: 
If operate from step 1 to step 2, the filter system will be removed; while operate from step 2 to step 1, the 
filter system will be installed.

Filter assembly

For best performance and results, the filter assembly must be cleaned. The filter efficiently removes food 
particles from the wash water, allowing it to be recirculated during the cycle. For this reason, it is a good 
idea to remove the larger food particles trapped in the filter after each wash cycle by rinsing the semicircular 
filter and cup under running water. To remove the filter assembly, pull on the cup handle in the upward 
direction. The entire filter assembly should be cleaned once a week. To clean the coarse filter and the micro 
filter, use a cleaning brush. Then, reassemble the filter parts as shown in the figures above and reinsert the 
entire assembly in the dishwasher, positioning in its seat and pressing downward. The dishwasher must 
never be used without the filters. Improper replacement of the filter may reduce the performance level of the 
appliance and damage dishes and utensils.

WARNING! 
Never run the dishwasher without the filters in place. When cleaning the filters, don't knock on 
them.
Otherwise, the filters could be contorted and the performance of dishwasher could be debased.

Cleaning the Spray Arms

It is necessary to clean the spray arms regularly for hard water 
chemicals will clog the spray arm jets and bearings

.

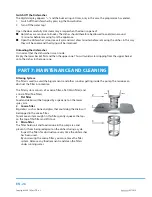
To remove the spray arms, screw off the nut clockwise to take out 
the washer on top of the spray arm and remove the arm. Wash 
the arms in soapy and warm water and use a soft brush to clean 
the jets. Replace them after rinsing thoroughly.

Caring for the Dishwasher

To clean the control panel, use a lightly dampened cloth then dry 
thoroughly

.

To clean the exterior, use a good appliance polish wax

.

Never use sharp objects, scouring pads or harsh cleaners on any 
part of the dishwasher.

Содержание PD 1273 BiT

Страница 1: ...PD 1273 BiT DISHWASHER USER MANUAL ...

Страница 2: ...Copyright 2016 Fast ČR a s 02 2016 Dear customer Thank you for buying a PHILCO brand product So that your appliance serves you well please read all the instructions in this user s manual ...

Страница 3: ...nser 14 Rinse aid dispenser 14 D Function of Detergent 15 PART 5 LOADING THE DISHWASHER BASKETS 18 Loading Cutlery and Dishes 22 When Loading the Dishes and Cutlery Please Note 22 Damage to Glassware and other Dishes 23 PART 6 STARTING A WASHING PROGRAMME 24 Wash cycle table 24 Turning on the Appliance 25 Change the Programme 25 Forget to Add Dish 25 PART 7 MAINTENANCE AND CLEANING 26 How to Keep ...

Страница 4: ...ch for several minutes This will release any accumulated hydrogen gas As the gas is flammable do not smoke or use an open flame during this time WARNING PROPER USE Do not abuse sit on or stand on the door or dish basket of the dishwasher Do not touch the heating element during or immediately after use Do not operate your dishwasher unless all enclosure panels are properly in place Open the door ve...

Страница 5: ...etergent or hand washing detergent in your dishwasher Other means for disconnection from the supply must be incorporated in the fixed wiring with at least 3mm contact separation in all poles Keep children away from detergent and rinse aid keep children away from the open door of the dishwasher there could still be some detergent left inside Young children should be supervised to ensure that they d...

Страница 6: ...should not be reused Make sure that the carpet must not obstruct the openings at the bottom base Use the dishwasher only for its intended function The dishwasher is intended for indoor use only The dishwasher is not designed for commercial use It is intended for use in domestic households and in similar working and residential environments READ AND FOLLOW THIS SAFETY INFORMATION CAREFULLY SAVE THE...

Страница 7: ... and human health which could otherwise be caused by inappropriate waste handling of this product For more detailed information about recycling of this product please contact your local city office and your household waste disposal service IMPORTANT To get the best performance from your dishwasher read all operating instructions before using it for the first time ...

Страница 8: ...er or electric shock may occur Before Installation Dishwasher place requirement The back of dishwasher should face to the wall and the dishwasher has inlet and outlet pipe which can be connected on the right or left side conveniently The dimensions of installation Cabinet 600min The connectors for power cord and inlet outlet hose Install the dishwasher into the cabinet 149 52 657 596 79 594 558 95...

Страница 9: ... The minimum required space when the door open 520 630 Dishwasher The door of Dishwasher The Minimum space for door opening is 50mm Cabinet The dimension of the front ornamental plate 15 540 2 2 594 659min 708max 66 the hole with 10mm depth ...

Страница 10: ...2016 Fast ČR a s 02 2016 Fix the ornamental plate The plug with T shape 2 4 26wooden screw ornamental plate 3 7KG 4 4 44wooden screw 1 remove 2 ST4X10 2 ST 4 4 44wooden screw the door of dishwasher 4 4 44wooden screws ...

Страница 11: ...n to make sure that the water is clear and free of impurities If this precaution is not taken there is a risk that the water inlet can get blocked and the appliance could be damaged Electrical connection Make sure the socket is compatible with the plug of the appliance The socket must have earthing wire and can hold 250V 10A otherwise damage or accidence may occur Other electric appliance with big...

Страница 12: ...e The required height of the skirting board is as per the principle of aesthetic and opening closing the door smoothly Please check the suggested chart for the reference Fixation of dishwasher 1 Fixing the dishwasher with the cabinet by turning the screws 2 Plug the four hole plugs into the holes in the sketch map Dishwasher liner right and left side and the top 4 holes use wood screws ST4 26 dish...

Страница 13: ...will display 6 Dry indicator An increased temperature during the final rinse stage will improve the drying process The indicator will be available when the Dry button is selected 7 Salt refill indicator The indicator lights up when the softener needs to be refilled 8 Rinse aid refill indicator The indicator lights up when dispenser needs to be refilled 9 3 in 1 indicator The indicator lights up wh...

Страница 14: ...et from H0 to H7 Salt is not required at the set value H0 1 Find out about the hardness value of your tap water Your water utility company will help you with this 2 Set value can be found in the water hardness table 3 Close the door 4 Switch on Power switch 5 Hold down Delay button and then press Program button for 5 seconds The buzzer rings one time and H flashes on the digital display factory se...

Страница 15: ...e the water softener In case of damages caused by the use of unsuitable salt the manufacturer does not give any warranty nor is liable for any caused damages Only fill with salt just before starting one of the complete washing programmes This will prevent any grains of salt or salty water which may have been split remaining on the bottom of the machine for any period of time which may cause corros...

Страница 16: ...e drying Attention Only use branded rinse aid for dishwasher Never fill the rinse aid dispenser with any other substances e g dishwasher cleaning agent liquid detergent This would damage the appliance When to Refill the Rinse Aid Dispenser If there is no rinse aid warning light on the control panel you can judge the amount of rinse aid by the color of the optical level indicator D located next to ...

Страница 17: ...spenser set on 4 If spots and poor drying are problems increase the amount of rinse aid dispensed by removing the dispenser lid and rotating the dial to 5 If the dishes still are not drying properly or are spotted adjust the dial to the next higher number until your dishes are spot free The dose is factory set in the position 5 NOTE Increase the dose if there are drops of water or lime spots on th...

Страница 18: ... Always add the detergent just before starting dishwasher otherwise it could get damp and will not dissolve properly Amount of Detergent to Use 1 2 NOTE 1 If the lid is closed press release button The lid springs open 2 Always add the detergent just before starting each wash cycle Only use branded detergent aid for dishwasher WARNING Dishwasher detergent is corrosive Take care to keep it out of re...

Страница 19: ... do only bleach a little Strong and coloured spots will not removed completely In this case please choose a programme with higher temperature Use of 3 in 1 Detergent Tablets General Advice 1 Before using these products you should first check that the water hard ness in your supply is compatible with the use of these products as per the detergent manufacturers instructions on the product packaging ...

Страница 20: ... BASKETS For best performance of the dishwasher follow these loading guidelines Features and appearance of baskets and silverware baskets may vary from your model Attention before or after Loading the Dishwasher Baskets Scrape off any large amounts of leftover food It is not necessary to rinse the dishes under running water Place objects in the dishwasher in the following way 1 Items such as cups ...

Страница 21: ... Type Item A Cup B Glass C Saucer D Serving bowl E Serving bowl Adjusting the Upper Basket If required the height of the upper basket can be adjusted in order to create more space for large utensils either in the upper basket or lower basket The upper basket can be adjusted for height by putting wheels of different height into the rails Long items serving cutlery salad servers or knives should be ...

Страница 22: ...p pots should be slanted to allow water to flow out The bottom basket features fold down tine rows so that larger or more pots and pans can be loaded Lower basket Type Item F Serving bowl G Soup plate H Dinner plate I Dessert plate J Oval plate Lower Basket Folding racks Folding racks consisting of two parts that are located on the lower basket of your machine are designed in order to let you plac...

Страница 23: ...as side baskets the spoon should be loaded individually into the appropriate slots especially long utensils should be placed in the horizontal position at the front of the upper basket Fork shelf Cutlery basket Door side Door side Cutlery basket Type Item 1 Tea spoons 2 Dessert spoons 3 Soup spoons 4 Gravy ladle 5 Serving fork 6 Forks 7 Knives 8 Serving spoons ...

Страница 24: ...or paint If you buy new dishes please make sure that they are suitable for dishwashers NOTE Please do not overload your dishwasher There is only space for 12 standard dishes Do not use dish that is not suitable for dishwashers This is important for good results and for reasonable energy consumption Loading Cutlery and Dishes Before loading the dishes you should Remove large left over Soften remnan...

Страница 25: ...of by the manufacturer Use a mild detergent that is described as kind of dishes If necessary seek further information from detergent manufacturers Select a programme with a low temperature To prevent damage take glass and cutlery out of the dishwasher as soon as possible after the programme has ended At the End of the Wash When the working cycle has finished the buzzer of dishwasher will ring for ...

Страница 26: ...used for more delicate items which are sensitive to high temperatures Run cycle immediately after use Pre wash Main wash 46 C Rinse Hot rinse Drying 5 20 or 3 in 1 176 0 75 11 5 Crystal For lightly soiled loads such as plates glasses bowls and lightly soiled pans Main wash 46 C Rinse Hot rinse Drying 5 20 135 0 70 8 5 60 min For lightly and normally soiled plates and pans for every day Hot rinse 1...

Страница 27: ...have already been released and the appliance may have already drained the wash water If this is the case the detergent dispenser must be refilled see the section entitled Fill in the Detergent Press Power button to cancel the programme and turn on it again then you can change the programme to the desired cycle setting see the section entitled Starting a wash cycle NOTE If you open the door when wa...

Страница 28: ...er basket onto the dishes in the lower one PART 7 MAINTENANCE AND CLEANING Filtering System The filter is used to avoid the big remnants and other sundries getting inside the pump The residue can obstruct the filter in sometime The filter system consists of a coarse filter a flat Main filter and a micro filter fine filter 1 Flat filter Food and debris will be trapped by a special jet on the lower ...

Страница 29: ... the figures above and reinsert the entire assembly in the dishwasher positioning in its seat and pressing downward The dishwasher must never be used without the filters Improper replacement of the filter may reduce the performance level of the appliance and damage dishes and utensils WARNING Never run the dishwasher without the filters in place When cleaning the filters don t knock on them Otherw...

Страница 30: ...on the stainless steel surface How to Keep Your Dishwasher in Shape After Every Wash After every wash turn off the water supply to the appliance and leave the door slightly ajar so that moisture and odors are not trapped inside Remove the Plug Before cleaning or performing maintenance always remove the plug from the socket Do not run risks No Solvents or Abrasive Cleaning To clean the exterior and...

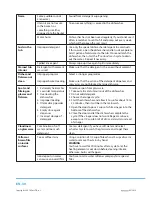
Страница 31: ...em Water diversion system malfunction Warning If overflow occurs turn off the main water supply before calling a service If there is water in the base pan because of an overfill or small leak the water should be removed before restarting the dishwasher Before Calling for Service Reviewing the charts on the following pages may make you be free of calling for service Problem Possible Causes What To ...

Страница 32: ...ing on glasses and flatware 1 Extremely hard water 2 Low inlet temperature 3 Overloading the dishwasher 4 Improper loading 5 Old or damp powder detergent 6 Empty rinse agent dispenser 7 Incorrect dosage of detergent To remove spots from glassware 1 Take out all metal utensils out of the dishwasher 2 Do not add detergent 3 Choose the longest cycle 4 Start the dishwasher and allow it to run for abou...

Страница 33: ...shes properly Steam Normal phenomenon There is some steam coming through the vent by the door latch during drying and water draining Black or gray marks on dishes Aluminum utensils have rubbed against dishes Use a mild abrasive cleaner to eliminate those marks Water standing on the bottom of the tub This is normal A small amount of clean water around the outlet on the tub bottom keeps the water se...

Страница 34: ...voltage frequency AC 220 240 V 50 Hz Water pressure flow pressure 0 4 10bar 0 04 1 0MPa Water temperature Max 61 C NOTE 1 A highest efficiency to D lowest efficiency 2 Energy consumption 231 kWh per year based on 280 standard cleaning cycles using cold water fill and the consumption of the low power modes Actual energy consumption will depend on how the appliance is used 3 Water consumption 3080 l...

Страница 35: ...ordance with standards under specified operating conditions Results may vary greatly according to quantity and pollution of the dishes water hardness amount of detergent etc The manual is based on the European Union s standards and rules NOTE All the here provided data is subject to change ...

Страница 36: ...mpact on the environment and human health which could be caused as a result of improper liquidation of waste Please ask your local authorities or the nearest waste collection centre for further details The improper disposal of this type of waste may fall subject to national regulations for fines For business entities in the European Union If you wish to dispose of an electrical or electronic devic...

Отзывы: