background image

28

Transcriber

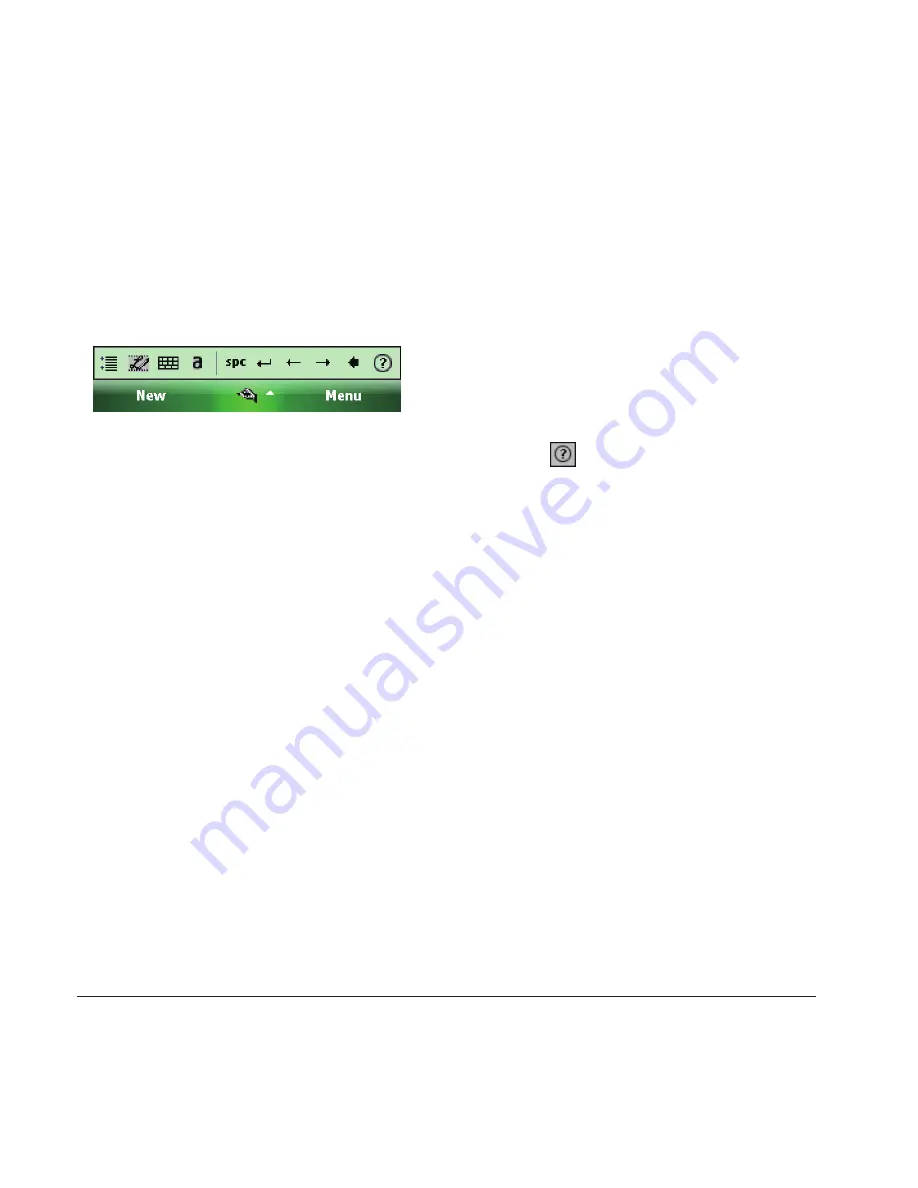
Transcriber recognizes handwriting in cursive and/or print. It uses the full screen as its 
recognition area. It interprets the movement of the stylus on the screen as you write.


To launch Transcriber, select the input method selector arrow (the up arrow next to

  the input method icon) and select 

Transcriber


Write anywhere on the screen.

NOTE:

 The Transcriber comes with detailed help pages. Select 

 if you need further assistance.

Содержание Traveler 137E

Страница 1: ...user manual Pharos Traveler 137...

Страница 2: ...cument are subject to change at any time without notice The information contained in this document does not affect or change the product specifications or warranties Pharos is not liable for any damag...

Страница 3: ...This is only the beginning We are constantly enhancing and improving our user experience For the latest information on what we ve added and how it works visit us online http www pharosgps com...

Страница 4: ...the SIM card snaps correctly into the SIM socket Do not open or tamper with the device cover as this will void your warranty Do not press hard on this product as it may cause damage to the screen or...

Страница 5: ...re using headphones or other audio devices Do not place the product on an unstable base Do not push objects of any kind into cabinet slots or other openings in the device The device should be operated...

Страница 6: ...tting Started 20 2 2 Today Screen Components 21 2 3 Start Menu 22 2 4 Programs Settings and Icons 23 2 5 Input Methods 26 Chapter 3 Synchronizing Information 29 3 1 Installing and Setting up ActiveSyn...

Страница 7: ...Contacts 46 5 2 Text Messaging 48 5 3 Multimedia Messaging Service 49 5 4 E mail 51 5 5 Using SIM Manager 54 Chapter 6 Basic Applications 56 6 1 Using Calendar 57 6 2 Using Notes 59 6 3 Using Tasks 6...

Страница 8: ...9 2 JETCET PDF5 81 9 3 Windows Media Player 82 9 4 JBlend 84 9 5 Profile Manager 84 9 6 GPS 85 9 7 Internet Sharing 87 9 8 FM Radio 88 9 9 Backup Restore 89 Chapter 10 Camera 89 10 1 Overview 91 10 2...

Страница 9: ...Chapter 1 Overview...

Страница 10: ...econds when the GPS or the Bluetooth is on The green light flashes on every five seconds when the GSM UMTS service is available The green light flashes on every 10 seconds when there is no signal from...

Страница 11: ...11 1 2 3 4 5 6 7 8 9 10 11 13 12 15 14 16 17 18 20 19...

Страница 12: ...12 AC Adapter Stereo Headset USB Cable Battery 1 2 Introduction cont What s in the Box...

Страница 13: ...cro SD Card Installing the SIM Card and Battery If you want to use the telephone features of the device you must install a valid SIM card Push either of the protrusions on the left or right side of th...

Страница 14: ...shown To lift the battery easier at the seam between the upper right corner of the battery and its compartment use your finger or fingernails to pry up the battery Slide the SIM card into the SIM car...

Страница 15: ...he back cover down as shown until it clicks into place NOTE The device is supplied with a rechargeable Li ion battery This battery is supplied partially or rarely charged It s recommended to fully cha...

Страница 16: ...ed To install the MicroSD card do the following 1 Remove the back cover 2 With the device facing down insert the media card into the slot logo side up To remove the MicroSD card slide it out from the...

Страница 17: ...ours and 40 mintues 2G up to 6 hours and 30 mintues 3G Standby time up to 189 hours 2G up to 217 hours 3G Charge Time average Charge by AC adapter one hour and 40 minutes Charge by USB bus 4 hours and...

Страница 18: ...choose to use 2G or 3G only 3 Immediately save your current data 4 Plug in or turn off the device 5 Close applications no longer in use Charging the Battery 1 To charge the battery make sure the batte...

Страница 19: ...Chapter 2 Basic Operations...

Страница 20: ...espond to your stylus When you turn on the device for the first of time you will be asked to calibrate the device If you would like to re calibrate the device follow the steps below 1 Select Start Set...

Страница 21: ...me 2 Wireless status 3 Tap here to show quick reminders about how to do basic tasks 4 Owner information 5 Unread messages including text messages MMS messages and e mails 6 Active tasks 7 Upcoming app...

Страница 22: ...ooth headset detected New Voicemail message Ringer on New notifications Ringer off New instant message Ringer in vibration mode Voice call HSPA available Voice call in progress HSPA in use Calls are b...

Страница 23: ...ice FM Radio Lets you listen to FM radio stations on the device Getting Started Brief introductions and shortcuts of commonly used items Internet Sharing Use the device as an external modem for a PC c...

Страница 24: ...ot support related services Settings Personal Buttons Configure button actions Input Configure input methods Lock Set a password to unlock the device Menus Configure the Start menu Owner Information E...

Страница 25: ...in Chapter 2 for details System Information Display information about device system software and hardware Task Manager Helps you to manage currently running programs Windows Update Lets you download...

Страница 26: ...nizer Transcriber Keyboard 1 Select the keyboard icon in the center of the bottom menu bar to launch the keyboard If the keyboard is not the selected input method select the arrow next to the keyboard...

Страница 27: ...he right recognition area the 123 box Block Recognizer Block Recognizer recognizes letters written in one stroke To launch Block Recognizer select the input method selector arrow the upward arrow next...

Страница 28: ...rea It interprets the movement of the stylus on the screen as you write To launch Transcriber select the input method selector arrow the up arrow next to the input method icon and select Transcriber W...

Страница 29: ...Chapter 3 Synchronizing Information...

Страница 30: ...ow many weeks of past calendar appointments to synchronize 3 1 Installing and Setting up ActiveSync IMPORTANT Be sure to install ActiveSync on the PC before connecting the device to it 1 Install Activ...

Страница 31: ...es check updates or explore the device without synchronizing Outlook information 3 3 Synchronizing Information Starting and Stopping Synchronization Manually 1 On the device select Start Programs Acti...

Страница 32: ...ck Delete IMPORTANT Outlook e mail can only be synchronized to one Outlook profile on the PC or one Exchange Server account 3 4 Changing Settings for an Information Type IMPORTANT Before changing sett...

Страница 33: ...In Server address enter the name of the server running Exchange Server then select Next Select This server requires an encrypted SSL connection if you want to receive personal information more secure...

Страница 34: ...Connect via Bluetooth Ensure that the device and PC are within close range 5 If this is the first time you have connected to this PC via Bluetooth you must complete the Bluetooth wizard on the phone a...

Страница 35: ...Chapter 4 Phone...

Страница 36: ...screen Select Start Phone NOTE On the Phone screen select Menu View to change entries that you want to show in the smart dial area The backlight of your device is set to turned off after you answer a...

Страница 37: ...acts Voice Call On the Phone Screen select Hide Keypad to show all Contacts on the smart dial area Tap on the desired contact in the list and then tap on the number you want to dial Video Call Select...

Страница 38: ...try 1 On the Phone screen select Hide Keypad 2 Select the entry that you want to delete 3 Select Delete Receiving Rejecting a Call When you receive a phone call you have the option to answer it or ign...

Страница 39: ...e your phone 1 Select Start Settings Phone Security tab Require PIN when phone is used 2 Enter the preset PIN provided by your wireless service provider 3 Select Enter NOTE If your PIN is entered inco...

Страница 40: ...rt Settings Phone Services tab 2 Select Caller ID Get Settings 3 Select Everyone No one or Only to contact Call Waiting When you are in another call you will be notified of an incoming call if this op...

Страница 41: ...all In Call Options The device provides various options for managing multiple calls at the same time You are notified when you have another incoming call and you have the choice of ignoring or accepti...

Страница 42: ...on hold then tap or Keypad to dial a second number 2 Select Menu Conference 3 To end the second call and return to the first call select on the screen or press END HOME NOTE If the conference connecti...

Страница 43: ...details When in a video call you can see yourself and the person you are talking to showing on the screen at the same time During the call you can choose to turn off the camera or switch between the f...

Страница 44: ...t on the screen You can still see the captured video from the other side Switch camera To switch between the forward facing or main cameras select on the screen Switch Window To switch the size of pre...

Страница 45: ...Chapter 5 Contacts Messaging...

Страница 46: ...e will allow you to call or send a message depending on the information available for that contact If you use Outlook on your PC you can synchronize contacts between your phone and PC Creating a New C...

Страница 47: ...shed making changes select OK Sending an E mail to a Contact 1 Select Start Contacts on the Today screen 2 Select the contact from the list 3 Select the e mail account to use 4 Enter a subject compose...

Страница 48: ...the To field tap To and select a recipient from the list Then select the recipient s phone number You can request a delivery notification for the text message Select Menu Message Options Request messa...

Страница 49: ...ses in the To Cc and or Bcc fields Insert a semicolon between multiple addresses 4 In Subject enter a subject 5 To create a slide do any combination of the following Select Insert Picture Video and se...

Страница 50: ...der drop down list says Inbox If it doesn t select the folder drop down list and select Inbox under MMS 3 In the message list select the MMS message you want to read Configuring MMS Settings MMS setti...

Страница 51: ...ou set up Network The type of network your e mail server connects to e g Work or The Internet Incoming mail server The name of your e mail server POP3 or IMAP4 Require SSL connection Select this to en...

Страница 52: ...retrieve settings for this e mail account saving you the effort of typing in all the required settings If no matching settings are found or if no internet connection exists then you will need to ente...

Страница 53: ...from your contact cards In the To field press ENTER and select a recipient from the list Then select the recipient s e mail address To change message settings such as its priority select Menu Message...

Страница 54: ...number per contact 1 Select Start Programs SIM Manager 2 Select New and enter the name and phone number you want to add 3 Select Save Deleting a Phonebook Entry from the SIM Card 1 Select Start Progr...

Страница 55: ...nubmer type abbreviations e g WT and MT 1 Select Start Programs SIM Manager 2 Select Menu Setting Select the phone number type that you want to copy Only phone numbers belonging to the selected type...

Страница 56: ...Chapter 6 Basic Applications...

Страница 57: ...oday Screen 2 Select Menu New Appointment 3 Enter information about the appointment 4 Select OK to save the appointment NOTE If you make this appointment as an all day event it will not occupy blocks...

Страница 58: ...r the month your free and booked days for a month indicates there is a morning appointment indicates there is a afternoon appointment indicates there are both morning and afternoon appointments indica...

Страница 59: ...ions for a note or recording select and hold the note or recording Creating a Note 1 Select Start Programs Notes 2 Select New and enter text 3 Select OK to save your note Setting the Default Input Mod...

Страница 60: ...will appear in the notes list and you can review it by selecting it 5 Select OK to return to the notes list NOTE Except creating a stand alone voice recording you can also add a voice recording to a...

Страница 61: ...n the Today screen To enable Tasks on the Today screen select Start Settings Today Items tab Creating a Task 1 Select Start Programs Tasks 2 Do one of the following Select the box labeled Tap here to...

Страница 62: ...ering Your Tasks 1 Select Start Programs Tasks 2 Do one of the following To sort the tasks select Menu Sort by then select a sorting option e g Status or Due Date To filter the tasks by category selec...

Страница 63: ...Chapter 7 Connecting to the Internet...

Страница 64: ...er the air configuration is supported If you need to manually set up a connection it is important that you obtain the following information from your Internet Service Provider ISP or the company whose...

Страница 65: ...ct Finish NOTE The device cannot connect to a PC through ActiveSync while connecting to the Internet using GPRS EDGE HSPA Creating a Dial up Connection Not all service providers support dial up connec...

Страница 66: ...ernet 5 Under Proxy server enter the proxy server name 6 If the proxy server uses a different port or requires a username and password select Advanced select the proxy type to change its settings and...

Страница 67: ...before running this utility IMPORTANT The Wi Fi connection is disabled when the device is synchronizing with a PC Connecting to a Wi Fi Network 1 Select Start Settings Connections tab Wireless Manager...

Страница 68: ...might sometimes need to enter the network settings manually To set up a new Wi Fi network connection you will first need to have your home router settings or information from your administrator about...

Страница 69: ...ve your settings 7 3 Using Wireless Manager You can use Wireless Manager to activate and de activate the various wireless features on the device including cellular phone Bluetooth and Wi Fi Wireless M...

Страница 70: ...en t done so please read the previous sections before continuing Browsing the Internet 1 To browse the Internet you must have a valid connection established 2 Select Start Internet Explorer 3 Do eithe...

Страница 71: ...rnet Explorer 2 Select Menu Tools Options Other select Show Pictures Images on the Web pages that you visit will be downloaded Un check this item if you do not want internet Explorer to show pictures...

Страница 72: ...or Temporary Files From time to time you might want to clear up space on the device and wipe Internet Explorer s browser history 1 Select Start Internet Explorer 2 Select Menu Tools Options 3 Select...

Страница 73: ...Chapter 8 Transferring Files to and From the Device...

Страница 74: ...o the PC and run Windows Update Please refer to Chapter 3 Synchronizing Information for details on how to install and set up ActiveSync 1 Connect the device to the PC with the USB cable Microsoft Acti...

Страница 75: ...ts 6 In the destination folder select Menu Edit Paste 8 3 Using Bluetooth Bluetooth is a short range wireless communication technology Devices with Bluetooth capabilities can exchange information over...

Страница 76: ...ActiveSync service from the list of your PC s available Bluetooth services Receiving a File Before receiving files you must allow incoming beams Select Start Settings Connections tab Beam then enable...

Страница 77: ...ant to beam For example open a task in Tasks 3 Select Menu Beam 4 Select the destination device 5 Select OK after the transfer is done NOTE If the target device does not appear in the list ensure that...

Страница 78: ...Chapter 9 Other Applications...

Страница 79: ...nger Signing In To Windows Live Messenger 1 Select Start Programs Messenger 2 In Sign in as choose a display status e g Online or Busy then select Sign in 3 Before using Windows Live messenger for the...

Страница 80: ...essage 1 Sign into Windows Live Messenger 2 Select the contact s name then select Send IM 3 Enter a message select Send 4 To close the chat window select Menu End conversation Changing Windows Live Me...

Страница 81: ...the location and enter the server address Viewing the Document After opening a file with JETCET PDF5 you can choose to view the file in full screen or zoom in out the file Select Menu View Full scree...

Страница 82: ...computer using a USB cable 3 In Windows Media Player on your computer click Sync 4 Drag each item you want to synchronize to the device pane on the right side of the Windows Media Player window 5 At...

Страница 83: ...the previous file Pause Play Skip to the next file Decrease the volume level Increase the volume level Move to a different position in the currently playing track Saving a New Playlist 1 Select Start...

Страница 84: ...Local Install Search MIDlet Select the program and then follow on screen prompts to complete the installation NOTE For more information about the functionality of JBlend select Start Help when JBlend...

Страница 85: ...lt in the device You have to install a mapping software on the device to start navigating Please follow the instruction of your mapping software to install it and use the navigation functions You may...

Страница 86: ...devices and mobile phones nearby since these products may cause unstable signal reception Connect an external Bluetooth GPS receiver not included in the package to the device in order to enhance the...

Страница 87: ...Select Start Programs Internet Sharing 2 In PC Connection select USB 3 In Network Connection select the connection that you want to use 4 Connect the device to your PC with the USB cable 5 Select Con...

Страница 88: ...s of lower frequencies tap to seek for available channels of higher frequencies To manually set the frequency tap or to adjust by 0 1MHz Tap to temporally mute the volume Tap to recover the volume To...

Страница 89: ...u can see a tree view of the data and files on the device Select the check box es of the item s that you want to back up 4 In Storage location select from the drop down list Tap Next 5 Rename the back...

Страница 90: ...Chapter 10 Camera...

Страница 91: ...mat options Special effects and image properties Advanced options including anti flicker storage location rest counter white balance shutter sound and geo tagging To open the camera press the camera b...

Страница 92: ...g or Recordable time 10 2 Taking a picture 1 Press the camera to launch the camera application Select the capture mode you want Photo or Contacts Picture 2 Position the device so that the image you wa...

Страница 93: ...ng Still Images Format JPG White Balance Auto Incandescent Fluorescent Daylight Effect Off Mono Sepia Solarize Negative Quality Basic Normal Perfect Self Timer Off 2seconds 5 seconds 10 seconds Save L...

Страница 94: ...3GP MP4 White Balance Auto Incandescent Fluorescent Daylight Quality Basic Normal Perfect Save Location Main memory Storage card Reset Counter Reset the file naming counter back to 1 To check the fil...

Страница 95: ...g the picture e g Delete Select View You can view the selected picture Select View and then select Menu From the menu list you can Zoom in out edit and rename the picture Viewing and Managing Videos 1...

Страница 96: ...Appendix...

Страница 97: ...rable Power Button TALK and END HOME Reset Button START OK Notifications Vibrate Audible Visual message LED Charging red priority 1 Full charged green priority 1 Notification blue blink in every 3 sec...

Страница 98: ...Bluetooth 2 1 compliant EDR USB USB 2 0 High Speed mini USB Wi Fi 802 11b g compliant External Memory Card Card Slot MicroSD with SDHC Battery and Power Battery Capacity Lithium Ion 1380 mAH Talk Tim...

Страница 99: ...Directive 73 23 EEC issued by the Commission of the European Community Compliance with these directives implies conformity to the following European Norms in parentheses are the equivalent internatio...

Страница 100: ...900 and GSM 1800 bands covering essential requirements of article 3 2 of the R TT directive 1995 5 EC 0678 Federal Communications Commission Notice This device complies with part 15 of the FCC Rules O...

Страница 101: ...e is 1 11 W kg for PCS Body SAR and 0 055 W kg for WLAN Body SAR Body worn measurements differ among device models depending upon available enhancements and FCC requirements For body worn operation th...

Страница 102: ...e a substantial safety margin designed to assure the safety of all persons regardless of age and health In the U S and Canada the SAR limit for mobile phones used by the public is 1 6 Watts kg W kg av...

Страница 103: ...environment and human health For more information about electronic and electrical waste equipment disposal recovery and collection points please contact your local government office household waste d...

Страница 104: ...soft Windows XP Professional Service Packs 1 and 2 Microsoft Windows XP Home Service Packs 1 and 2 Microsoft Windows XP Tablet PC Edition 2005 Microsoft Windows XP Media Center Edition 2005 Microsoft...

Отзывы: