background image

9:4

A

B

C

D

E

9

10

8

11

Embr

oidery mode - stitch-out
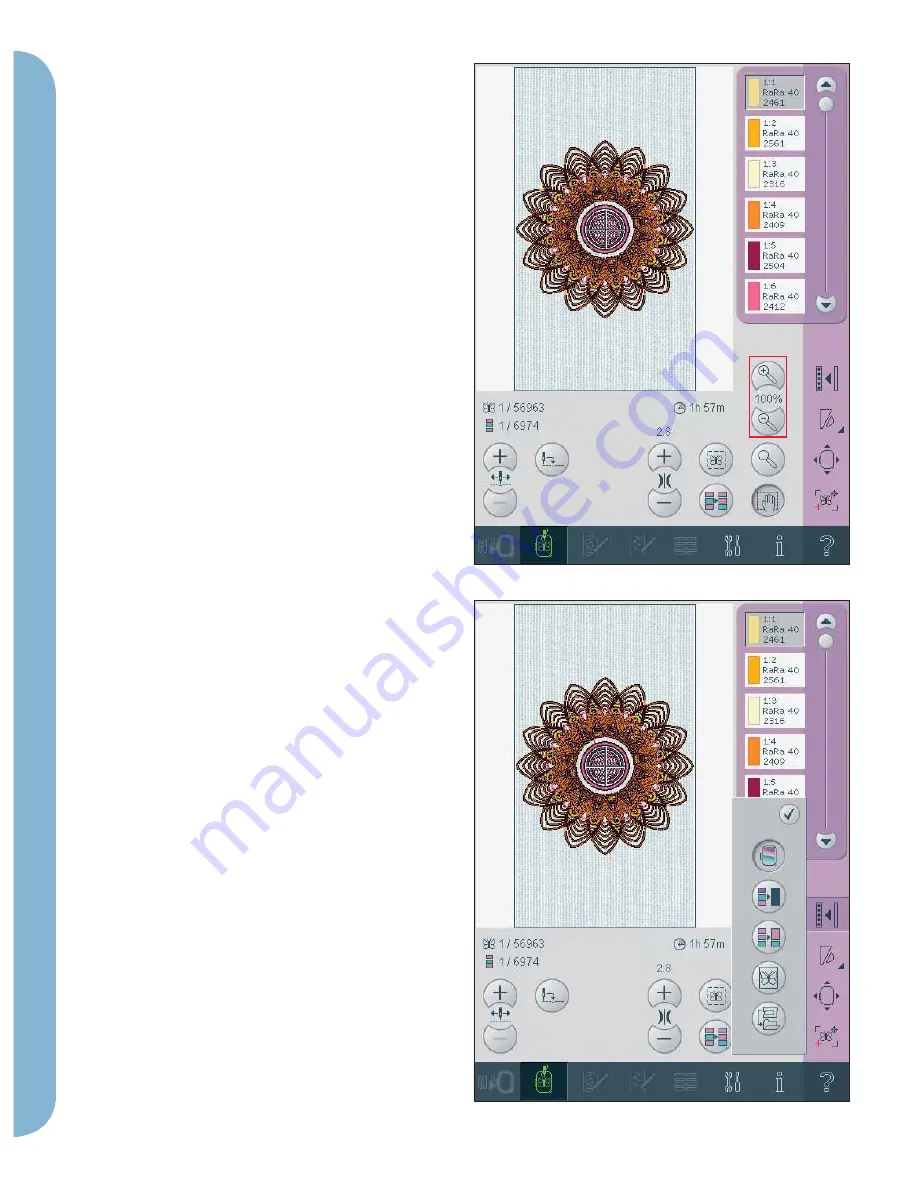
 Zoom (8)

Use to zoom in or out of the embroidery fi eld. Use 

zoom in (+) to get a close-up of an area within the 

embroidery design. Use (-) to return to zoom out.

 Zoom to hoop/zoom to all (9)

Using this icon, you can toggle between zoom to 

hoop and zoom to all. Zoom to hoop will adjust 

the embroidery fi eld to fi t the selected hoop. Zoom 

to all will show all the design(s) in the embroidery 

combination the largest view possible. 

   Pan (10)

In embroidery stitch-out, the pan function is 

always active. Use the stylus to pan on screen.

Option bar

More options (11)

 Background fabric (A)

If you have changed the background fabric color in 

embroidery edit, the background fabric icon will be 

active and selected. To turn the background fabric 

off and have a white background, deselect the icon. 

 Monochrome (B)

Touch the icon to activate monochrome 

embroidery. All designs are shown in a grey color 

and the machine does not stop for color block 

changes. To deactivate monochrome embroidery, 

touch the icon again. 

 Color merge (C)

If you want the machine to ignore the stop between 

identical thread colors, e.g. after having used color 

block sort, touch the color merge icon. 

 Full screen (D)

To see your design as large as possible, use the full 

screen function. The embroidery will fi ll the whole 

screen. To close, touch the screen once. 

  Save current state (E)

If you want to stop embroidering and save your 

current position, touch Start/Stop to stop the 

embroidery. Then touch the save current state icon 

to save the current position. You can now turn the 

machine off.
When saving current state, all your adjustments are 

stored and you can continue to embroidery later. A 

current state is saved until you re

place it.

Note: If you have chosen AutoSave current state in the 

Settings menu, this icon will be disabled, and current 

state is stored periodically.

Содержание Embroidery Mode-Stitch-Out

Страница 1: ...Embroidery mode stitch out ...

Страница 2: ...all 10 Touch function pan always active 11 More options 12 Speed control 13 Hoop position 14 Precise Positioning To enter embroidery stitch out To embroider your design s enter embroidery stitch out by touching the embroidery toggle icon A on the task bar The embroidery unit needs to be connected and the machine enters embroidery stitch out Functions used when embroidering a design are now shown E...

Страница 3: ...uns out Touch and hold to move through the stitches quickly The crosshair will follow the stitches in the embroidery field Go to stitch 4 To move to a particular stitch in the design touch the go to stitch icon A pop up will appear where you can enter the desired stitch number Current stitch will then move to that stitch number If the number entered is too large current stitch will move to the las...

Страница 4: ...e B Touch the icon to activate monochrome embroidery All designs are shown in a grey color and the machine does not stop for color block changes To deactivate monochrome embroidery touch the icon again Color merge C If you want the machine to ignore the stop between identical thread colors e g after having used color block sort touch the color merge icon Full screen D To see your design as large a...

Страница 5: ...sition When you want to return to the current stitch and start embroidering again where the embroidery was interrupted touch the current position icon You can also press the start stop button once to return to the current stitch and start to embroider Park position When you have finished your embroidery remove the hoop and select park position The embroidery arm will be placed in a position that w...

Страница 6: ...function move F Touch function rotate G Touch function pan H Wheel I Orbiting to check corners To select locking point and position hoop Select locking point A Place the red crosshair where you would like the locking point to be in your embroidery Next activate B position hoop The red crosshair will be locked on the screen changing color from red to blue with a ring around the center of the lockin...

Страница 7: ... can be used to trace the design field by touching each of the four corner icons You can find the center of the design again by touching the centering icon The orbit function will also swiftly move the crosshair to the selected position when doing precise positioning Use the corner icons to set the connecting point for precise positioning in a corner of the design This is the easiest and most prec...

Страница 8: ...ing point to the upper left corner of the embroidered design Use the touch function move Check that the needle is at the exact position If satisfied close precise positioning and start embroidering 3 To line up the design on the screen with the previously embroidered select matching point C to be the corner Use the touch function move or the orbiting icons 4 Select the next function rotate design ...

Страница 9: ...oidery edit and go to select hoop Bobbin empty When the bobbin is almost empty the machine stops automatically and a pop up appears on the screen Note It is possible to embroider until the thread has completely run out Press the start stop button to continue embroidering without closing the bobbin empty pop up Close the pop up Replace the empty bobbin with a full one Pull back excess needle thread...

Страница 10: ...ine The next recommended color is shown in the pop up Cut thread end After changing the thread the machine will sew a few stitches and then stop so you can cut the thread end Embroidery is finished clear screen When the embroidery is finished the machine will ask you if you want to clear the screen If you touch OK the designs will be deleted Touch cancel to get back to your design ...

Отзывы: