Engli
Sh
9
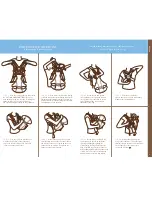
Step 11
For babies between 8-11 lbs
(3.5-5 kg), connect the infant leg support
button on the left and right side of the shell to
the infant leg button hole on the lining.
Step 12
While supporting the baby with
one hand, adjust the carrier to your body by
tightening the left and right torso straps, and
if needed, re-positioning the location of the
back adjustor. When worn properly, torso and
shoulder straps should fit snugly to the body.
For proper back support, the carrier should
never be worn with the straps loose.
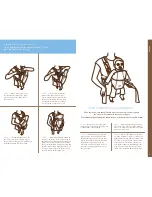
for use wiTH an older baby
Step 9
Connect the upper clip on
the right shoulder strap to the upper
clip connection on the right side of
the carrier shell.
Step 10
Pull the top adjustment
straps on the upper left and right
clips to provide gentle support for the
baby’s head. Always make sure there
is adequate room around your baby’s
face to provide a clear source of air.
Step 6
Gently place your baby in the
carrier facing out by feeding the baby’s left
leg through the left leg opening.
for use wiTH an infanT (ConT.)
Use the following directions to carry a baby from 21
"
(53 cm)
and 8 lb (3.5 kg) up to 22 lb (10 kg)
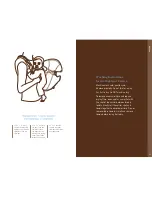
When your baby is old enough to hold his or her head and shoulders upright,
you may use the carrier with your baby facing out.
To position your baby facing out, follow steps 1-5 then proceed to steps 6-9 below.
Step 8
Still supporting your baby, fold
down the head support at the top of the
detailed stitch lines and connect the upper
clips in the modified, folded-over position.
The baby’s arms should be above the
folded-down front flap. Tighten or loosen
the upper clip adjustment straps to your
baby’s comfort.
Step 9
While supporting the baby with
one hand, adjust the carrier to your body by
tightening the left and right torso straps, and
if needed, re-positioning the location of the
back adjustor. When worn properly, torso
and shoulder straps should fit snugly to the
body. For proper back support, the carrier
should never be worn with the straps loose.
Step 7
While fully supporting your baby,
connect the lower clip on the right shoulder
strap to the lower clip connection on the right
side of the carrier shell.


