


• End fittings that are damaged or leaking
• Outer covering that is chafed or cut
• Exposed wire that is used for reinforcement
• Outer covering that is ballooning locally
• Flexible part of the hose that is kinked or crushed
• Armoring that is embedded in the outer covering
A constant torque hose clamp can be used in place
of any standard hose clamp. Ensure that the constant
torque hose clamp is the same size as the standard
clamp.
Due to extreme temperature changes, the hose will
harden. Hardening of the hoses will cause hose
clamps to loosen. This can result in leaks. A constant
torque hose clamp will help to prevent loose hose
clamps.
Each installation application can be different. The
differences depend on the following factors:
• Type of hose
• Type of fitting material
• Anticipated expansion and contraction of the hose
• Anticipated expansion and contraction of the
fittings
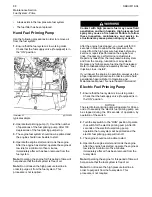
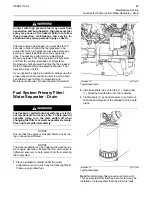
Replace the Hoses and the Clamps
Refer to the OEM information for further information
on removing and replacing fuel hoses (if equipped).
The coolant system and the hoses for the coolant
system are not usually supplied by Perkins. The
following text describes a typical method of replacing
coolant hoses. Refer to the OEM information for
further information on the coolant system and the
hoses for the coolant system.
Pressurized System: Hot coolant can cause seri-
ous burns. To open the cooling system filler cap,
stop the engine and wait until the cooling system
components are cool. Loosen the cooling system
pressure cap slowly in order to relieve the
pressure.
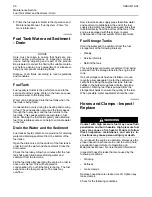
1.
Stop the engine. Allow the engine to cool.
2.
Loosen the cooling system filler cap slowly in order
to relieve any pressure. Remove the cooling
system filler cap.
Note:
Drain the coolant into a suitable, clean
container. The coolant can be reused.
3.
Drain the coolant from the cooling system to a
level that is below the hose that is being replaced.
4.
Remove the hose clamps.
5.
Disconnect the old hose.
6.
Replace the old hose with a new hose.
7.
Install the hose clamps with a torque wrench.
Note:
For the correct coolant, see this Operation and
Maintenance Manual, “Fluid Recommendations”.
8.
Refill the cooling system. Refer to the OEM
information for further information on refilling the
cooling system.
9.
Clean the cooling system filler cap. Inspect the
cooling system filler cap's seals. Replace the
cooling system filler cap if the seals are damaged.
Install the cooling system filler cap.
10.
Start the engine. Inspect the cooling system for
leaks.
i02335774
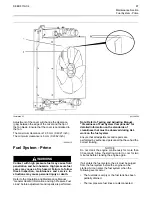
Radiator
-
Clean
The
radiator
is
not
usually
supplied
by
Perkins.
The
following
text
describes
a
typical
cleaning
procedure
for
the
radiator.
Refer
to
the
OEM
information
for
further
information
on
cleaning
the
radiator.
Note:
Adjust
the
frequency
of
cleaning
according
to
the
effects
of
the
operating
environment.
Inspect
the
radiator
for
these
items:
Damaged
fins,
corrosion,
dirt,
grease,
insects,
leaves,
oil
and
other
debris.
Clean
the
radiator,
if
necessary.
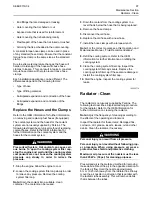
Personal injury can result from air pressure.
Personal injury can result without following prop-
er procedure. When using pressure air, wear a
protective face shield and protective clothing.
Maximum air pressure at the nozzle must be less
than 205 kPa (30 psi) for cleaning purposes.
Pressurized air is the preferred method for removing
loose debris. Direct the air in the opposite direction to
the fan's air flow. Hold the nozzle approximately
6 mm (0.25 inch) away from the radiator fins. Slowly
move the air nozzle in a direction that is parallel with
the radiator tube assembly. This will remove debris
that is between the tubes.
SEBU8119-04
97


