32 . TGA 8000 Installation and Hardware Guide
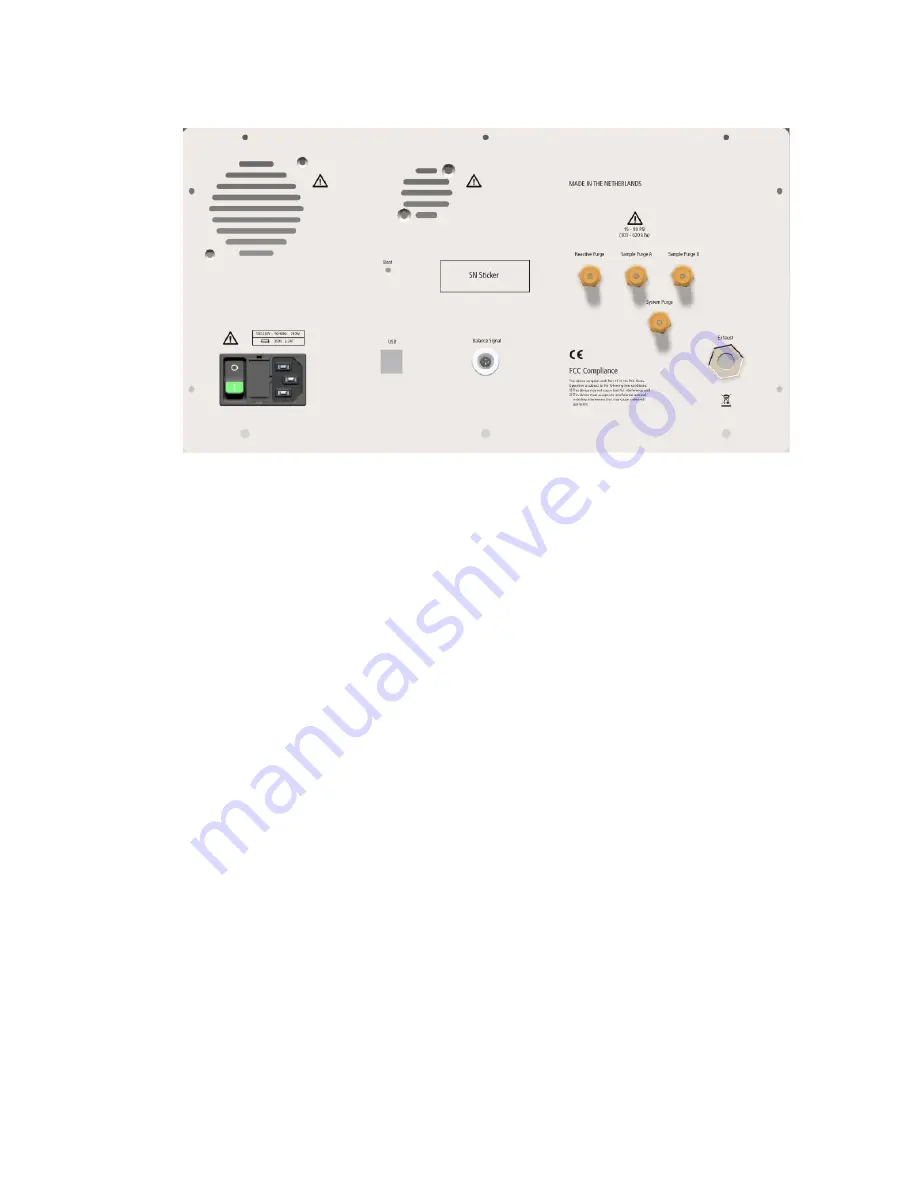
The image below shows the rear panel connections on the TGA 8000.
1.
Install the Pyris Software
2.
Connect one end of the USB cable to the back of the TGA 8000.
3.
Connect the other end of the USB cable to the computer.
IComputer will recognize new hardware, install the drivers from the Prgram
Files\PerkinElmer\Pyris\Drivers folder.
4.
From device manager determine which comport is assigned to the TGA8000
5.
Connect the printer cable, if applicable, to an unused USB port on the computer.
6.
Connect the analyzer, printer and computer power cords to AC outlets.
7.
Once the system connections are made, switch on the system in the following order:
•
Computer
•
TGA 8000
•
Printer
8.
Turn on the purge gas supply, and the water for the TGA 8000 cooling system, if
applicable, or any other accessories for the cooling device you are using.
Configure the TGA 8000
Highlighting the TGA 8000 in Pyris Configuration dialog and clicking Edit displays the
Instrument Configuration dialog. This contains fields for Name, Port, Serial Number,
Accessories.
Before acquiring data, the software must be configured for the analyzer(s) connected to the
computer. Follow the steps below to configure the TGA:
1.
In the Device Manager determine the COM Port assigned to the TGA 8000.
2.
Select Pyris Configuration from the Pyris group under PerkinElmer Applications
on the Programs menu accessed from the Start button or select Configure
Analyzer from the Pyris Manager Start button menu. The Configuration dialog box
appears on the screen.
Содержание TGA 8000
Страница 1: ...TGA 8000 Installation and Hardware Guide THERMAL ANALYSIS...
Страница 5: ...5 Safety and Regulatory Information...
Страница 19: ...19 Prepare the Laboratory...
Страница 25: ...25 Installing the TGA 8000...
Страница 55: ...55 TGA 8000 Hardware Maintenance...
Страница 68: ...68 TGA 8000 Installation and Hardware Guide...
Страница 85: ...85 TGA 8000 Autosampler...


