4
Step 18.
Press and
hold program-
ming/mode
button on
PESWIPS.
LED will light.
Step 19.
Release
programming/
mode button.
PESWIPS
PESWIPS
PESWIPS
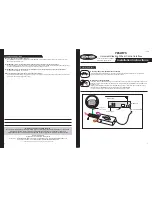
You only need to press the programming/mode button once to program all the buttons. If you press this button again after the
interface is programmed, it will erase all previous learned buttons.
PESWIPS
PESWIPS
PESWIPS
PESWIPS
PESWIPS
If you programmed the interface for version #4, proceed with the following steps.
If you did not program the interface for version #4, skip to Step 18.
Step 12.
Press and hold
programming/
mode button
on PESWIPS.
Step 14.
Press and hold the TEMP UP
button on the steering wheel
control.
LED will turn off.
LED will light.
Step 13.
Release
programming/
mode button.
Step 15.
Release the TEMP UP button.
LED will turn on. The
function is pro-
grammed.
Step 16.
Repeat Steps 14 and 15, using the TEMP DOWN Button.
Step 17a.
If the vehicle is equipped with FAN UP and FAN DOWN buttons:
Repeat Steps 14 and 15 for these buttons as well.
Step 17b.
If the vehicle is NOT equipped with FAN UP and FAN DOWN buttons:
Press and release the programming/
mode button on the PESWIPS.
PESWIPS
PESWIPS
In either case, the
LED will fl ash once
and stay on.
Skip to Step 20.
You have 7 sec-
onds to perform
the next step.
PESWIPS
Programming the PESWIPS to Control the Head Unit
Step 11.
Turn the vehicle ignition to
the ON position.
LED will fl ash to
indicate set version
number.
OFF
ACC
IGN
STRT
TEMP
TEMP
IMPORTANT!
Some steps of the programming instructions
must be completed within a certain number of seconds following the
previous step.
Review the complete instruction before beginning the pro gram ming sequence.
5
11-29-05
PESWIPS
PESWIPS
Programming the PESWIPS to Control the Head Unit (cont.)
Step 22.
Release the button.
The LED will turn on
back on.
Skip to Step
24.
Step 24.
If you need to program more buttons,
repeat step 20 for each additional audio
function on the steering wheel.
Once programming
is completed, wait 7
seconds. The LED will
fl ash three times indi-
cating end of program-
ming. The Interface will
then fl ash the version
number it was pro-
grammed for.
Step 21.
Within 7 seconds
, press and
hold the button that is to be
learned on the steering wheel.
The LED will turn off
when the button has
been learned.
PESWIPS
After all buttons are
programmed
Program
remaining buttons
VOL
VOL
1. Volume Up
2. Volume Down
3. Mute
4. Track Up/Seek Up
5. Track Down/Seek Down
6. Source
7. Preset Up/Disc Up
8. Preset Down/Disc Down
9. Band
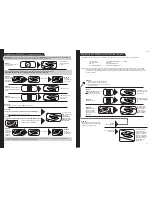
The PESWIPS must be programmed in the specifi c order shown below. If a function is not needed, it may be skipped.
PESWIPS
Step 23.
Within 7 seconds
,
press and release
the programming/
mode button on the
PESWIPS.
PESWIPS
The LED will fl ash
once and stay on.
This will indicate
that the function
has been skipped.
Skip to Step 20.
Step 20.
A. If the current function above is what you
need to program, proceed to step 21.
B. If the current function above is not needed,
proceed to step 23
Example: If you have a vehicle with only 3 functions, and you want to program Volume Up, Volume Down and Source. You will do
Step 21-22 twice, the fi rst time for Volume Up, the second time for Volume Down. Step 23 will be done 3 times to skip
Mute, Track Up and Track Down. Do Step 21-22 to program Source. After all 3 buttons have been programmed, you will
proceed to Step 24.


