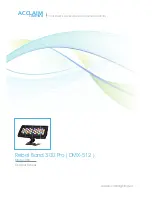
Operating Instructions
1. Charging light pod batteries
a.
Plug the power adapter (1) into a power outlet
and connect to battery charger unit (4).
b.
A single blue light in the center of the charger
will indicate power to the charger.
c.
Place a light pod (3) into the charger unit (4).
Make sure the lens is facing up to engage
charger terminals.
d.
When the light pod(s) is inserted into the
charger, the appropriate charger indicator
lights will illuminate.
e.
When all four charger lights are illuminated, the light pod is fully charged.
2. Mounting the light
Attach the Firefly mount to your loupes.
Universal Mount attachment to eyeglass frames
Open the clip and slide down over the top of the nose bridge. The padded arms of the clip
should grasp each side of the eyeglass lenses. Tighten thumb screw to secure clip
to
frame.
There are many mount options for all glasses styles. Please contact DenMat Customer Care
with mount options and questions.
3. Clip the Firefly light pod to its mount
a.
Remove the fully charged light pod from the Firefly charger.
b.
Place the rear of the light pod on the mount. It will magnetically “click” into place.
4. Turn on light pod by rotating pod
Rotating the light pod on its mount will cycle through off-high power-low power-off settings.
5. Adjust the direction of the LED beam
To adjust the tension or the lamp head position, use the supplied phillips screwdriver to
tighten or loosen the two small link screws as needed.
5. Removing the Firefly light pod from the mount
To remove the firefly light pod from the magnetic mount twist the light to break the
magnetic seal, then pull to the left or right of the loupes and NOT up or down.
Device Description and Intended Use
The PeriOptix
®
Firefly Cordless Headlight System is a fully portable lighting system
worn by the operator and is intended to illuminate a working area. It can be worn on a
headband or attached to all types of loupes. The light pod(s) are internally powered
with a rechargeable lithium-ion battery that provides more than 60 minutes of bright,
focused light between charges.
What’s Included:
Cleaning Instructions
Disinfection with a low-alcohol (<25%) solution such as CaviCide
®
or CaviWipes
®
is
recommended. If using spray disinfectant, avoid spraying liquid directly on the unit.
Instead, spray onto a soft no-scratch cloth, and wipe the product as per disinfectant’s
directions for use. Clean all lens surfaces with the dry optical cleaning cloth provided with
the unit. Do not use a liquid cleaner on the lens. Should you have any questions, please call
DenMat Customer Care at 800-433-6628.
CAUTION
• DO NOT SUBMERGE PRODUCT OR SUBJECT TO SURFACE SATURATION.
Your product is not waterproof.
• DO NOT SUBMERGE IN ANY LIQUID OR ULTRASONIC CLEANER.
• DO NOT CLEAN VIA AN AUTOCLAVE, CHEMICLAVE, GLUTARALDEHYDE, IODOPHOR,
OR ANY OTHER STERILIZATION METHOD.
• NO MODIFICATION OF THIS EQUIPMENT IS ALLOWED.
• THIS UNIT CONTAINS A LITHIUM-ION BATTERY. AS A RESULT PLEASE BE SURE TO
NOT STORE THE UNIT UNCHARGED FOR AN EXTENDED PERIOD OF TIME AS THIS MAY
CAUSE THE BATTERY TO DISCHARGE AND REDUCE THE LIFETIME OF THE UNIT.
denmat.com
English
denmat.com
English
110v / 120v
1
4
3
Carrying Case
(2) Light Pods
Light Pod Mount
Battery Charger Unit
Power Adapter
1
2
3
4
5
Operating Environment
• 10º – 30º C (50º – 86º F)
• 95% or less humidity
• Maximum barometric pressure 80kPa
• Maximum altitude of operation must be 2000m or less
Transport Environment
• 0º – 40º C (32º – 104º F)
• 95% or less humidity
• 70kPa – 106kPa
Symbols Glossary available at denmat.com/symbols.


