background image

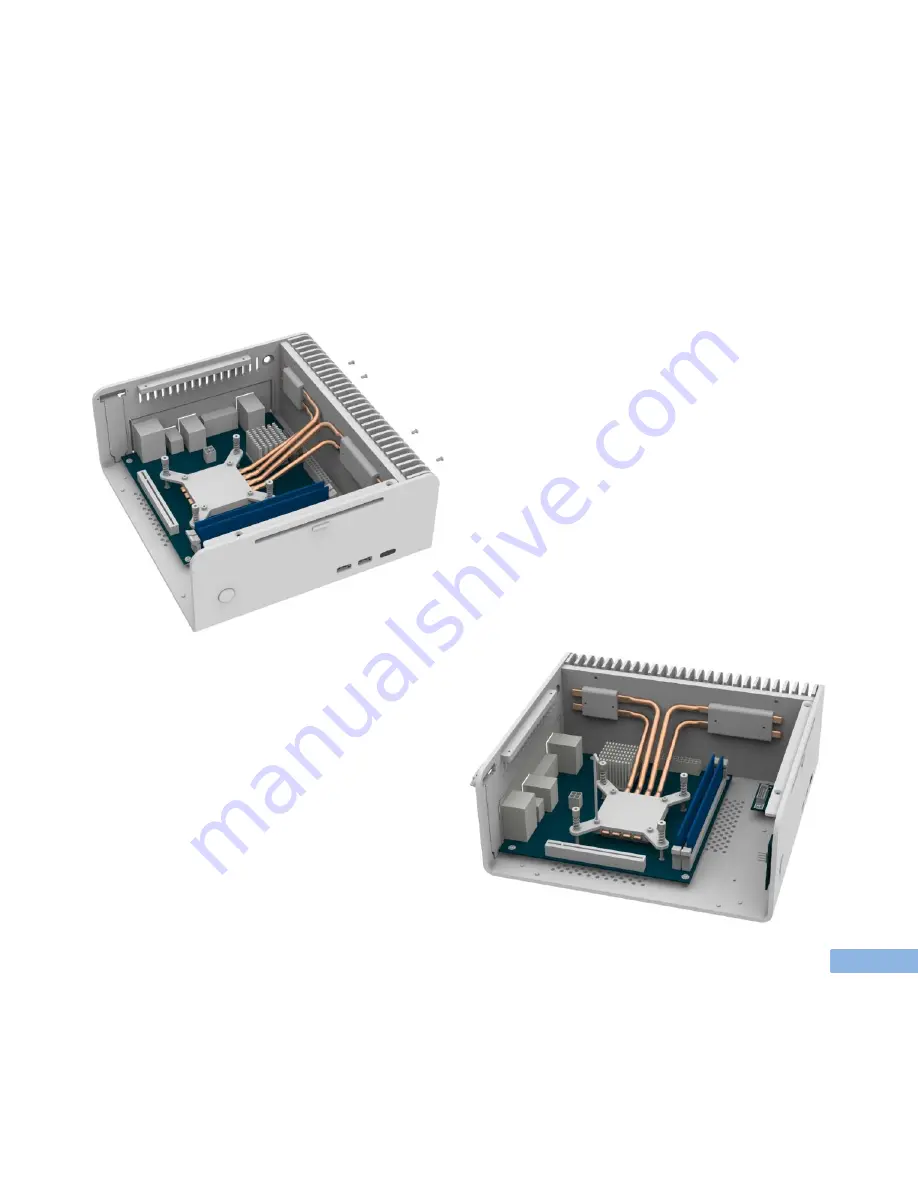
Then put another two screws and set up assembly over CPU perfectly. 

Now you can tighten screws. 

First, Four screws in heatsink blocks.  Pipes still 

can move toward heatsink. 

Next, use supplied wrench and tighten screws 

keeping both plates together.  Do not over 

tighten screws! 

At last, hand tighten long screws and you just 

finished installation of cooling system for your 

CPU. 

P8-12 

Now, when everything is on place, perfectly 
arranged, tighten long screws first.  Use fingers 
only do not use wrench. 

Содержание FLM-7

Страница 1: ...2014...

Страница 2: ...nk you for your purchasing of our product If you have any questions that are not covered in this manual please contact us by phone or e mail at Sales PerfectHomeTheater com USER MANUAL FLM 7 FLM 8 P2...

Страница 3: ...drive universal eject button with FLM 8 only Ports 2 x USB2 0 Front side USB3 0 Ready cable sold separately Expansion Slot 1 x half height expansion slot Cooling Fanless Dimension 240 x 250 x 100mm W...

Страница 4: ...eat Sinks 6 HDD ODD tray 7 PCI Expansion Slot 8 Power Button PCB Removing top panel Attention Our chassis are built with very small gaps between front top and back so please be careful when removing a...

Страница 5: ...ssis please stick four CPU cooler mounting nuts on the bottom of Motherboard Next install CPU and memory on Mobo install backplate and motherboard inside of chassis Next install CPU and memory on the...

Страница 6: ...right side of motherboard like ASRock motherboard used in this manual Such motherboards require short cooling pipes HP4 97 sold separately Standard pipes are too long for this motherboard They will ex...

Страница 7: ...te on CPU and put lower plate on CPU Apply thermal paste on both sides of thermal pipes 3 and install pipes 1 and 2 first Do not tighten any screws yet Than install pipes 3 and 4 Do not tighten any sc...

Страница 8: ...can move toward heatsink Next use supplied wrench and tighten screws keeping both plates together Do not over tighten screws At last hand tighten long screws and you just finished installation of coo...

Страница 9: ...ODD HDD bracket is hold in place by four screws Please remove screws and remove ODD HDD bracket Installing HDDs and ODD P9 12 Now it s time to connect PSU and cables...

Страница 10: ...es on the bracket First 2 5 HDD on the bottom If you install two 2 5 HDs Next install SSD and ODD on the top If you didn t install 2 5 HD and want to install 3 5 HD do it now Put HD between rubber dam...

Страница 11: ...8 only M3x4 2 IR M3x4 9 Motherboard M3x5 16 2 5 HDD 6 32x6 12 3 5 HDD M3x10 4 Heat sink blocks M3x10 4 Heat sink plates CPU retention screws 4 Heat sink mounting screws Mounting nuts 4 Heat sink mount...

Страница 12: ...Perfect Home Theater 163 America Blvd Ashland MA 01721 1869 www shop perfecthometheater com Perfect Home Theater 163 America Blvd Ashland MA 01721 1869 www shop perfecthometheater com...

Отзывы: