background image

5

 STARTING OPERATION

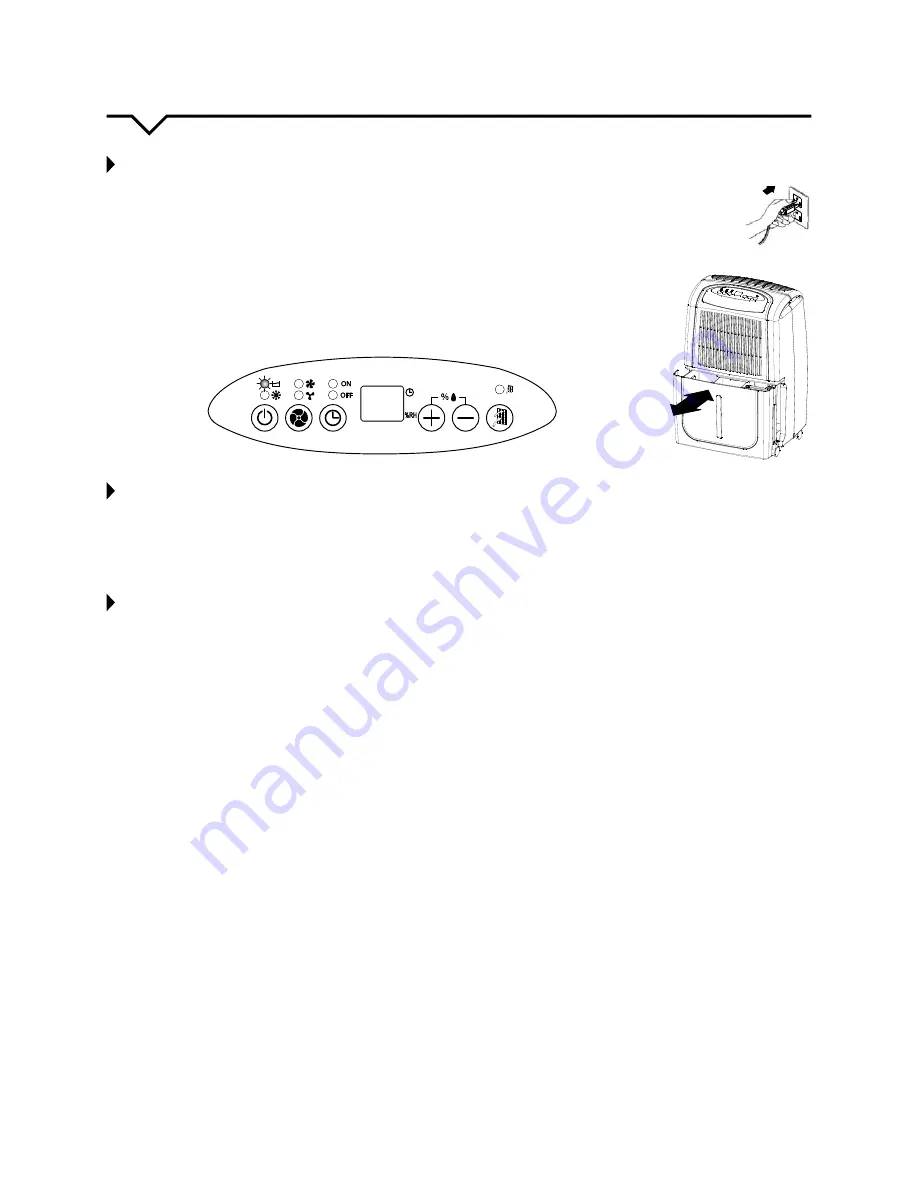
1.  Ensure that the unit is plugged into a properly designated power outlet.
2.  Insert the plug into a suitable wall outlet. The dehumidifier is suitable for operation on an 

electricity supply having the same voltage as that shown on its rating label.

3.  Place the unit in an upright position on a flat, level, steady, stable, heat-resistant surface. 

Make sure there is nothing flammable or heat sensitive within 39 inches (100 cm) of the unit. 

Operating the unit in any other position is hazardous.

4.  Make sure the bucket is placed in the proper position. (After switching the unit on for the 

first time, the BUCKET FULL light may illuminate. Pull the bucket out, check that the “float” 

lever is able to move freely, then push the bucket back to the proper position.)

 WHEN BUCKET FULL LIGHT IS ON 

When the bucket is full, the unit will stop running, beep 5 times, and the BUCKET FULL light will illuminate. To empty the 

bucket, carefully slide the bucket out from the bottom front of the unit. Hold the bucket with both hands to avoid spilling. 

Once the bucket has been emptied, return the bucket to its proper position by sliding the empty bucket back into place. 

The unit will start up and run normally.

 DEFROST

When operating in low temperatures (less than 54°F/12°C) the surface of the evaporator may accumulate frost and affect 

the efficiency of the dehumidifier. When this happens, the unit will automatically go into DEFROST mode. This is normal 

and the DEFROST light will illuminate. Once the unit is done defrosting, it will resume running as normal. The unit can 

operate in temperatures down to 41°F/5°C. Defrost times may vary. If the dehumidifier freezes up, turn the unit off for a 

few hours and then restart. It is not recommended to use the dehumidifier in temperatures below 41°F/5°C.

OPERATING INSTRUCTIONS

Содержание 1PEDP50

Страница 1: ...OR MODELS 1PEDP50 1PEDP70 Before using your dehumidifier please read this manual carefully and keep it for future reference along with your receipt USER MANUAL Be sure to read the QUICK START TIPS on...

Страница 2: ...___________________________ Purchase Date _____________________________________ Store Purchased ______________________________________ Installation Date ____________________________________ Installati...

Страница 3: ...acking the dehumidifier note that the foam inside the float piece in the bucket should NOT be removed Without this foam piece the dehumidifier will not operate properly and water can overflow NOTE Rem...

Страница 4: ......

Страница 5: ...otection against shock hazards DO NOT remove the third prong The unit must be used in a properly grounded wall receptacle If the wall receptacle you intend to use is not adequately grounded or protect...

Страница 6: ...plug with wet hands CAUTIONS DO NOT place anything on top of the unit DO NOT place anything over the air inlet or outlet grilles DO NOT let children play by or with the unit DO NOT get any liquid on...

Страница 7: ...NOT place the machine on an uneven ground Always keep the unit 8 inches 30 cm away from the wall to dissipate the heat properly 8 It is dangerous to pour anything into the machine Close all open wind...

Страница 8: ...ions and functions are the same Handle Moist Air Intake Dry Air Vent Control Panel Water Bucket Air Filter found behind the grille Roll Casters Continuous Drainage Outlet Pump Outlet WHAT IS THE FLOAT...

Страница 9: ...UMIDITY TIMER HUMIDITY SET DISPLAY When the unit is running it displays the current humidity Press TIMER pad the set hours are displayed here Ten 10 seconds after displaying the timer the display will...

Страница 10: ...the bucket is full the unit will stop running beep 5 times and the BUCKET FULL light will illuminate To empty the bucket carefully slide the bucket out from the bottom front of the unit Hold the bucke...

Страница 11: ...topper 4 Return the bucket to its proper position Bucket Store Rubber Stopper and Drain Hose in Bucket 5 Insert the drain hose provided through the hole of the drain cover with the washer portion on t...

Страница 12: ...tray capacity reaches the pre determined water level the unit will pump automatically DISASSEMBLY 1 Press and hold the ribbed circle found above the adapter 3 in diagram on the unit 2 The continuous...

Страница 13: ...he dehumidifier to avoid splashing water onto in the unit Partially fill the bucket with clean water and add a small amount of mild detergent Swish it around in the bucket empty and rinse NOTE DO NOT...

Страница 14: ...sure unit is level and that there are no curtains blinds or furniture blocking the unit Check that room temperature is 41 F or above If unit is near a heat source such as a clothes dryer etc relocate...

Страница 15: ...back of unit and always be positioned at a DOWNWARD slope to the desired drain location Check that filter vents and bucket are thoroughly clean Be sure nothing is obstructing hose connection and there...

Страница 16: ...Belt Line Rd Suite 878 Dallas TX 75254 Distributed by 844 4PA AIRE 844 472 2473 www perfectaire us Specification and performance data is subject to change without notice Printed in China PA User_1PED...

Отзывы: